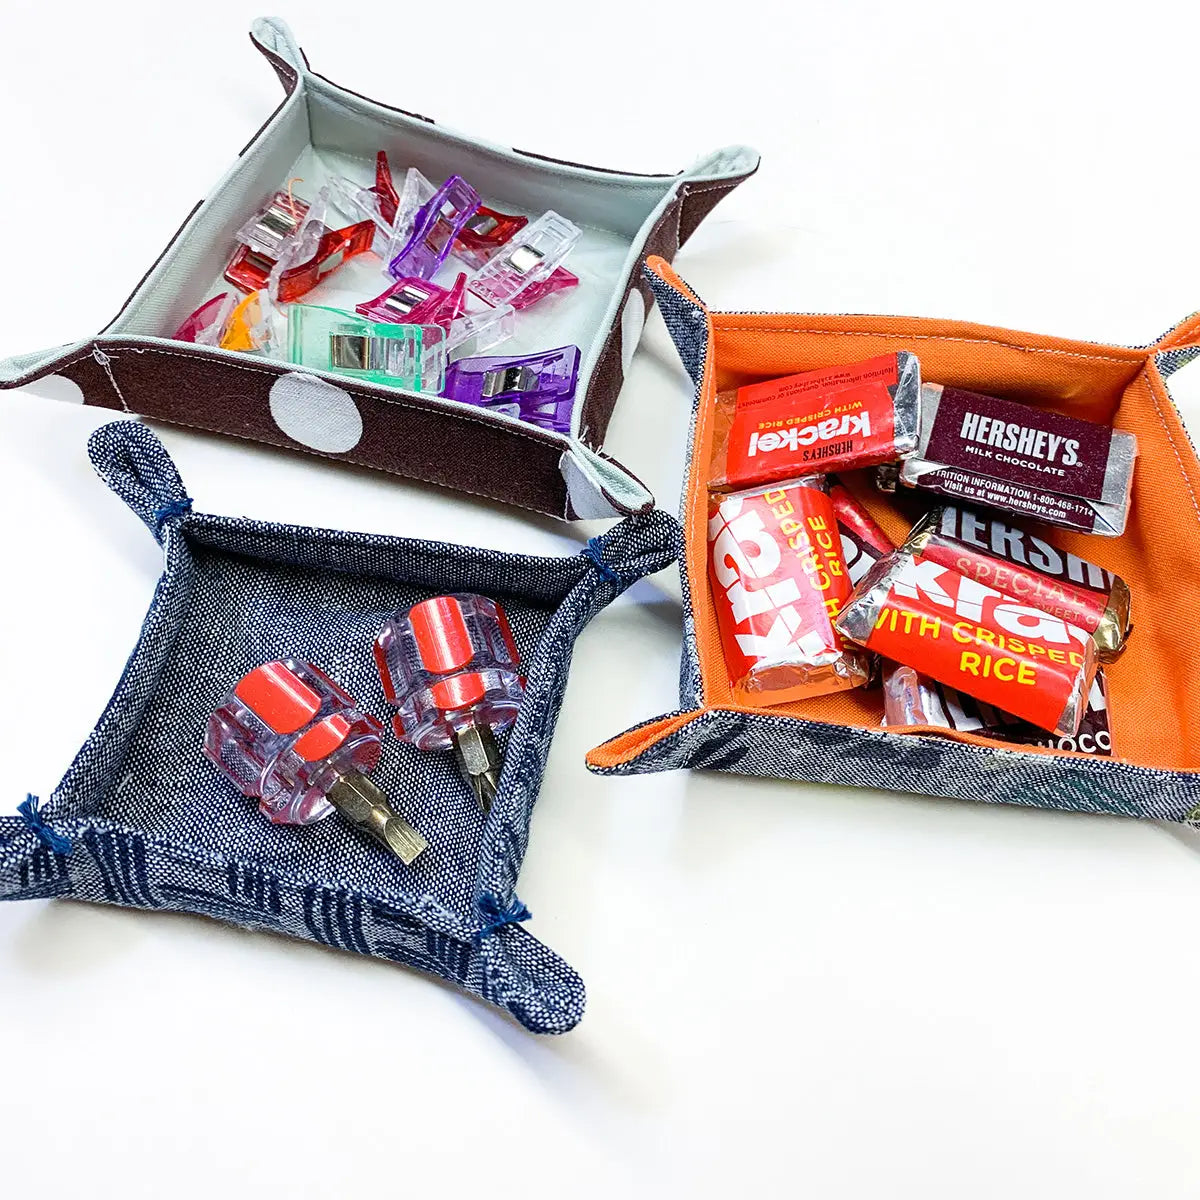
This quick and easy sewing project will make great use of your scraps and help keep any surface tidy, my Catch-All Fabric Trays. I am forever tidying up countertops, work tables, and dresser tops, and every time I've come away with a handful of little...stuff...that doesn't quite have a home, but also shouldn't be thrown away. Loose change, Clever Clips, charging bricks and cords--you name it, it's run amok on my surfaces.
That's why I love catch-all trays. They're shallow enough so that nothing piles too high, but spacious enough to hold all that loose change. Moreover, you can really make them any size to suit your organizational needs. I like the squares, but I've made a few rectangles to keep my daughter's markers and art supplies in order.
Catch-all trays make a great easy, gender-neutral gift. And you can tailor your fabric selection to suit each recipient.
Let's get started.
There are two ways to make these trays; one with quilting cotton and batting, and the other with interfacing. I'm a big proponent of "use what you have," and I've just finished up a quilt so I've got some extra batting so that's what I'm going with.
Supplies:
- two 5.5" squares of fabric,
- one 5.25 square of batting (or interfacing if that's what you have on hand)
- matching thread and bobbin thread
- embroidery floss (to match or contrast--your choice)
- Walking foot (if you're using batting), or a 1/4" footif you're using interfacing
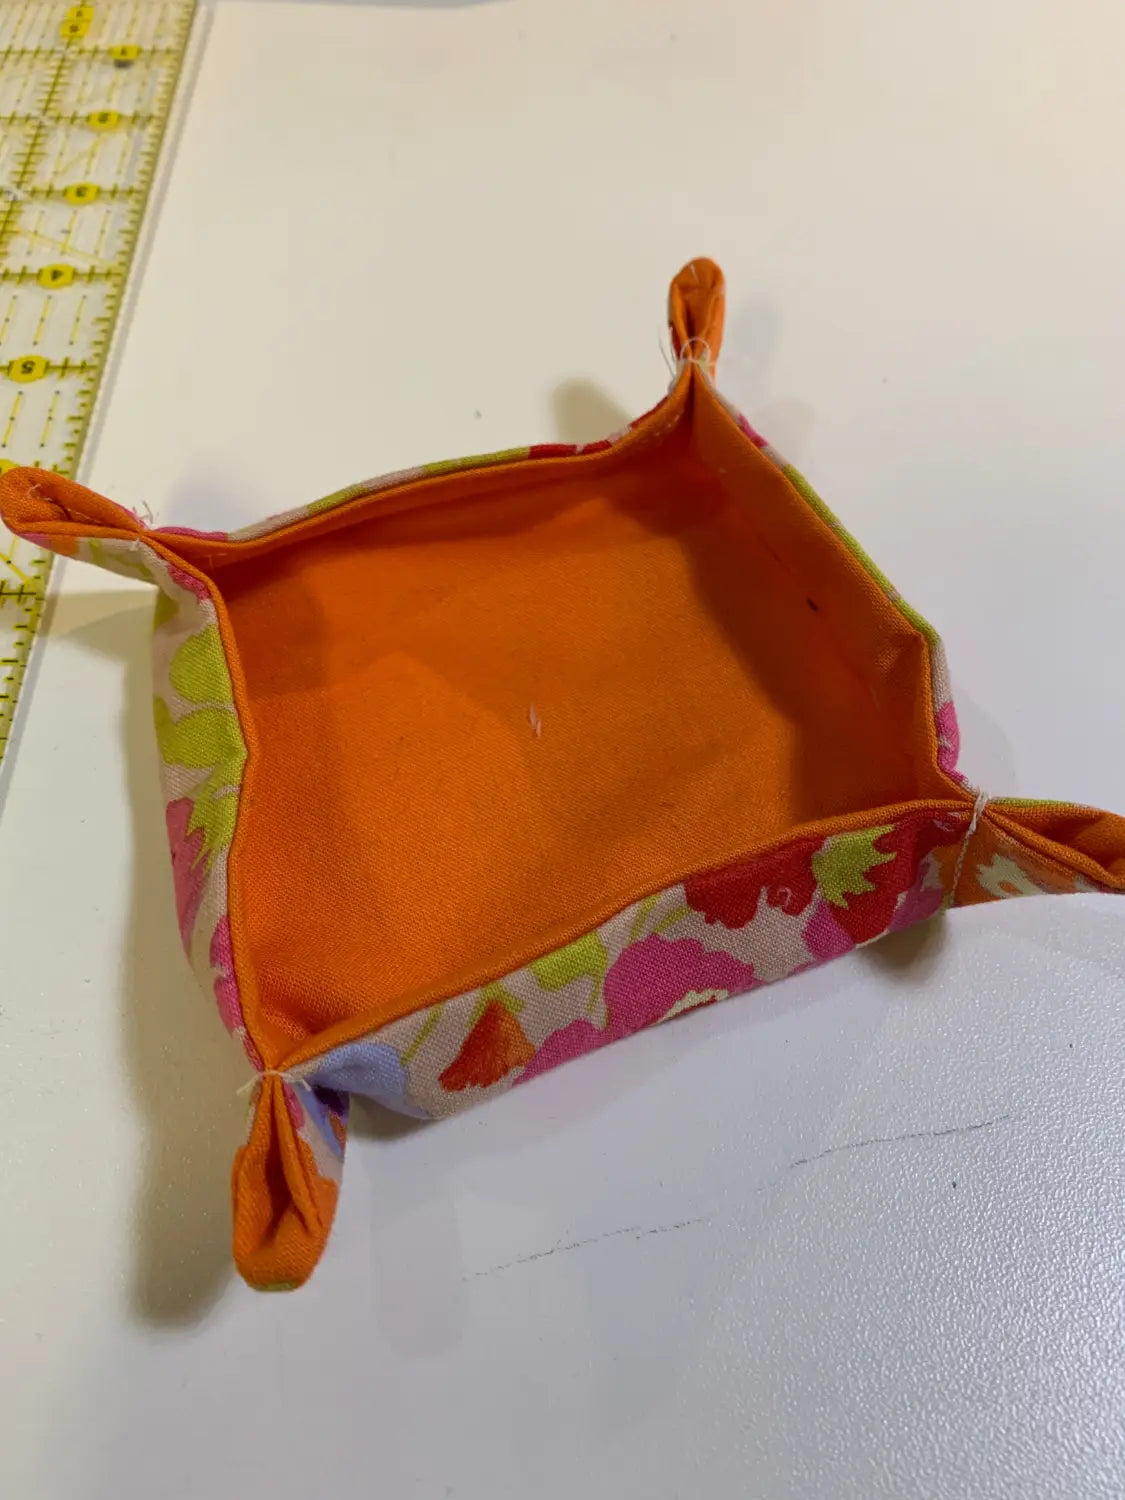
If you're wondering whether or not you need batting or interfacing, I highly recommend using one or the other. It adds structure to your piece, and that's what you want. This was my prototype (based on a product I saw in a store). You can see that it's sorta floppy. After experimenting, I learned that if you're using quilting cotton, you'll definitely want either batting or interfacing. If you're using a heavier canvas (upwards of 10oz) or waxed cotton or even kraftex, then you can do without that extra step.
Fabric choices--there are so many! Personally, I like two for contrast, but of course you can have the inside and outside of the tray be from the same fabric. I had a whole set of fat quarters that I'd been squirreling away, so I broke into those to see what I could come up with.
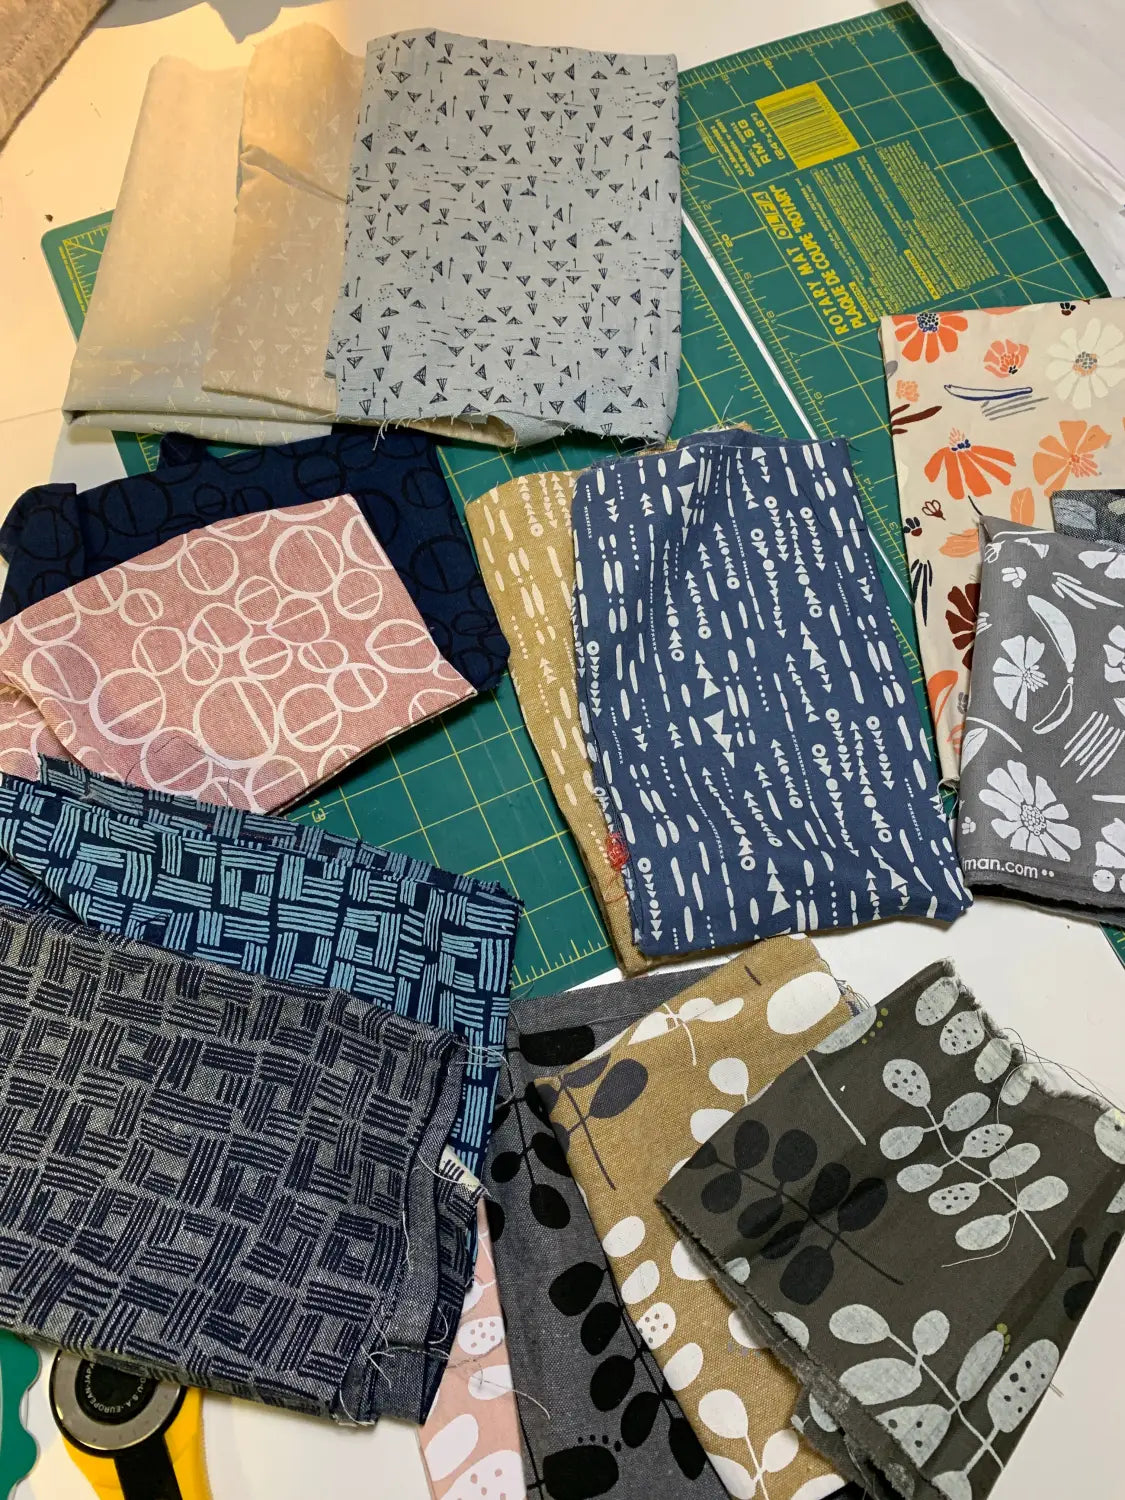
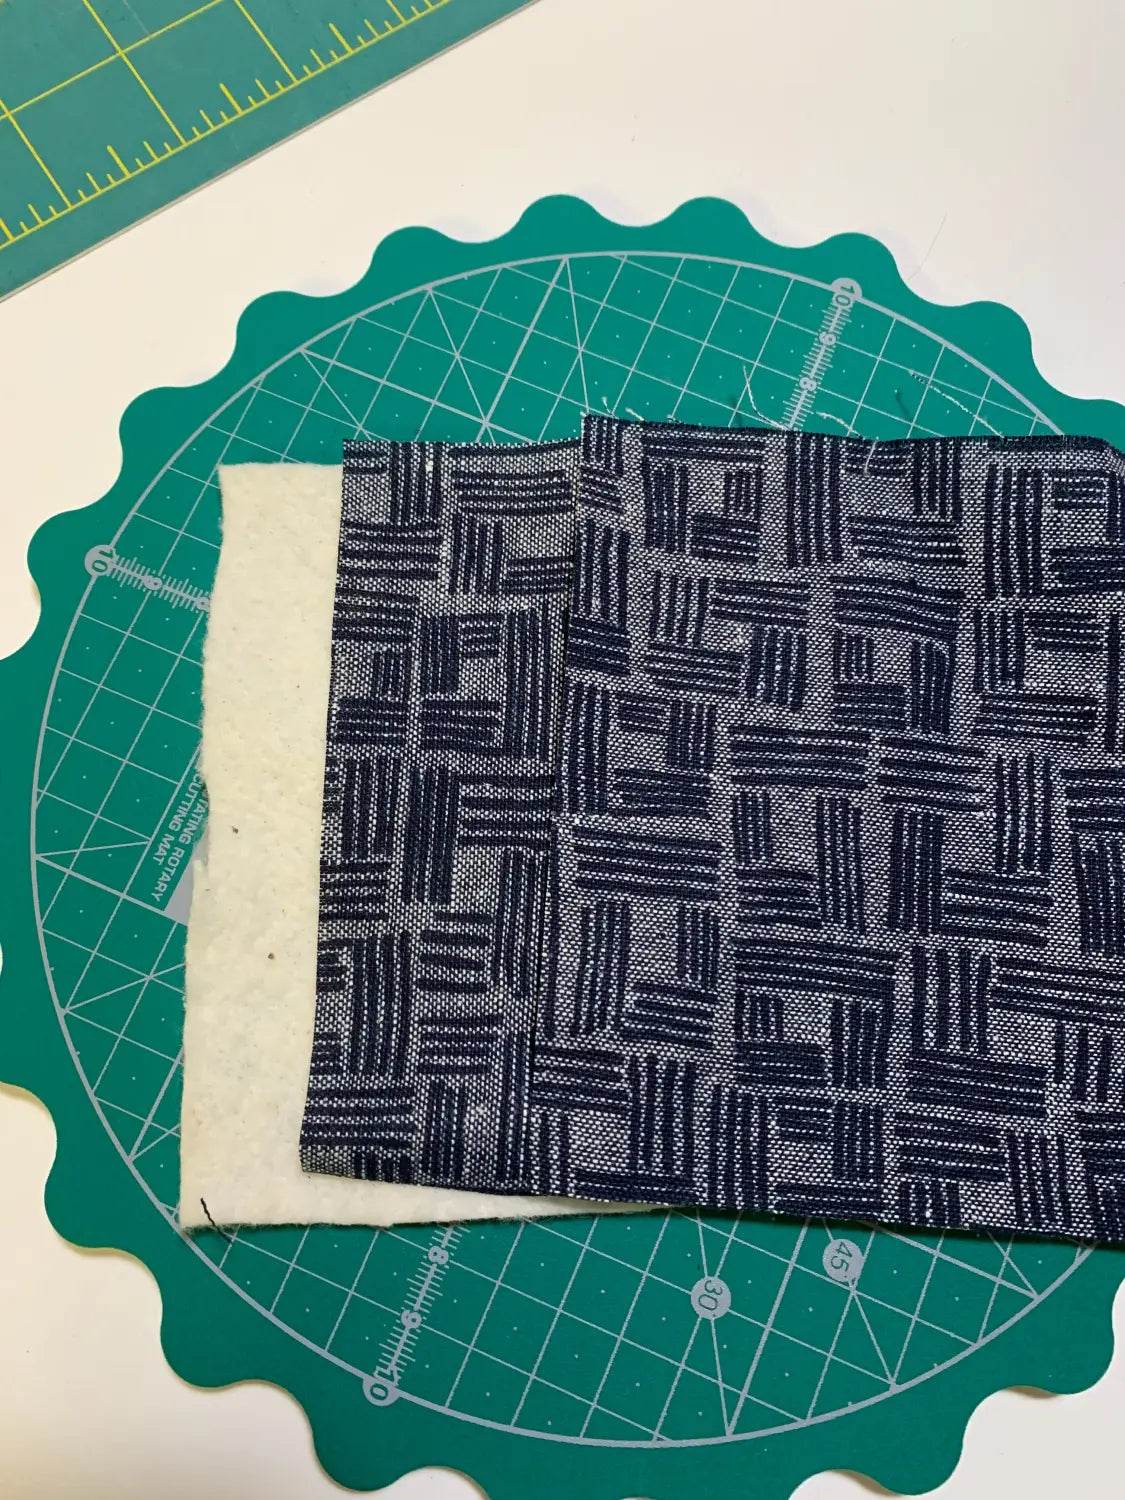
While I loved these fabrics, I wanted something non-directional, so I ended up with the blue on blue squares (lower left). I decided to use the print side (for my outer) and the wrong side (for the inside). A note on using fabric: you pay for both sides. And sometimes the wrong side just fits the bill.
Order of Operations
- Cut your fabric and batting to size. I cut mine to 5.5"
- Layer your pieces: first batting, then fabrics, right sides together. (Full disclosure: I screwed this up not once, but twice (!) which is why I often choose two widely different fabrics.
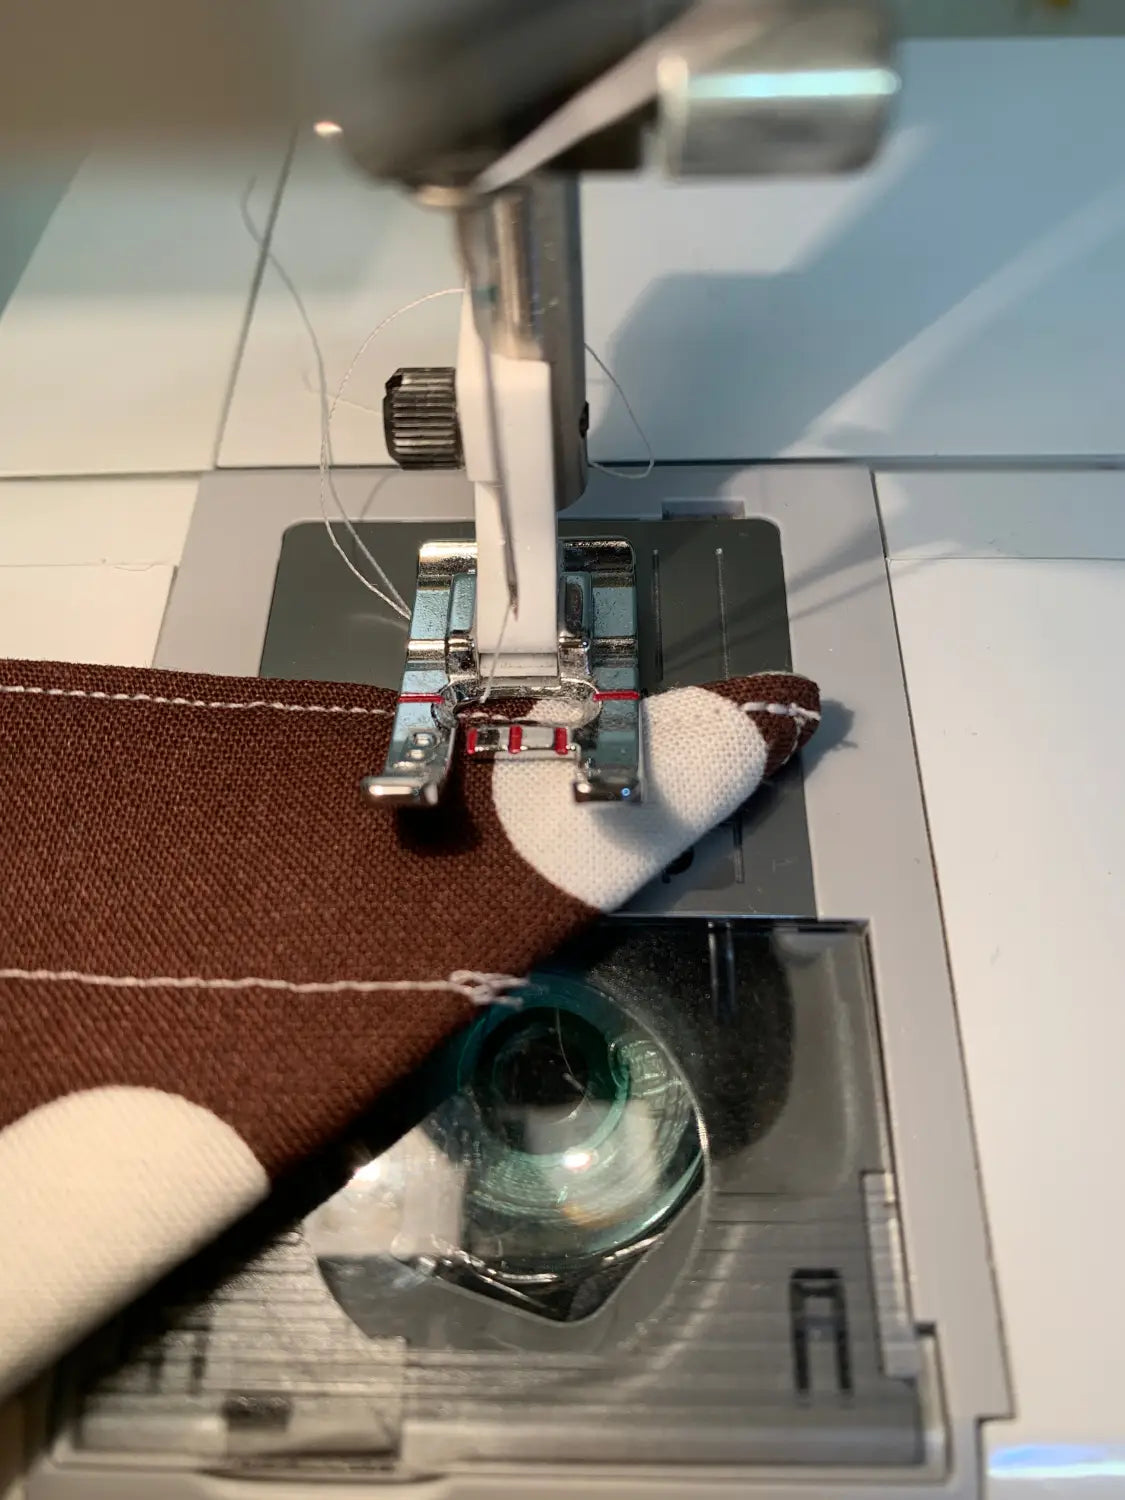
- at your machine, stitch around the perimeter with a 1/4" seam allowance. Leave a 2" opening on one side.
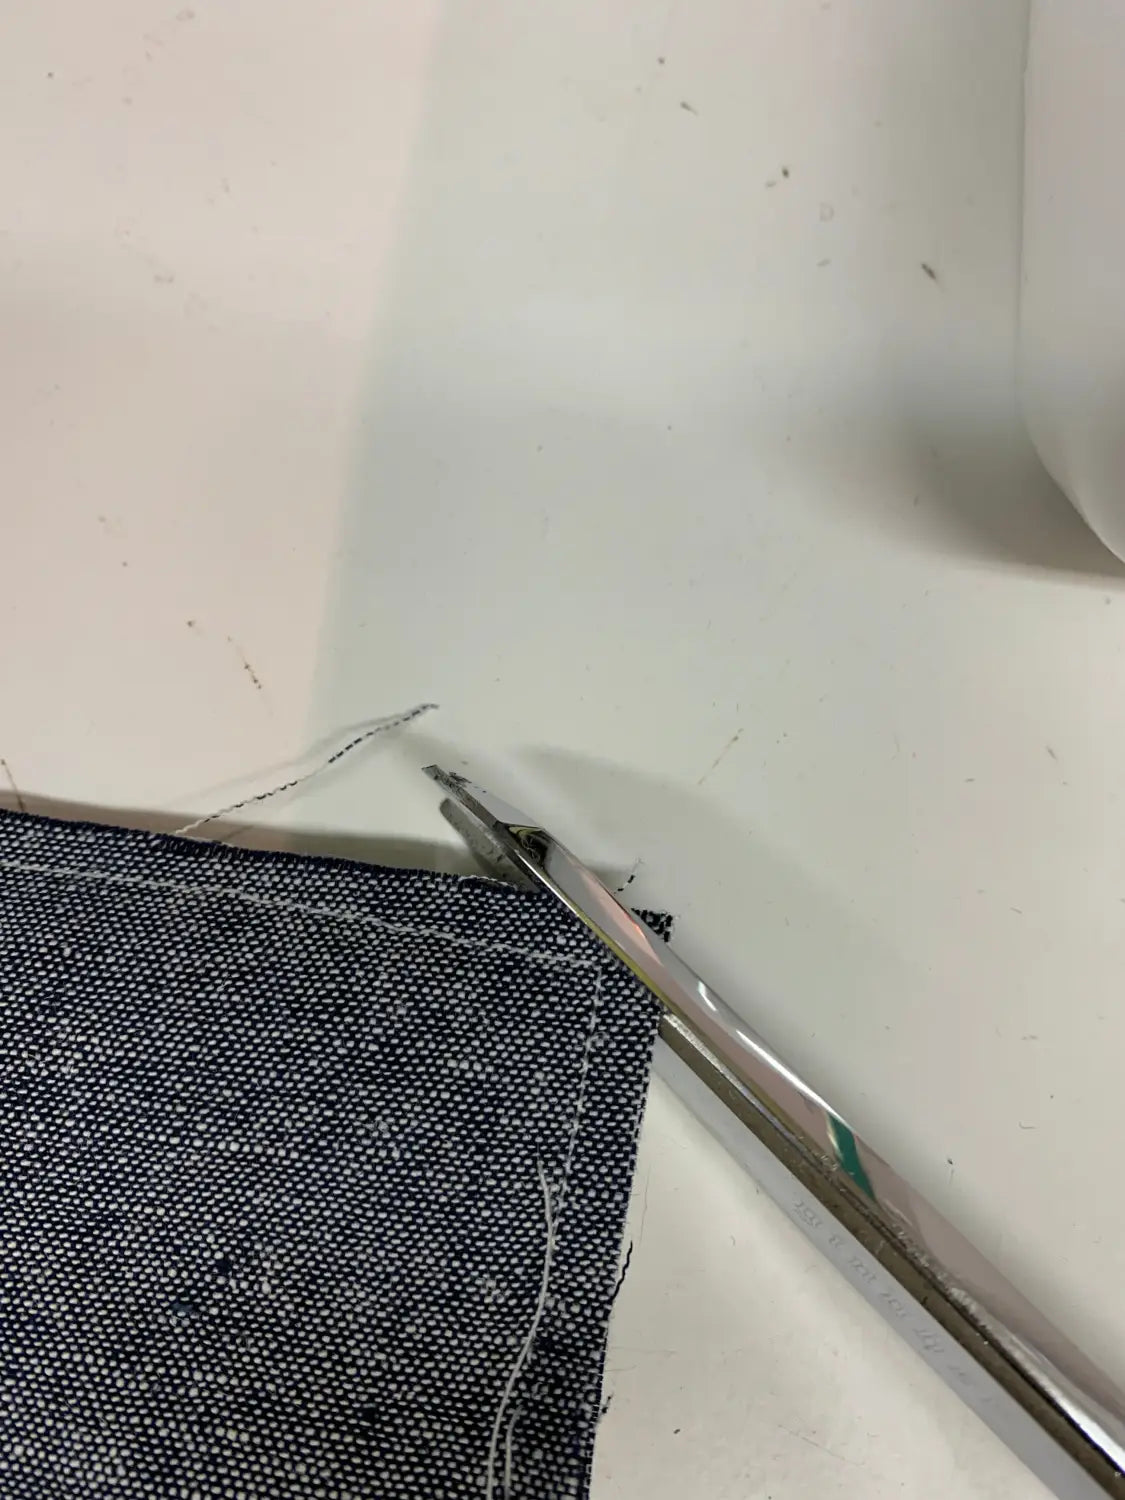
- clip your corners
- turn the piece right-side out (through that opening, and using a corner-turning tool (or chopstick), gently poke the corners into position.
- press, folding back the seam allowance of the opening into the body of the tray.
- Edgestitch 1/8" around the entire tray.
- With an erasable marking pen, mark a stitch line about 1" into the tray all the way around (basically creating a second square).
- Stitch that square. (This extra step helps create a base for your tray)
- Press
Finishing
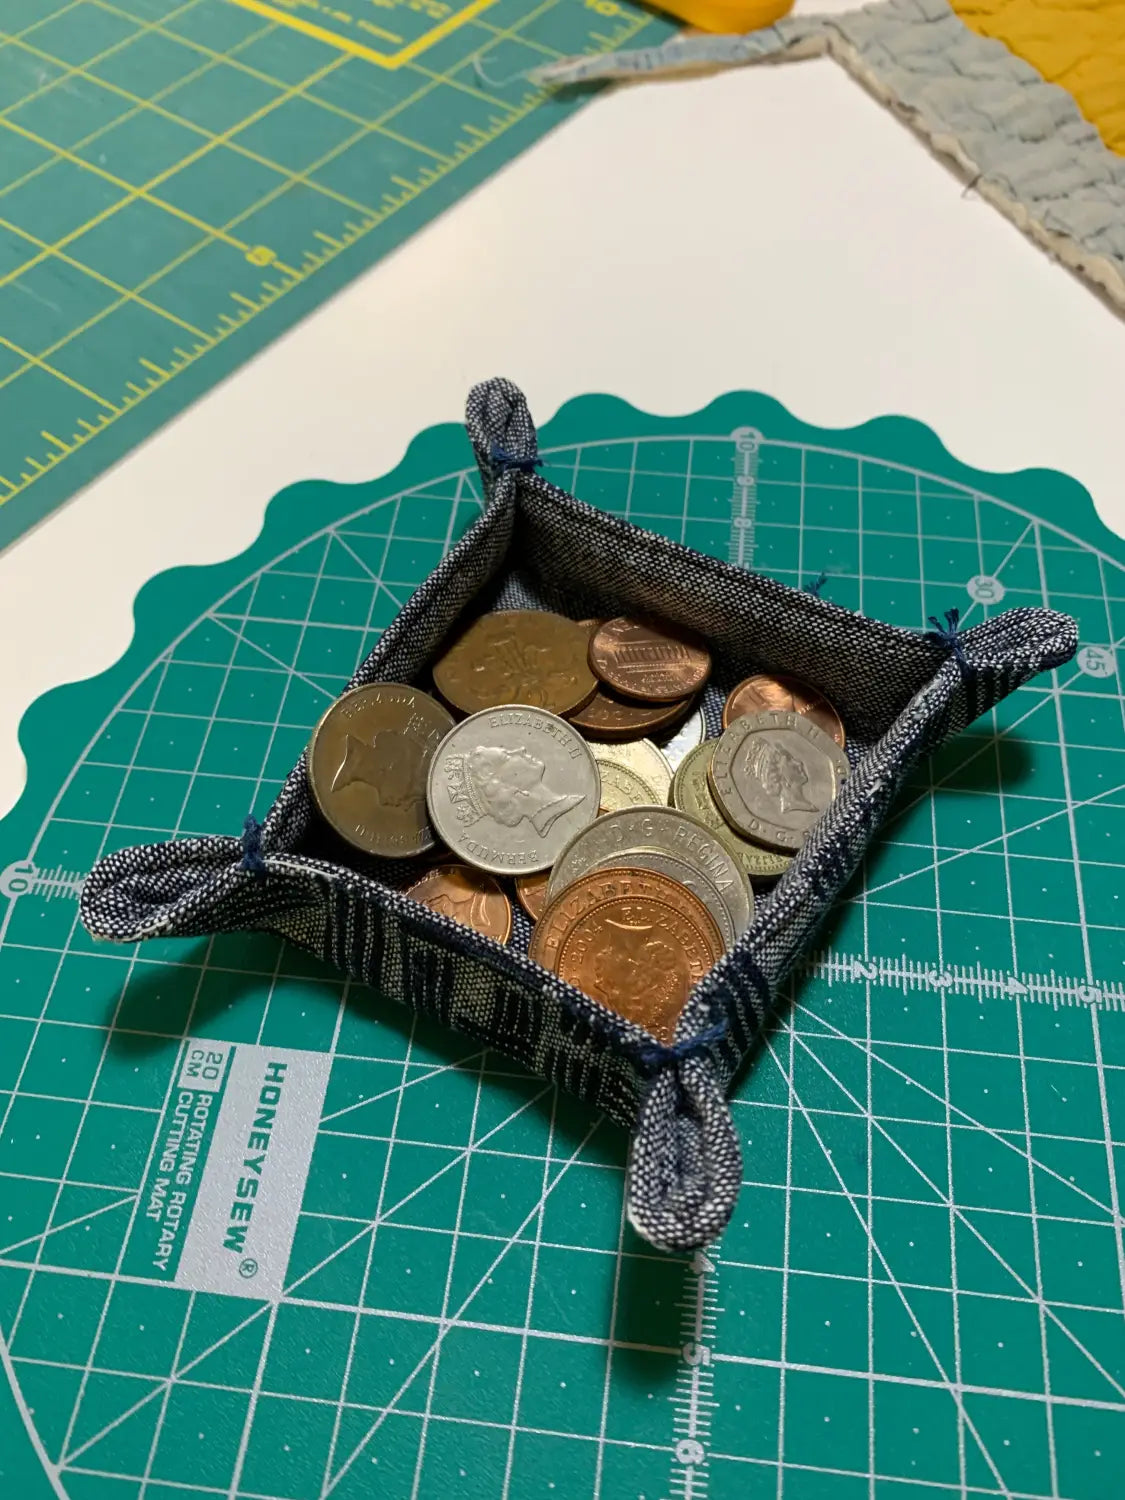
- Pinch two sides to create a corner. That inside square you just stitched acts as a guide.
- With your handsewing needle and embroidery floss, pass the needle through both sides of the tray. Tie a knot.
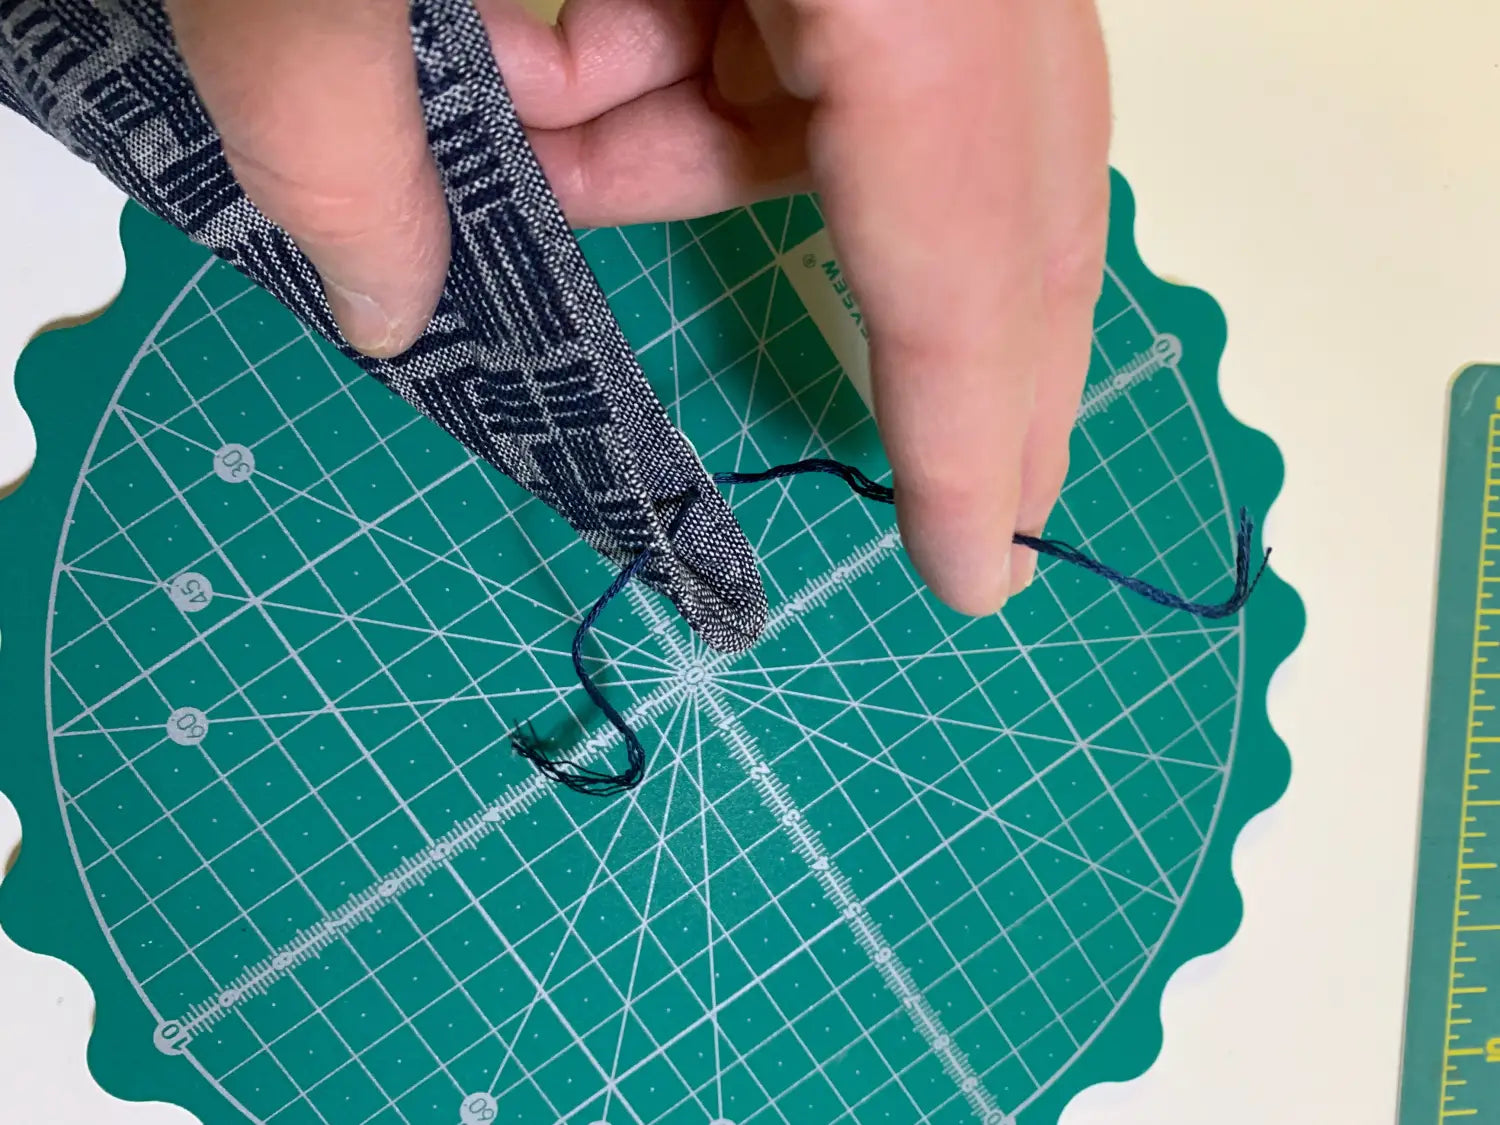
- Repeat for the other three corners.
- Fill your tray!
For giggles, I decided to make a few more using some sew-in interfacing I found in my scrap bin. Iron-on interfacing would work just as well. I followed the same process:
- Layer your pieces: interfacing then fabrics right sides together.
- Sew around the perimeter with a 1/4" seam allowance, leaving about a 2" gap along one side.
- Trim your corners and grade your seams (except for the side with the gap)
- Pull the tray right-side out.
- Press, and fold the seam allowance where the gap is inside the tray.
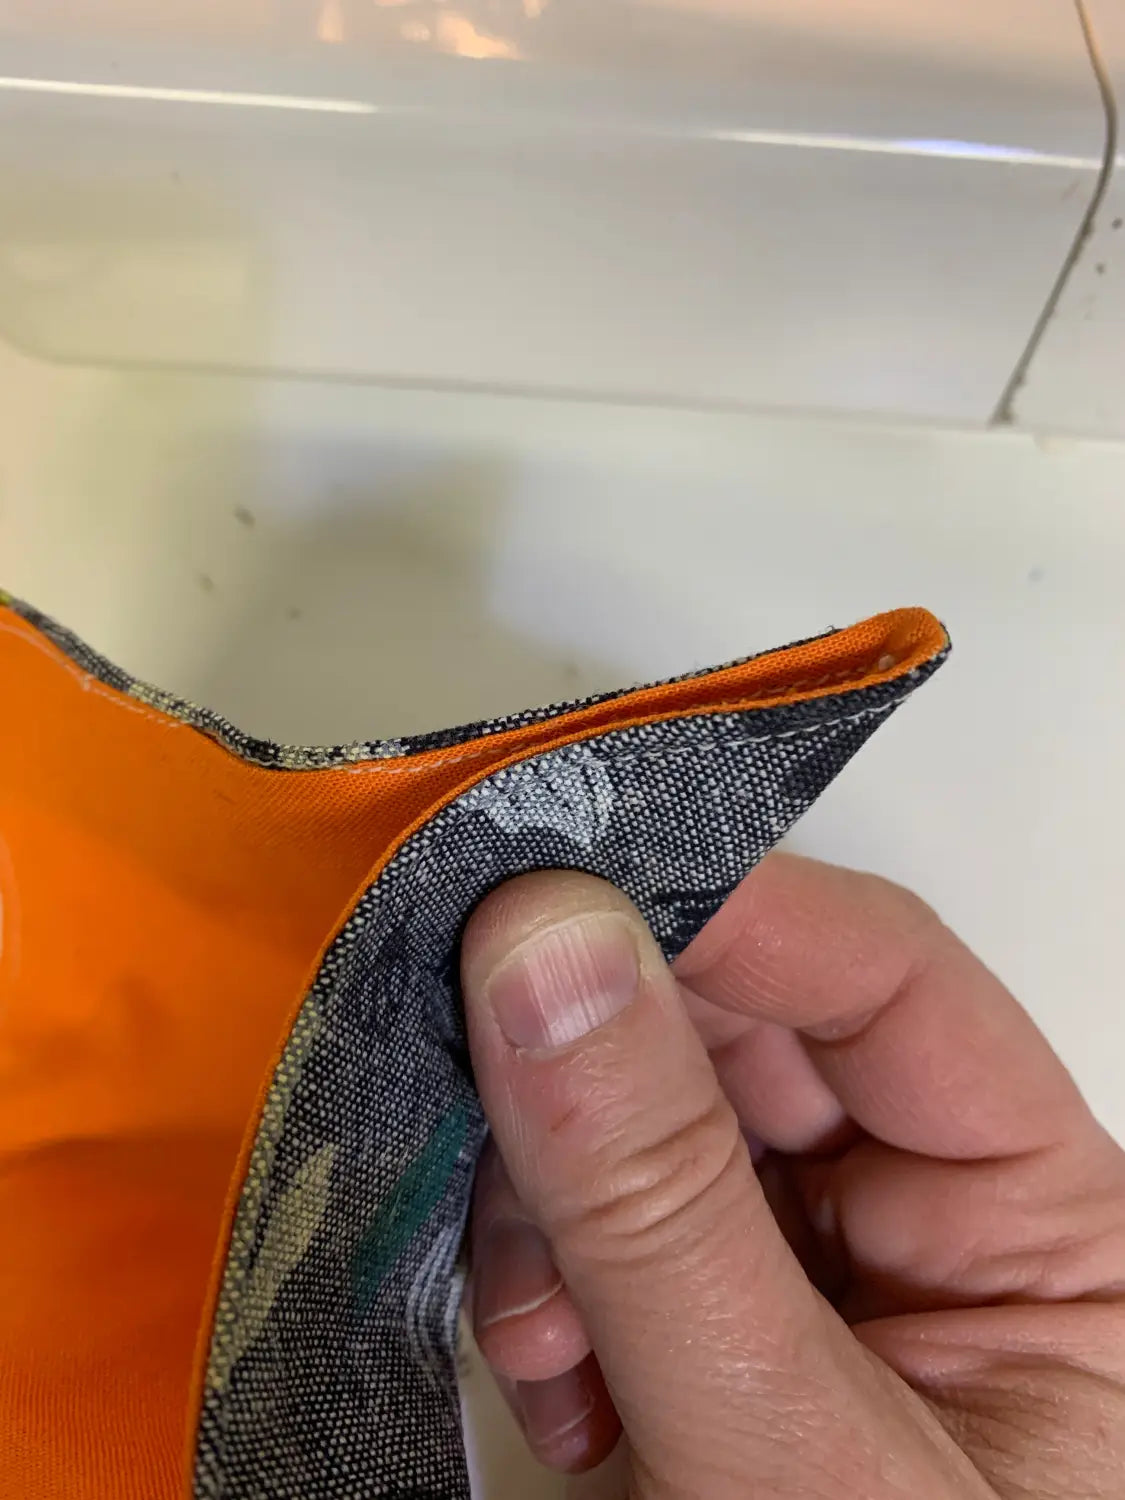
- Edgestitch around the entire piece
- Here's where I experimented: For one tray, I marked another stitching line approximately 1" in from the edge, all the way around. For the 2nd, I didn't.
- And instead of hand-stitching the corner closed, I decided to use my machine. I pinched the corner closed, and with about a 3/4" seam allowance, I sewed the corners from the top (where they met) to the base of the tray. (remember in this step to keep the top of the tray perpendicular to the stitch line. the right edge will be at a diagonal).
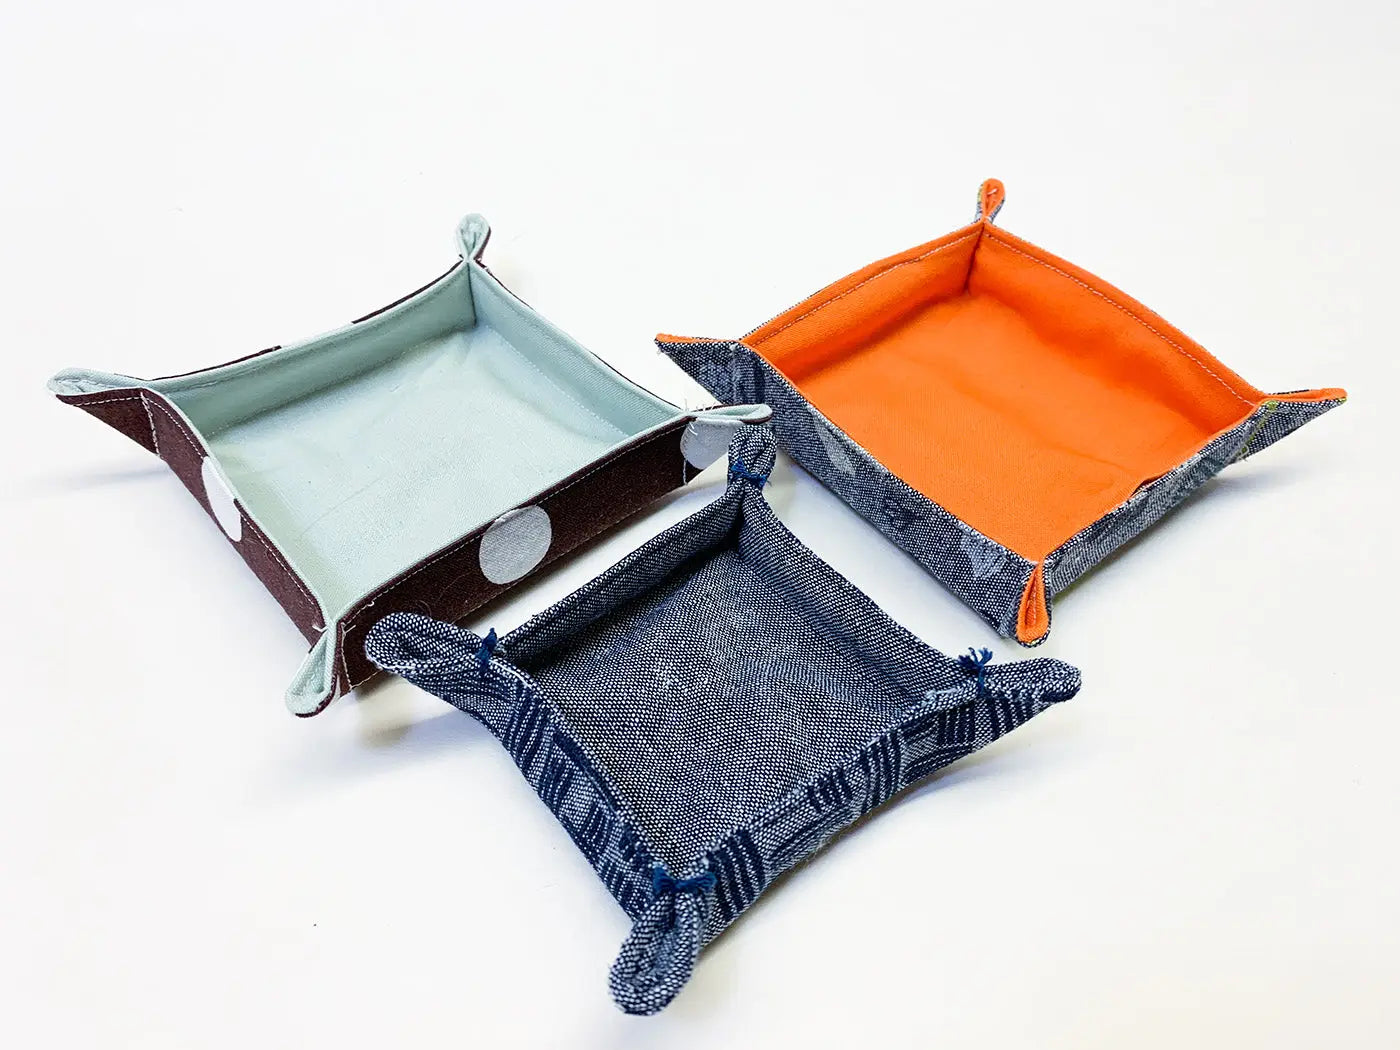
Same process, three different results.
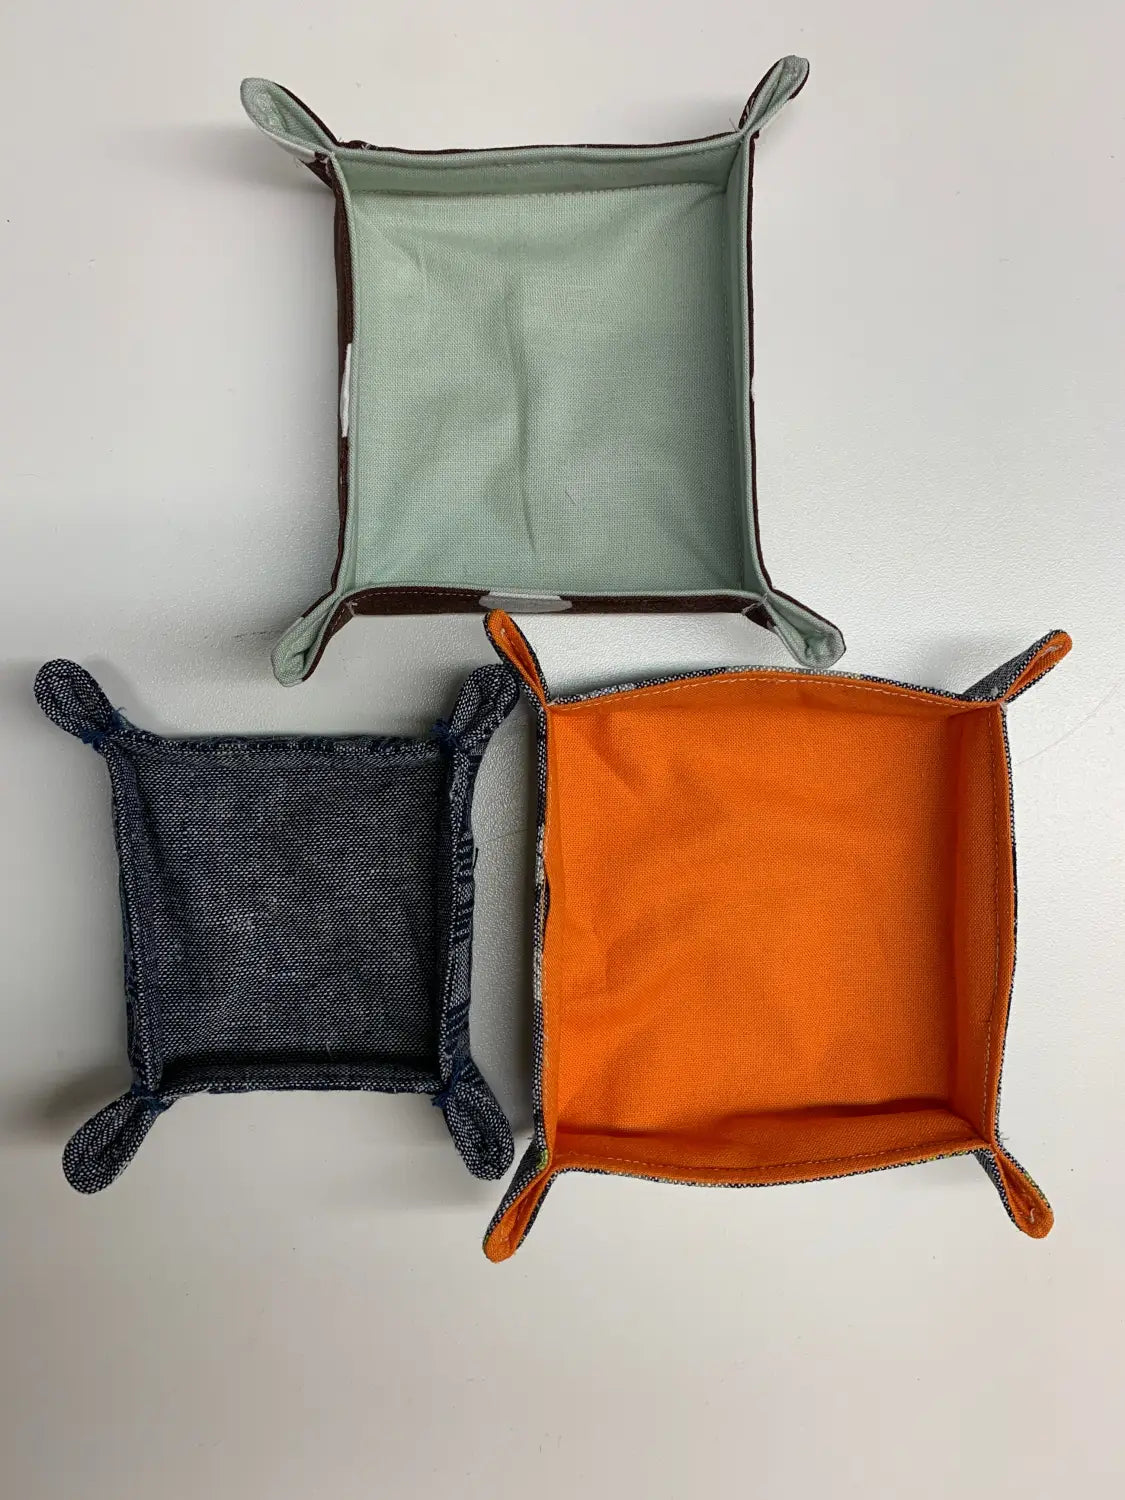
Top: quilting cotton, sew-in interfacing, additional stitched "inside" square, machine-sewn corners
Left: quilting cotton, cotton batting, additional stitched "inside" square, hand-sewn corners
Right: quilting cotton, sew-in interfacing, corners pinched closed and machine stitched.
All three do their job. All three would make someone happy. I can see the top one looking right at home on an entryway sideboard or dresser. And maybe the left one (with batting) would work for a child who collects bits and bobs from daily walks. And the right one definitely can hold all my loose sewing machine feet!
Making these trays is like eating potato chips--you can't stop at just one. So give yourself an hour or two this weekend and on Monday your gift list will be that much lighter!
Need a way to get organized with your gift giving? Check out our organizational process with free downloadable worksheets here:
https://sewingbysarah.com/blogs/tutorials/organizing-your-holiday-gift-making-it-s-not-too-late
Stay in touch and Show us what you've made:
Instagram: @sewingbysarahstore
Facebook VIP Group: https://www.facebook.com/groups/sbsvip


Leave a comment (all fields required)