In our last post, we demonstrated how the use the Adjustable Zipper Foot to install a zipper...but what about invisible zippers?
What exactly is an invisible zipper? And why would I use it?
Invisible zippers have very fine teeth, and are meant to be sewn into the seam of a garment (a top, dress, skirt, or even slacks) and they "disappear" into that seam. It doesn't distract from the lines of the garment, and is often used in more formal clothing.
Ok, I'm intrigued--how do you insert one?
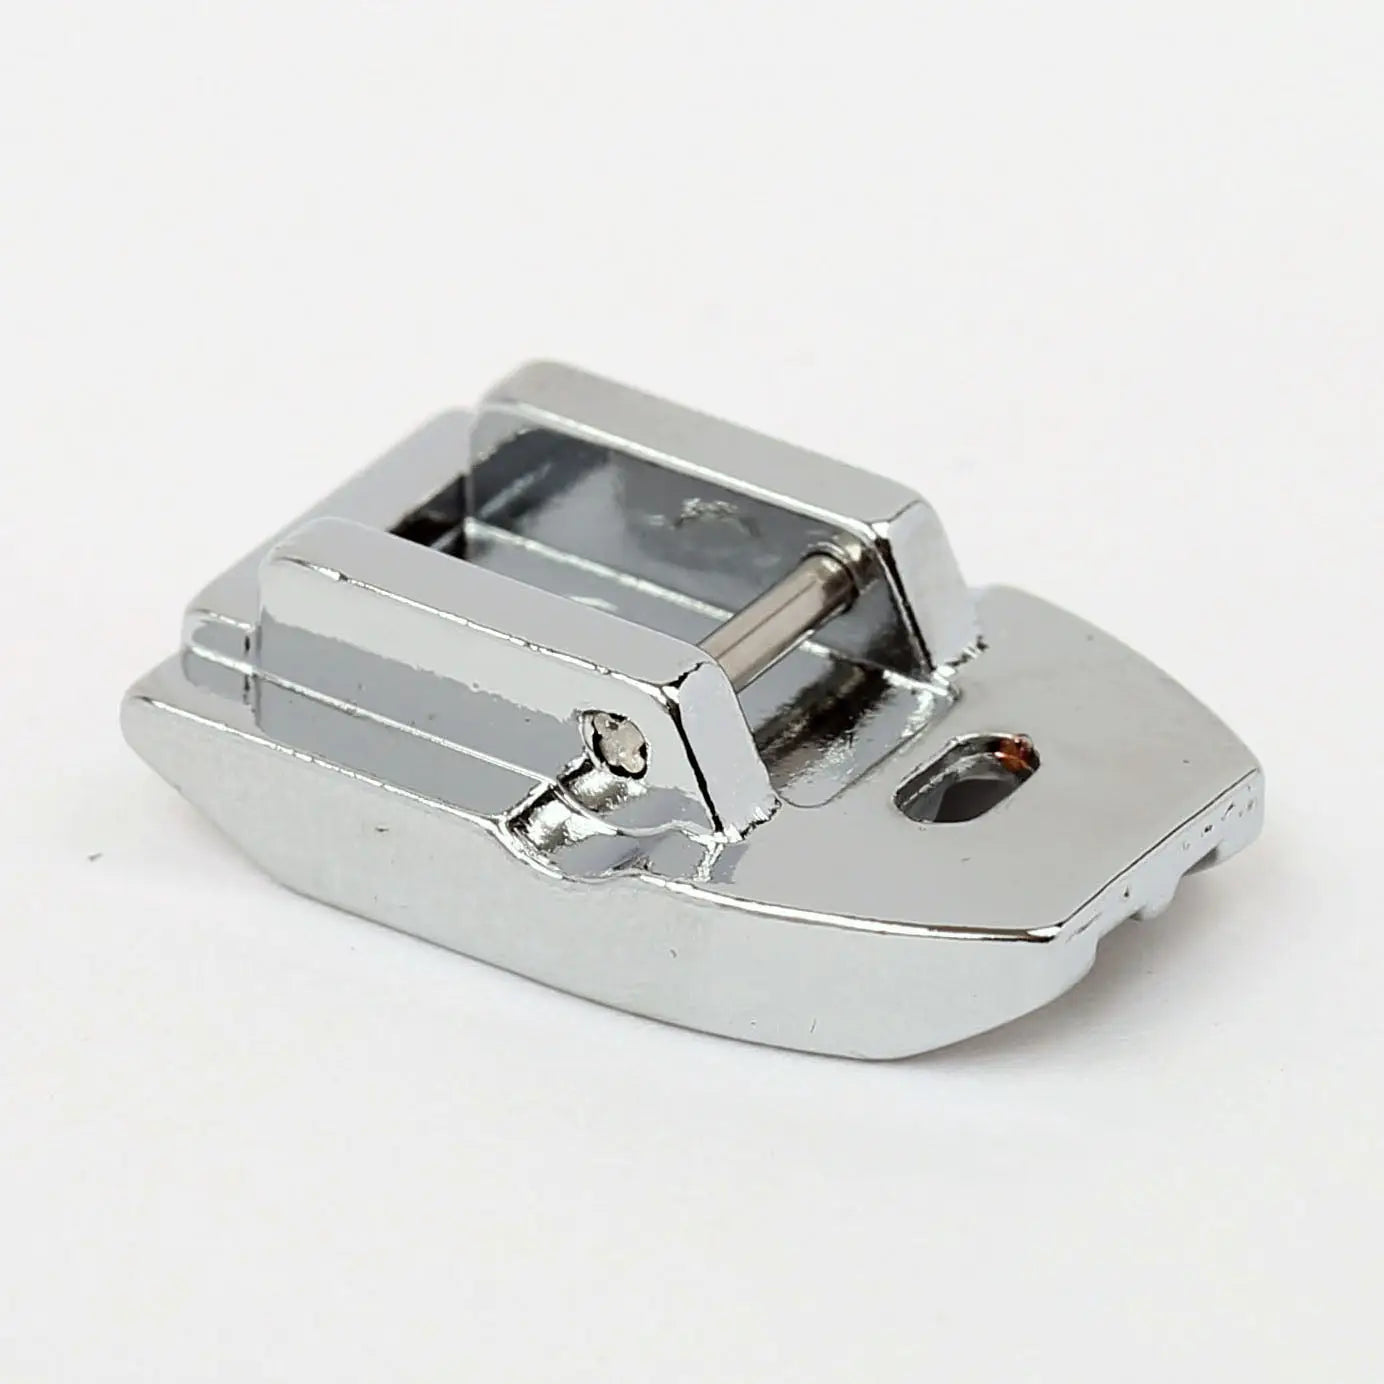
Good news! Your 32 piece set contains an Invisible Zipper Foot. (And before you ask: yes, you can use your Adjustable ZIpper Foot for an invisible zipper, but the specialized foot will give you the precision you need without the fussing). How is the Invisible Zipper Foot different? Turn it over and you will see: there are two ridges on the underside of the foot, each meant to hold the zipper coil in place so that you can stitch EXTREMELY close to the zipper teeth.
It's not at all difficult--let's get started. Scroll down to go to the video on the entire process.
Supplies:
- invisible zipper
- Invisible Zipper Foot
- sewing machine
- matching thread
- fabric marking pen
- pins or Clever Clips
- Wool Pressing Mat
- Iron
1. Prep your zipper by taking it out of the packaging, and sliding open the zipper. Turn it right side down on your pressing surface. With your hot iron, press the coils away from the zipper tape. Do this for both sides.
2. Since we use invisible zippers mainly on garments, I'm going to use a 5/8" seam allowance. Place your zipper face down on your fabric piece which is right side up along the left raw edge. Align the top of the zipper tape with the top of your fabric piece. Pin your zipper tape so that your seam line (just inside of the zipper teeth) is 5/8" away from the raw edge. There should be about 1/4" between the zipper tape and the raw edge of the fabric.
3. Place your pinned piece under the zipper foot on your sewing machine. You'll see that the zipper teeth fit neatly into the left groove of the Invisible Zipper Foot. Sew the zipper to the fabric. Remove from the machine.
4. Now you'll sew the other piece of fabric to the other side of the zipper tape, but before you do so, with a fabric marker, mark your last stitch on the unsewn side of the zipper tape.
5. Flip the piece you've just sewn wrong side up, and place it on your other piece of fabric (which is right side up). Your zipper will be aligned with the left raw edge, and the top of the zipper will align with the top edge of the fabric. Pin the zipper tape in place, again with the 5/8" seam allowance. Once you've pinned, open the zipper. Place the piece so the zipper coil fits under the right side notch, and sew until you hit the last stitch mark.
6. After removing your piece from the machine, give it a light press, and VOILA! You've got your invisible zip invisibly inserted!
OTHER TIPS when using an invisible zipper:
- Buy an invisible zipper as close to the color of your fabric as possible. It's designed not to show, but the color will help it blend even better.
- Always buy a zipper longer than the opening you intend to have for the zipper.
- You do NOT sew the seam first. Insert the zipper into the seam allowance/2 sections to be closed by the zipper and THEN sew the rest of the seam closed. I would recommend putting the zip into the garment as soon as possible during construction. It is easier to work with when your fabric is flat and before you have joined lots of garment seams together.
- If you are working with thick fabrics and an invisible zipper, get the highest quality invisible zipper with thick zipper tape. Thick fabrics can be particularly difficult to work with as invisible zippers can be delicate.


Leave a comment (all fields required)