In this final installment of our Storm at Sea Quilt Along we are going to put it all together and complete our quilt top, quilt and bind our quilt!
Okay then…. Have you made up all of the blocks and the partial blocks that go along the side and bottom? I hope that you had fun making them.
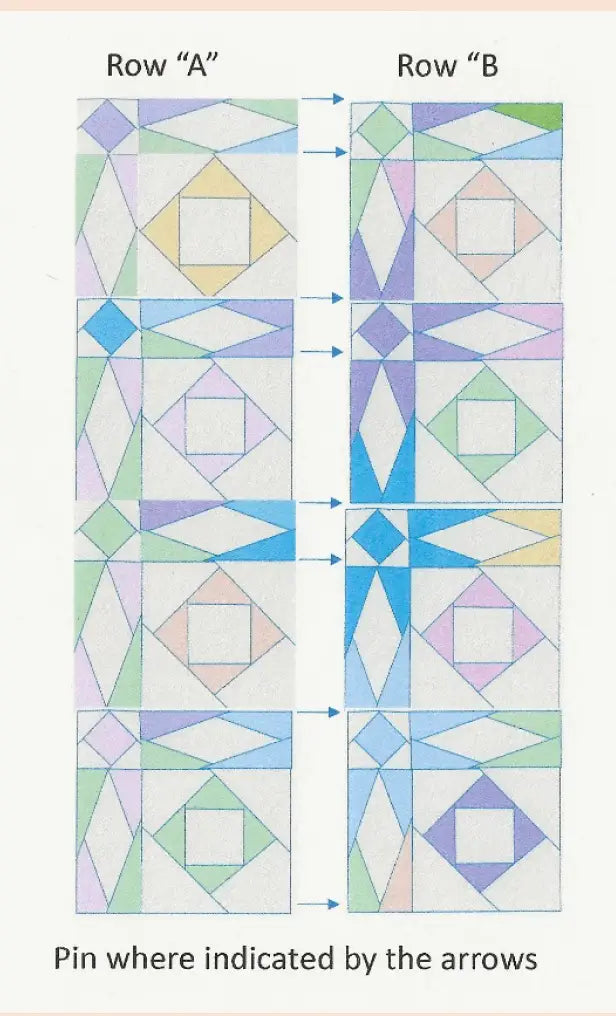
Now for some excitement! Let’s put them all together.
Here's a quick video of how the blocks go together:
Do you have a large area where you can lay them out by Row? My dining room table works great. But sometimes I have to use that for meals. When that’s the case, I have a quilt hanging up in our guest room. I use it to pin up the blocks, like a “Design Wall”.
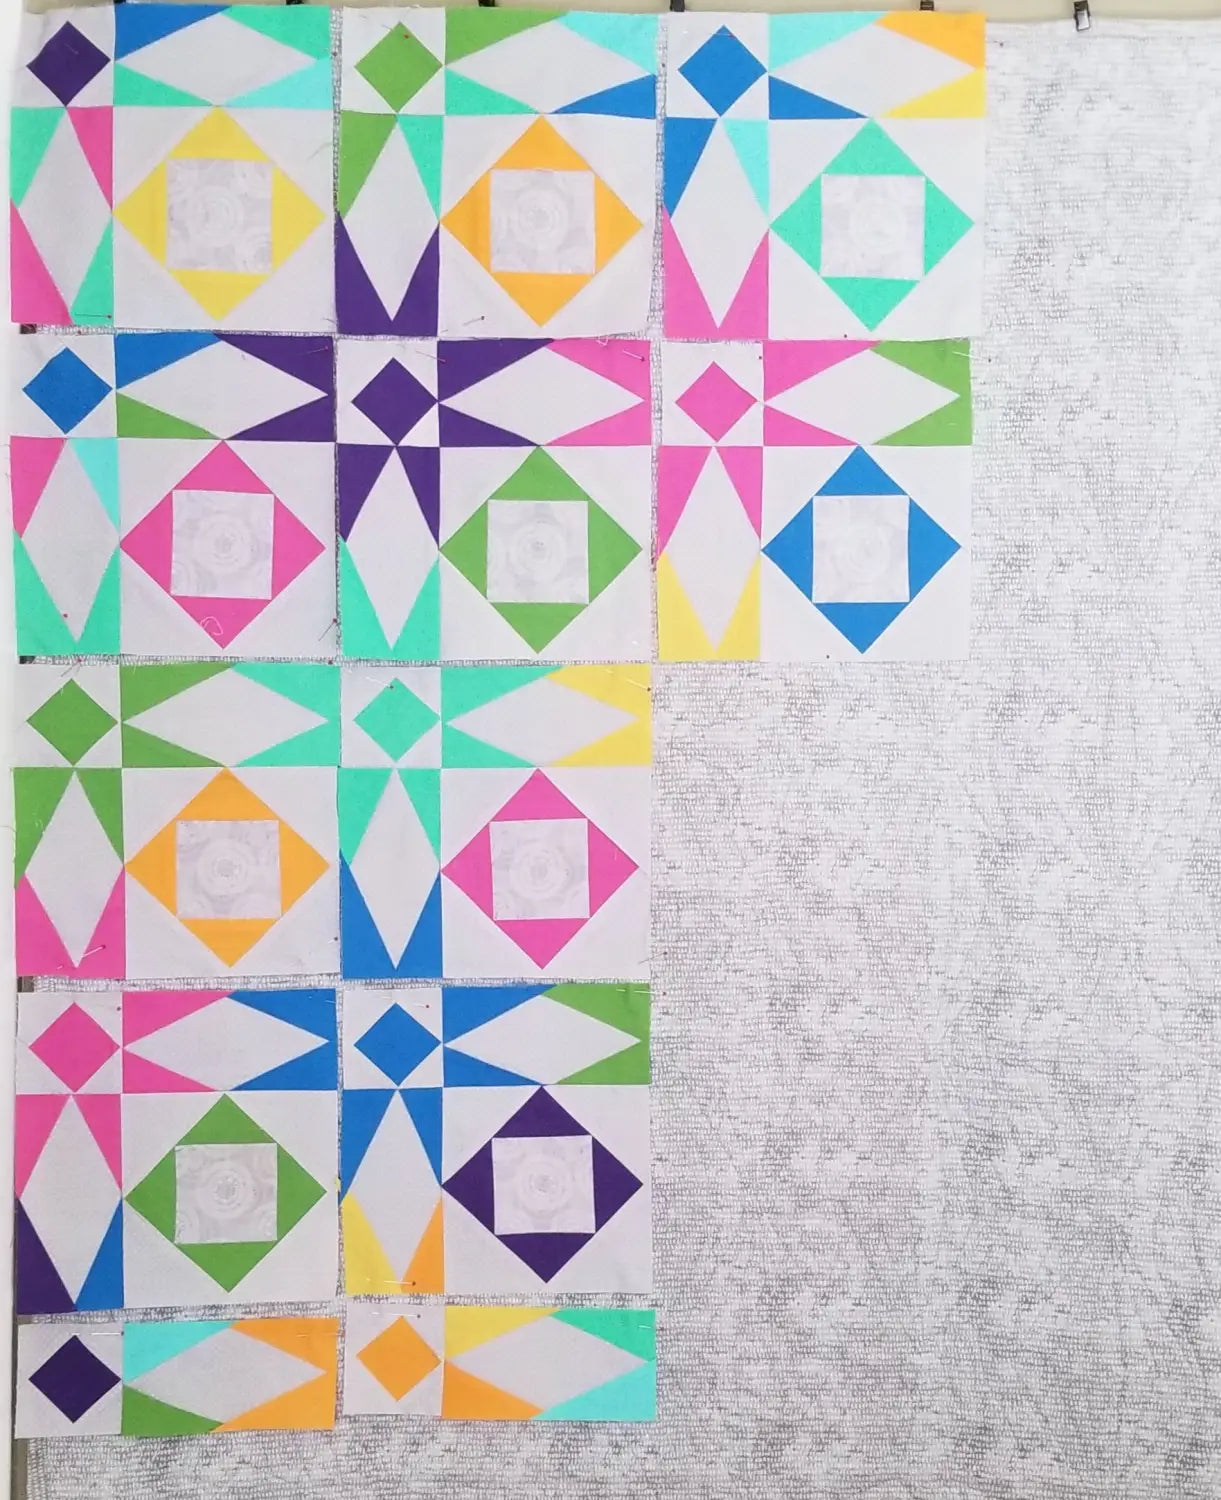
It works great. I simply pin each block in place by row, onto the hanging quilt. I turn the quilt around so that the quilt design is on the backside and I have a plain area for pinning. I like that I am able to step back and look at my blocks straight on, as opposed to seeing them on the surface of a table.
So, get your blocks organized by row, because there is nothing worse that realizing that you forgot a block, or skipped to another row…after sewing them in place.
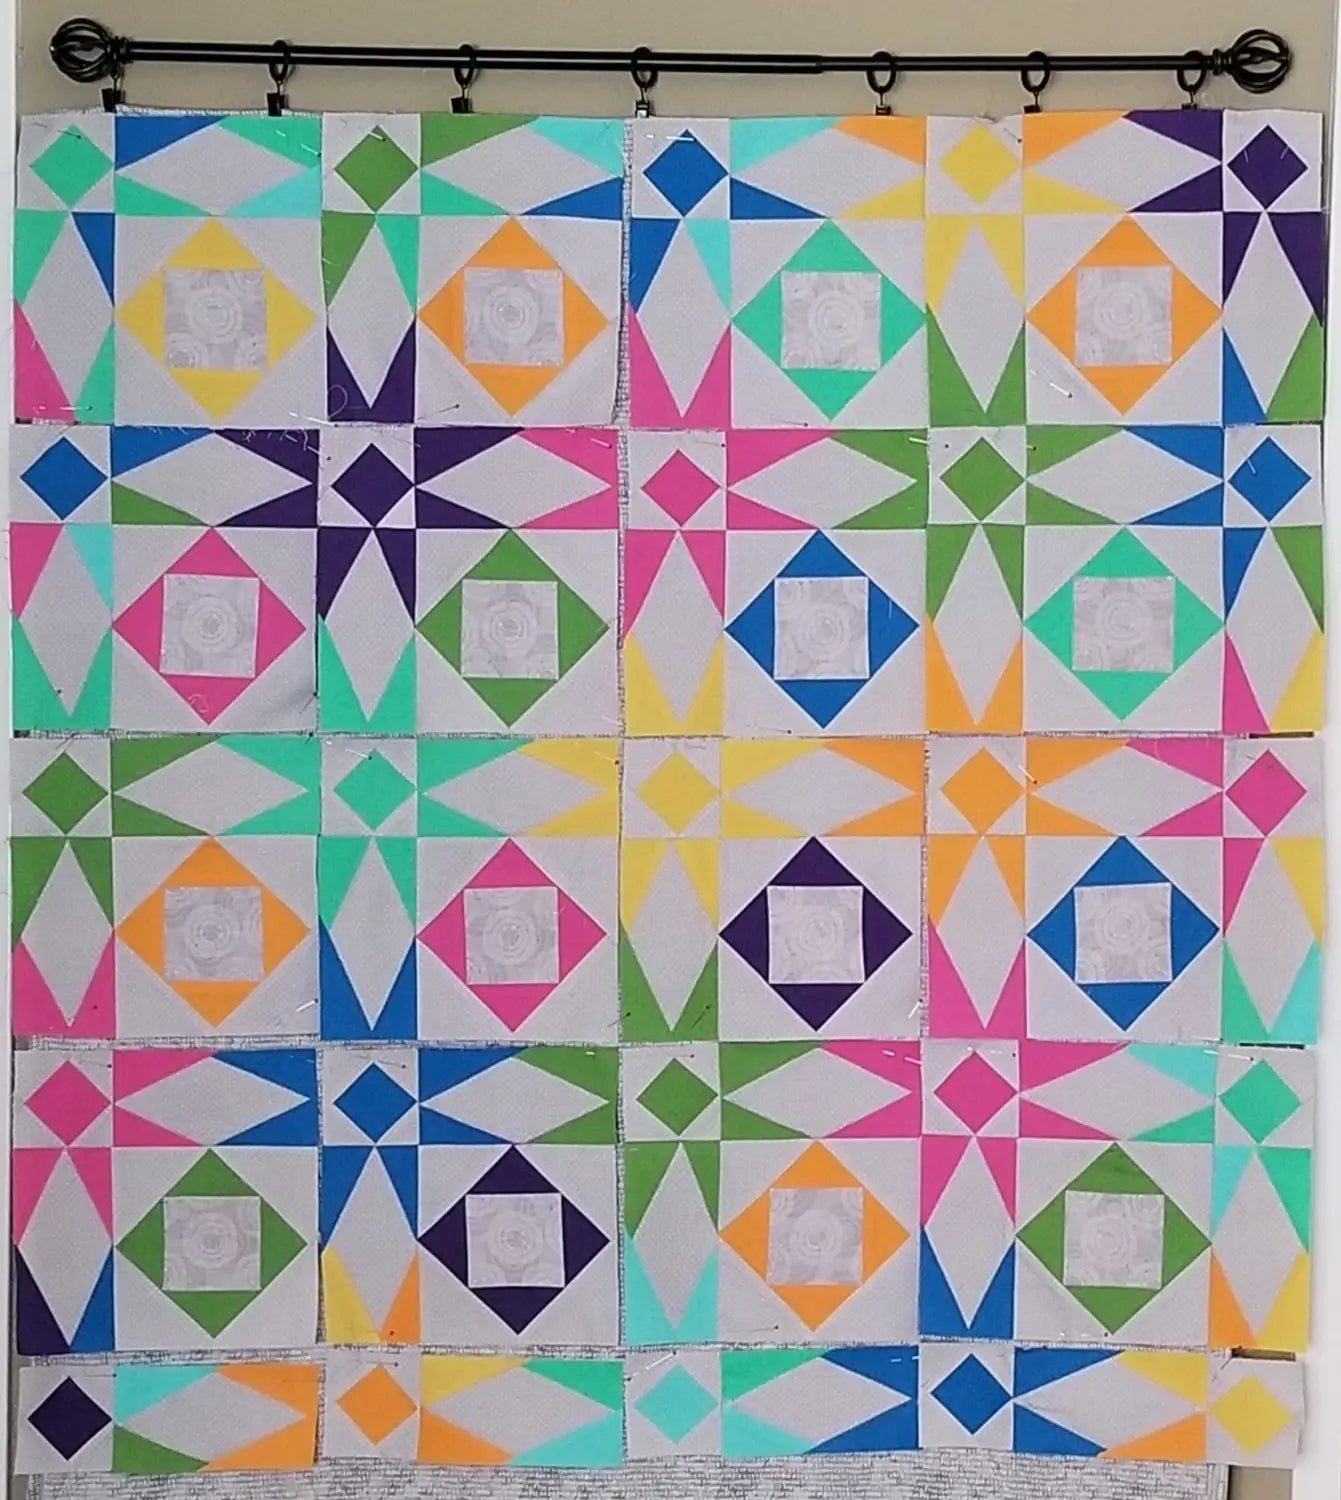
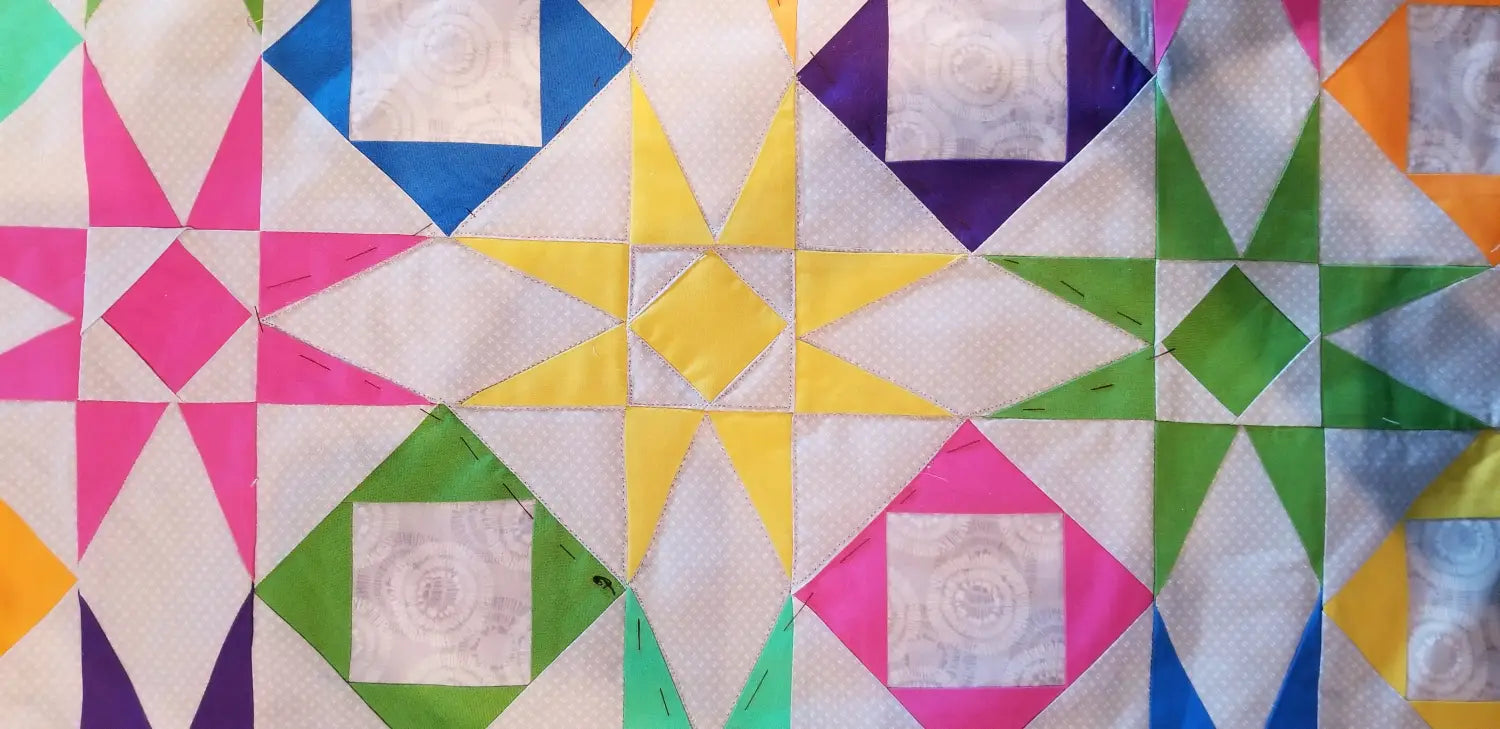
Here are all of my blocks and partial blocks (along the side and bottom). Pinned to my design wall quilt. You might notice that I made a few changes. I changed the upper left corner, and the purple box at the bottom. Pinning up you quilt this way gives you the opportunity to see it face on. Now is a great time to change anything that you don’t like.
Sew the Blocks Into Rows:
Begin with Block #1, Row A. Sew this to Block #2, Row A. and so forth for every row.
This pattern is pretty simple to piece. If you have trimmed all of your blocks to 8-1/2” square, they should line up nicely.
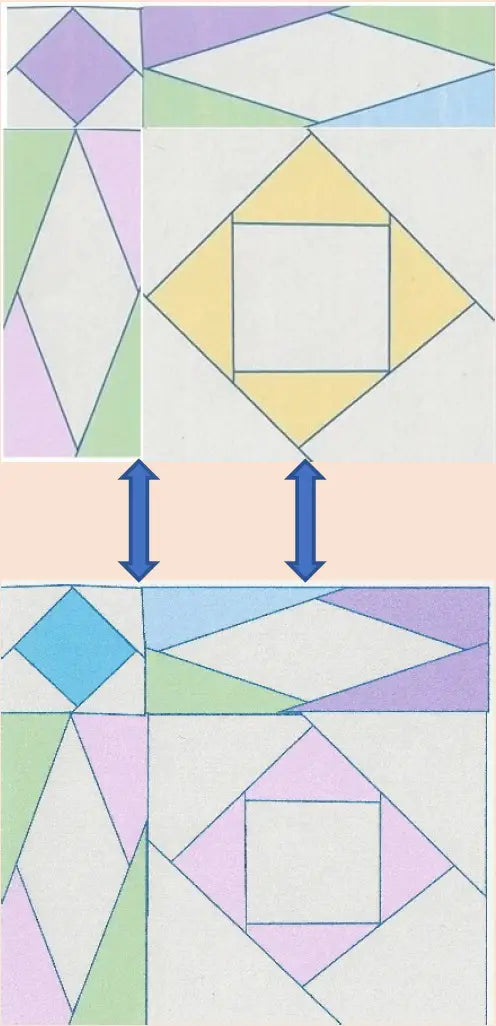
First, with RST, pin together these two points; the area where the seams meet, and where the edge of the diamond meets the tip of the 6” square. Then pin them together at the ends. This way, if you have one that’s a fraction off, you can give it a little pull as you stitch.
Be careful not to sew over the points of the colored triangles in the 6” square, or the corners of the colored 3” square. These will really show up in the final quilt top.
The overlap points of the diamond block will disappear and that’s okay. The points of the stars will still be sharp. Try to keep the sides of the diamonds even. Otherwise, you will have “wonky” stars. “Wonky” stars have points that are mismatched. So, even if you do have “wonky” stars, I think they can still look cute, especially for a child’s quilt.
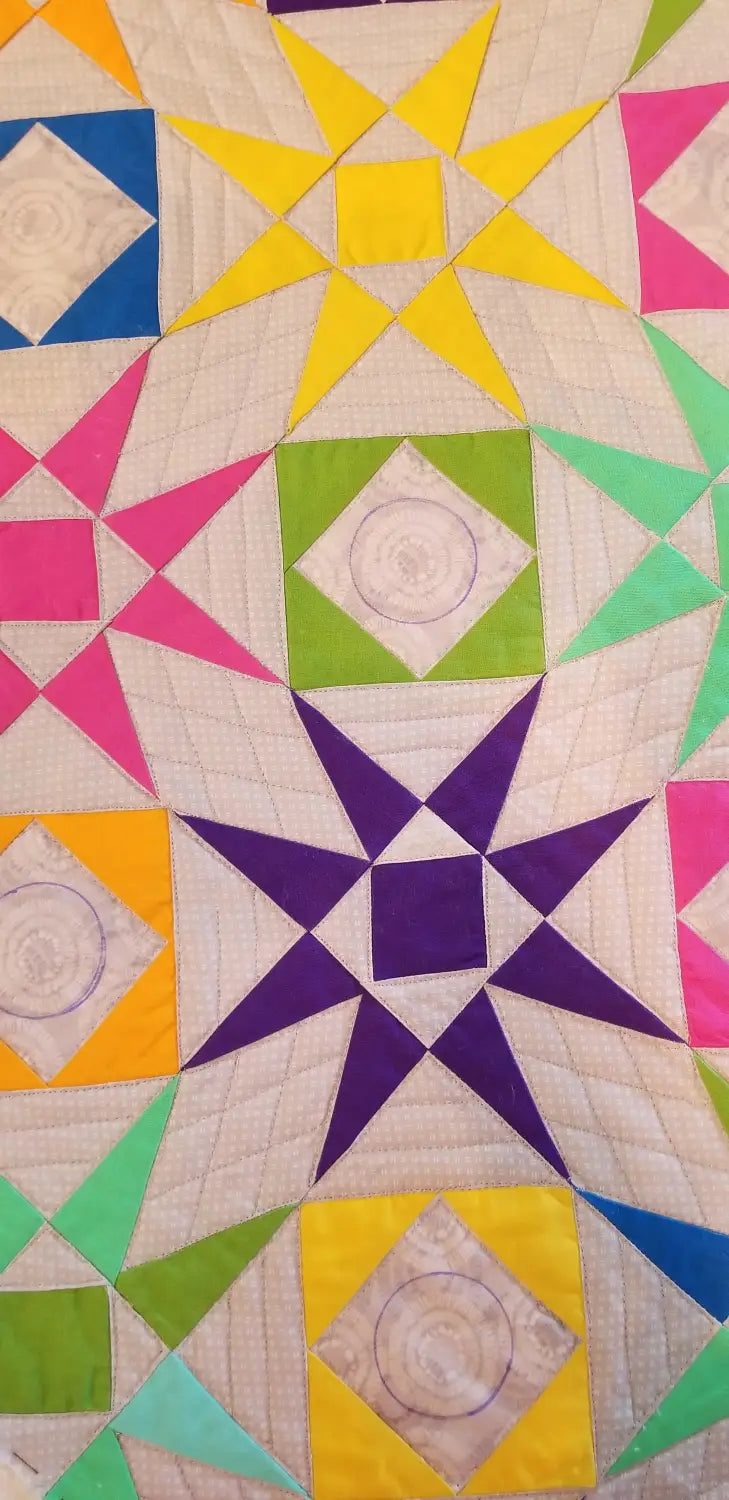
Here are my blocks sewn into rows. Beginning with row ”A”. I find it easiest to match the final row (E) by first sewing it to row “D”.
Sew the Rows into the Final Quilt Top:
Pin each row at every point where the legs of the stars meet the 3” square (center of the star).
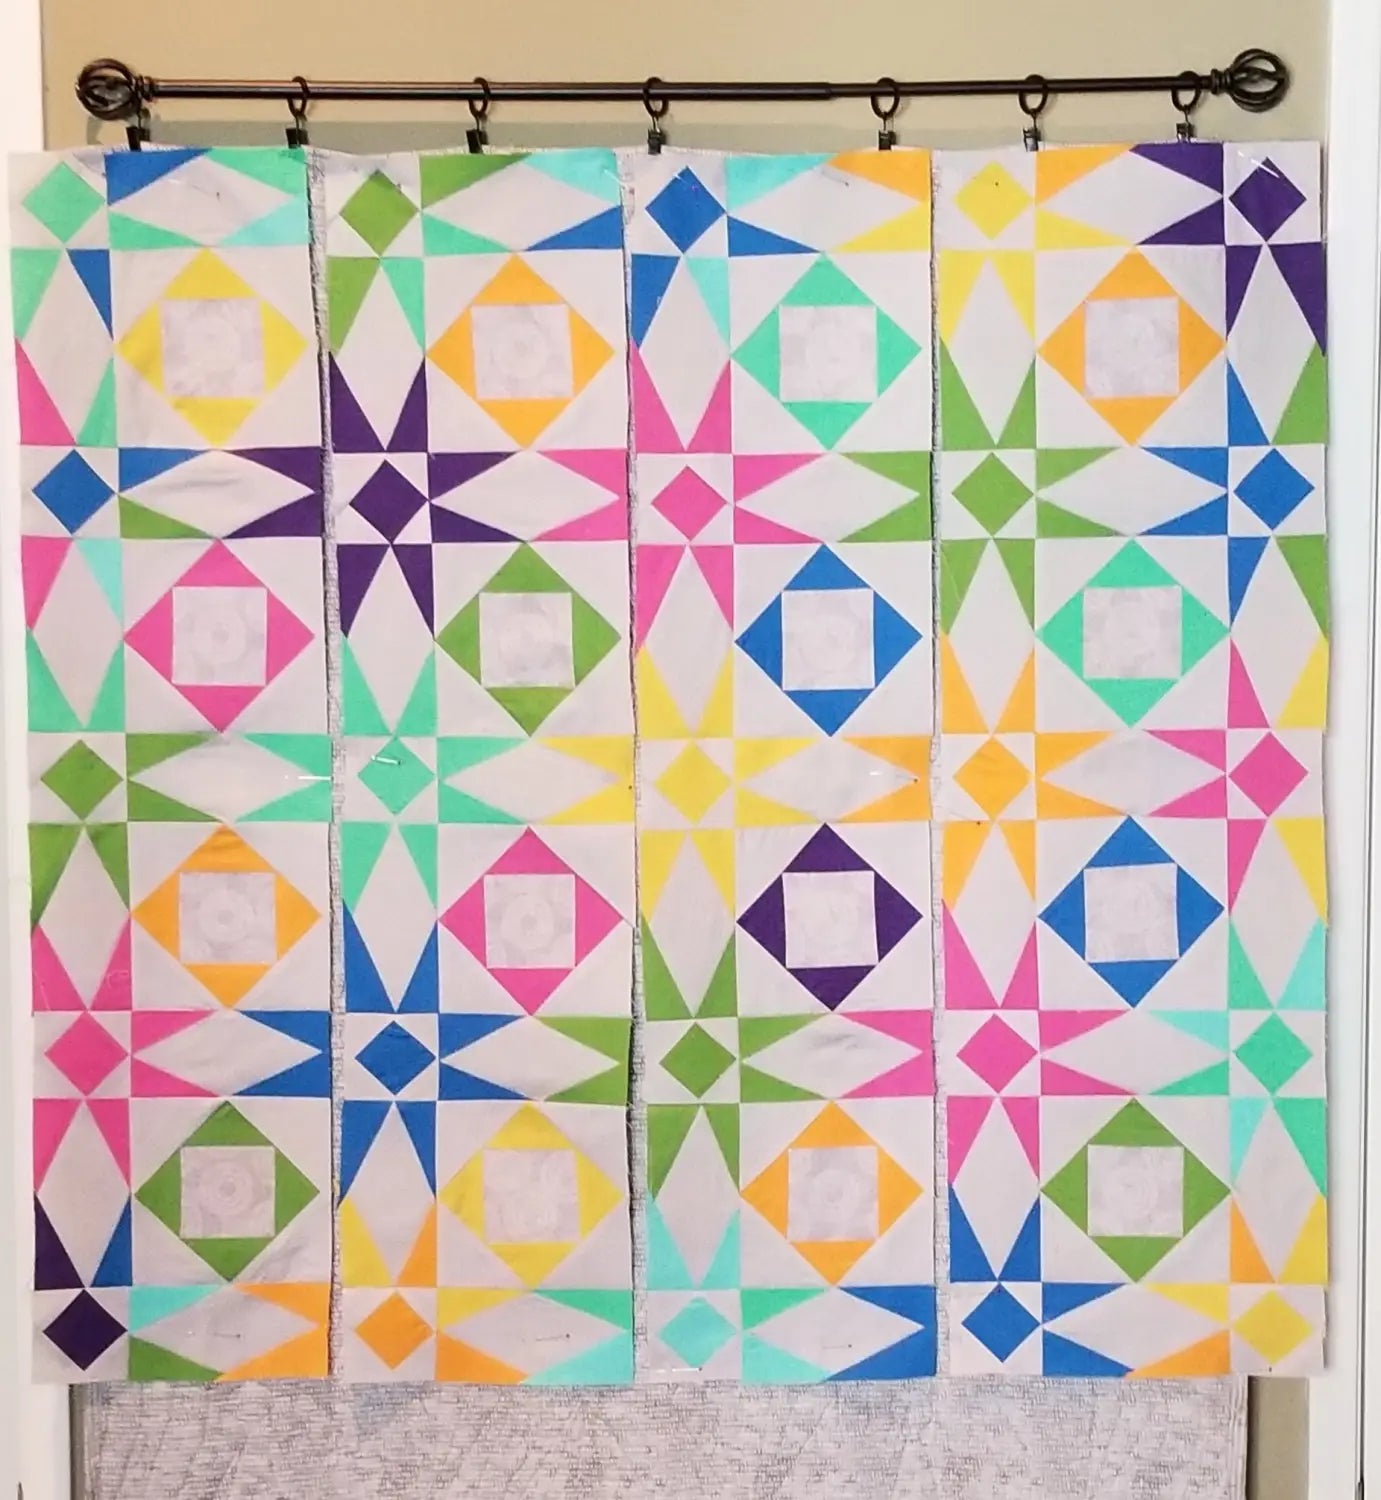
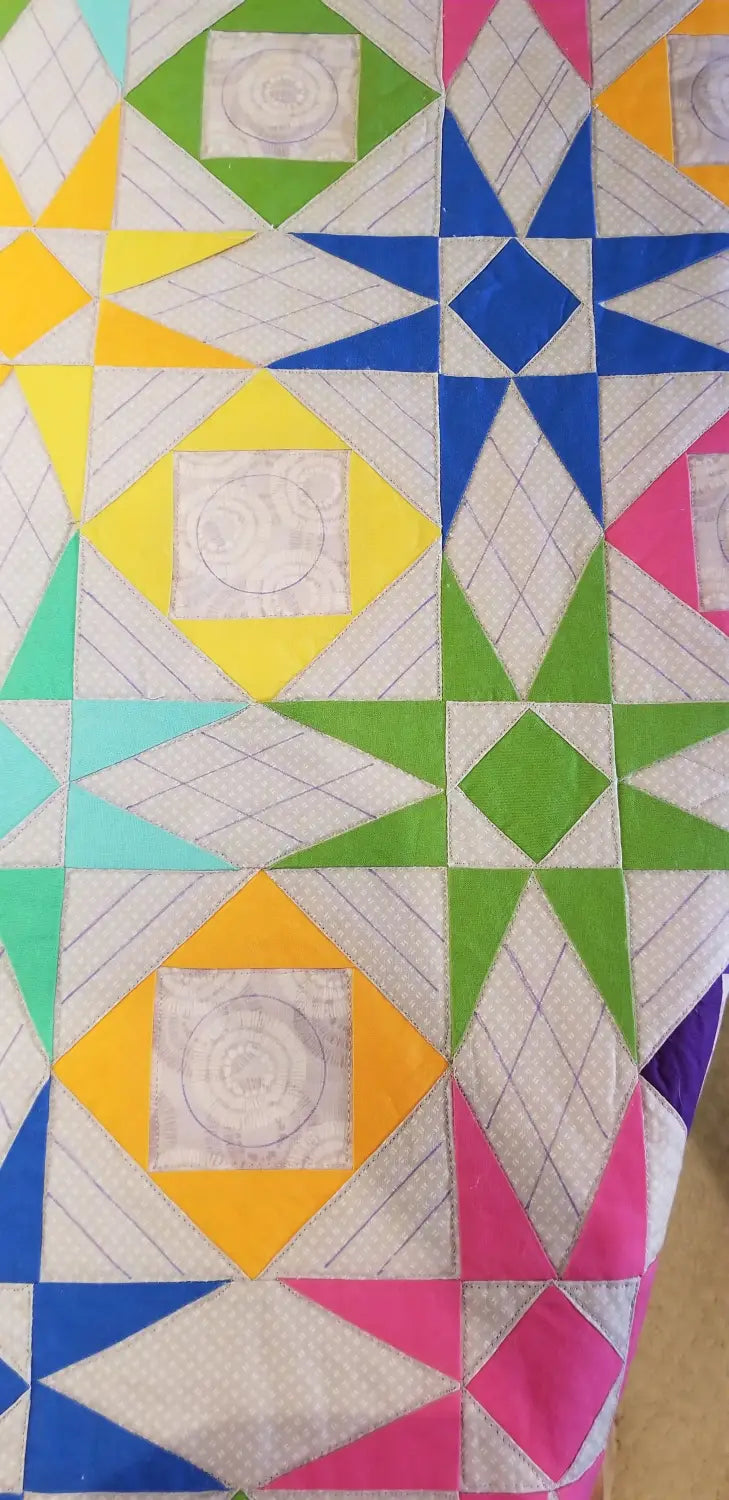
Here is my “Flimsy”, the finished quilt top.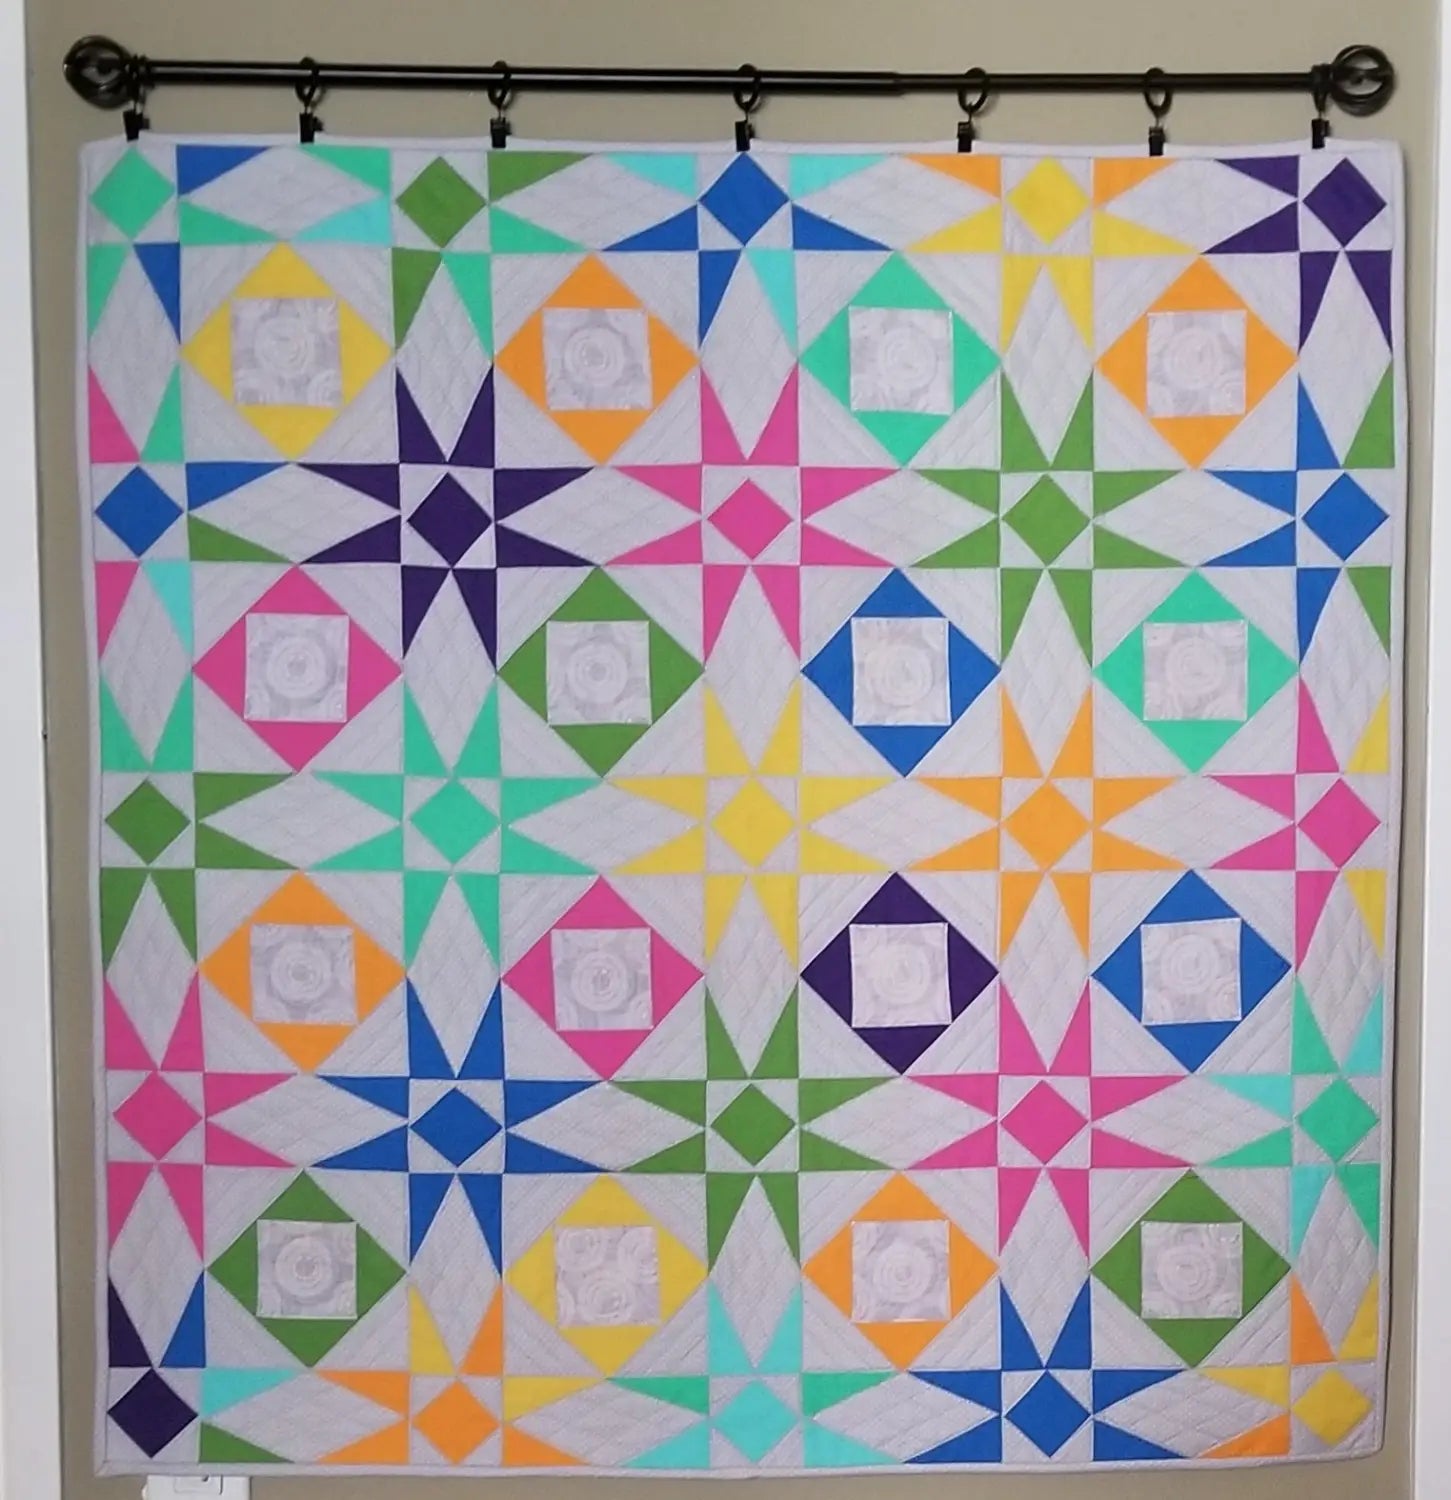
Hurray! Time to start Quilting!

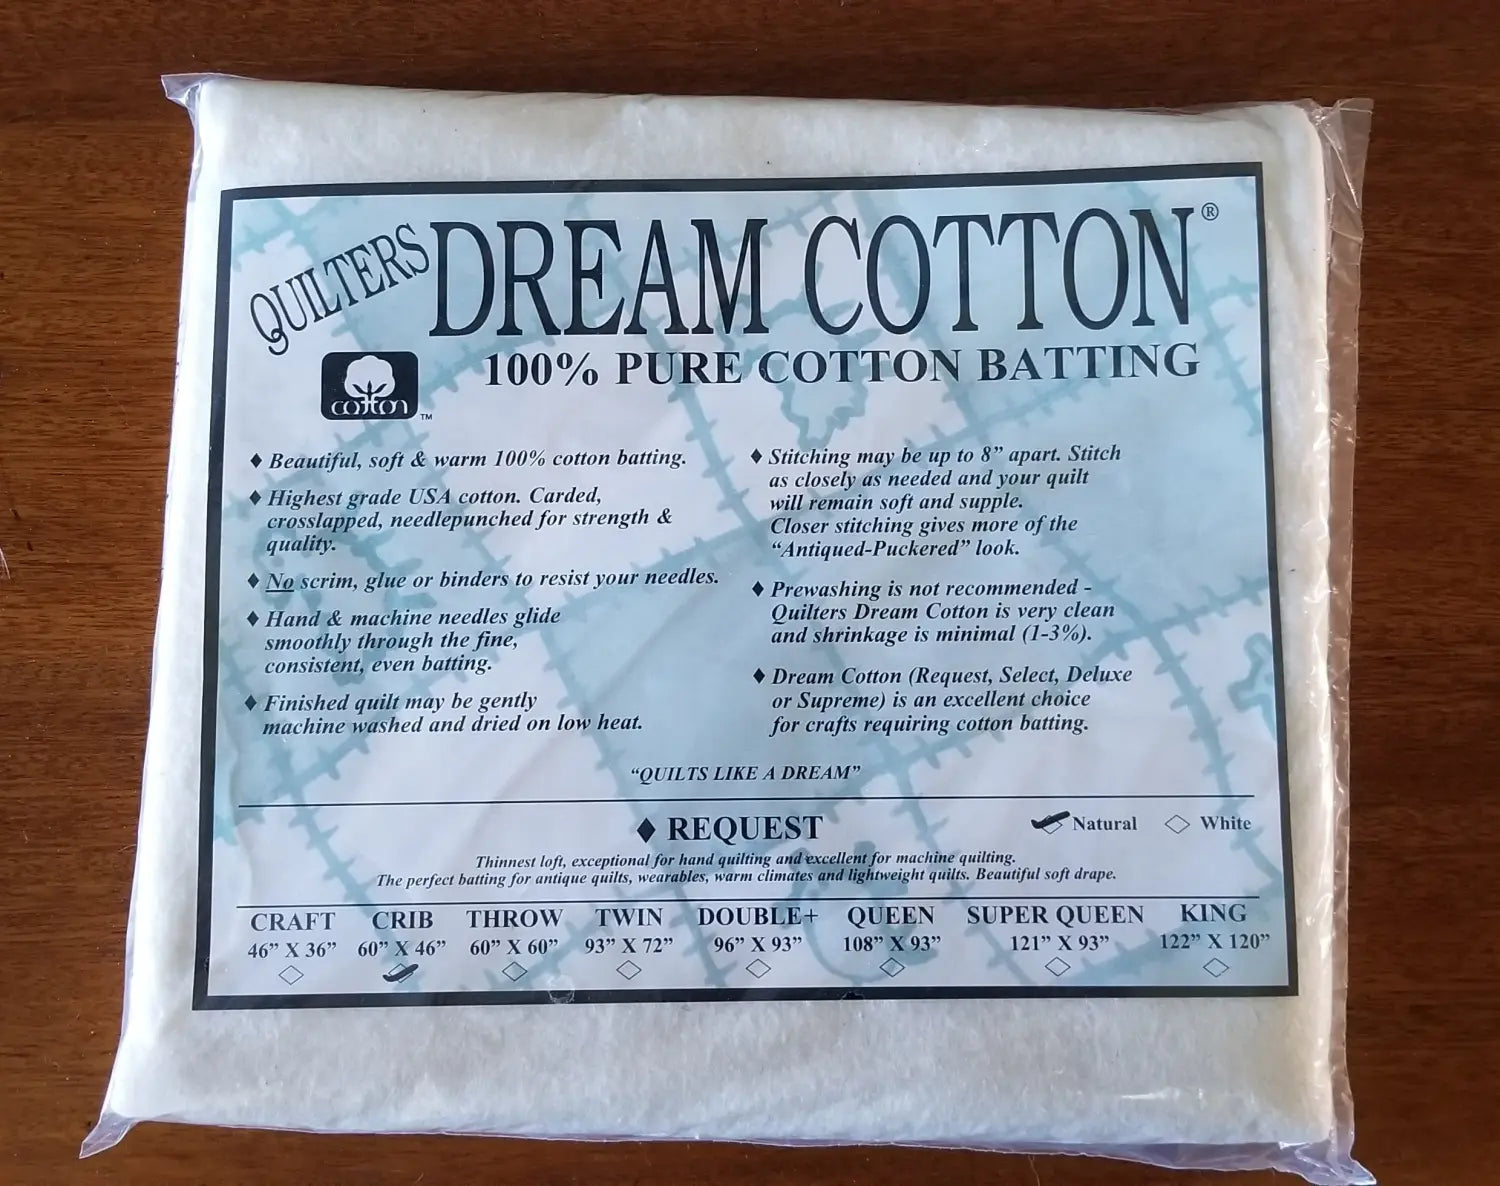
Layer the Quilt top with a light batting and a back fabric.
I will be quilting this in an easy way. Anyone can do this! I use the very lightest, thinnest batting that I can find. This is the “Request” batting by Dream Cotton. If your fabric store doesn’t carry it, you can buy it on Amazon. A light batting makes quilting easier and also, it is best for small quilts because they are light and floppy. A thick batting will make your small quilt stiff. Low loft is easy to work with.
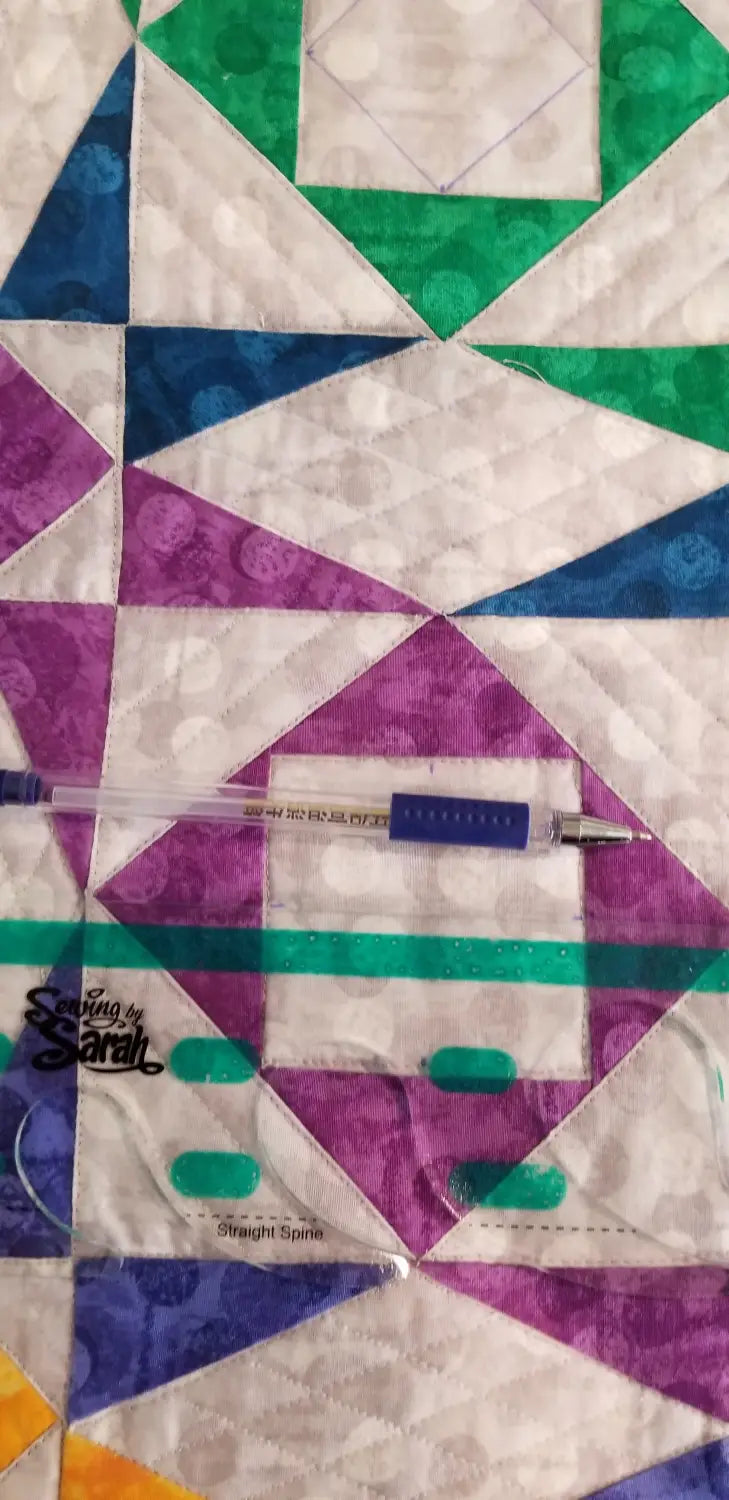
You will need a great straight edge ruler. I use one by SewingBySarah.com because it has non-slip areas on the back side. I also use their fabric pens and they are the best I have ever used because they won’t disappear until you want them to.
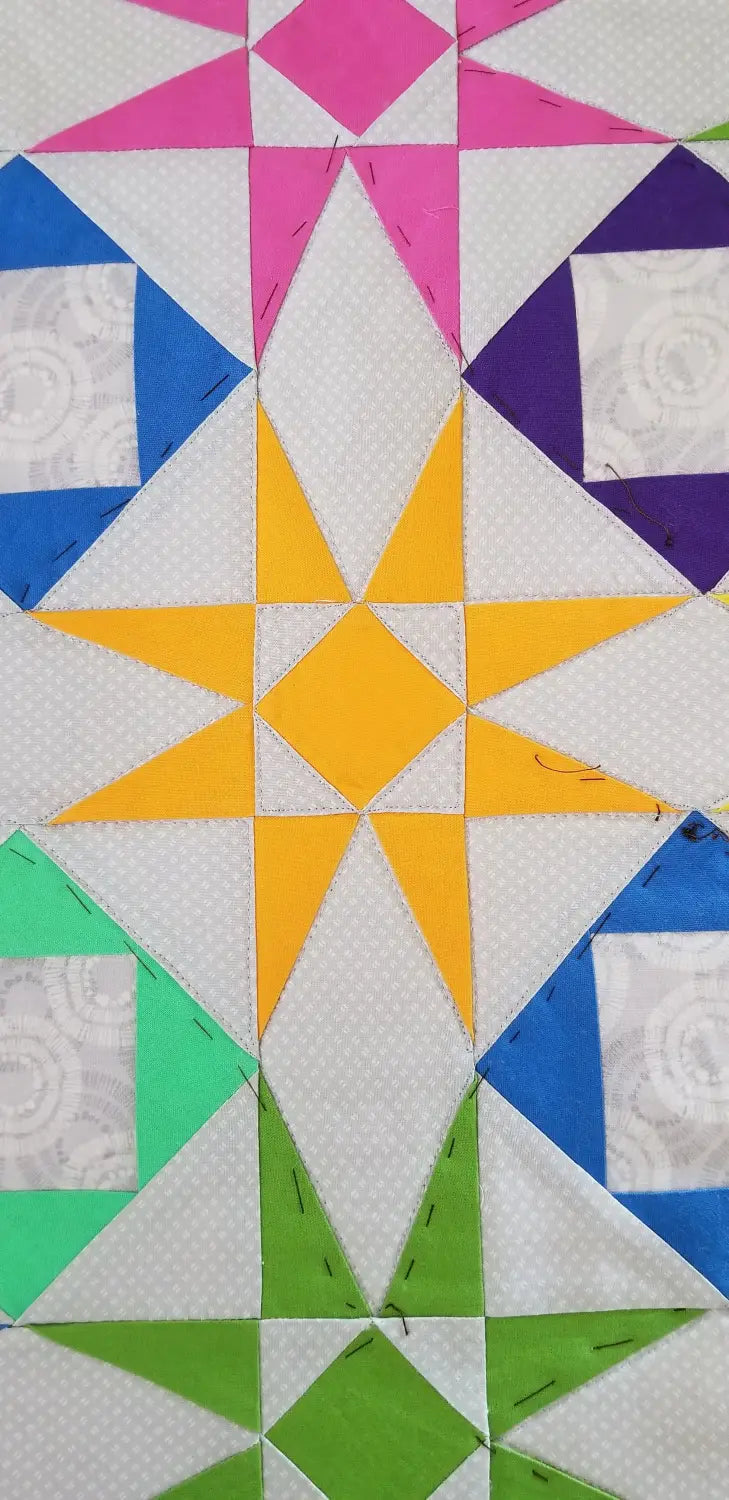
Begin by Ironing. I use spray starch and a silicone iron cover to get things really flat. Then baste around each star, beginning in the center. I like to baste on the colored areas because I will be quilting on the background.
Beginning in the center of the quilt, quilt as closely as possible around every colored piece. Quilt on the background fabric with matching thread. This will make the color designs Pop!
I am not great at straight lines. It is easier for me to stipple than to keep my lines straight. However, I wanted to quilt in a way that accentuated the wavey lines of this pattern. Using disappearing ink for fabrics, draw the lines. I quilted both colorways of the design in the same way. Just use simple straight lines in the background, following the angles of the colored pieces. I traversed the lines only on the diamond background areas, creating diamonds in the quilting.
I know there are some truly amazing quilters out there reading this quilt-along blog. Please, please post photos of your quilting! I am always excited to see what other quilters can do!
Finally, bind your quilt!
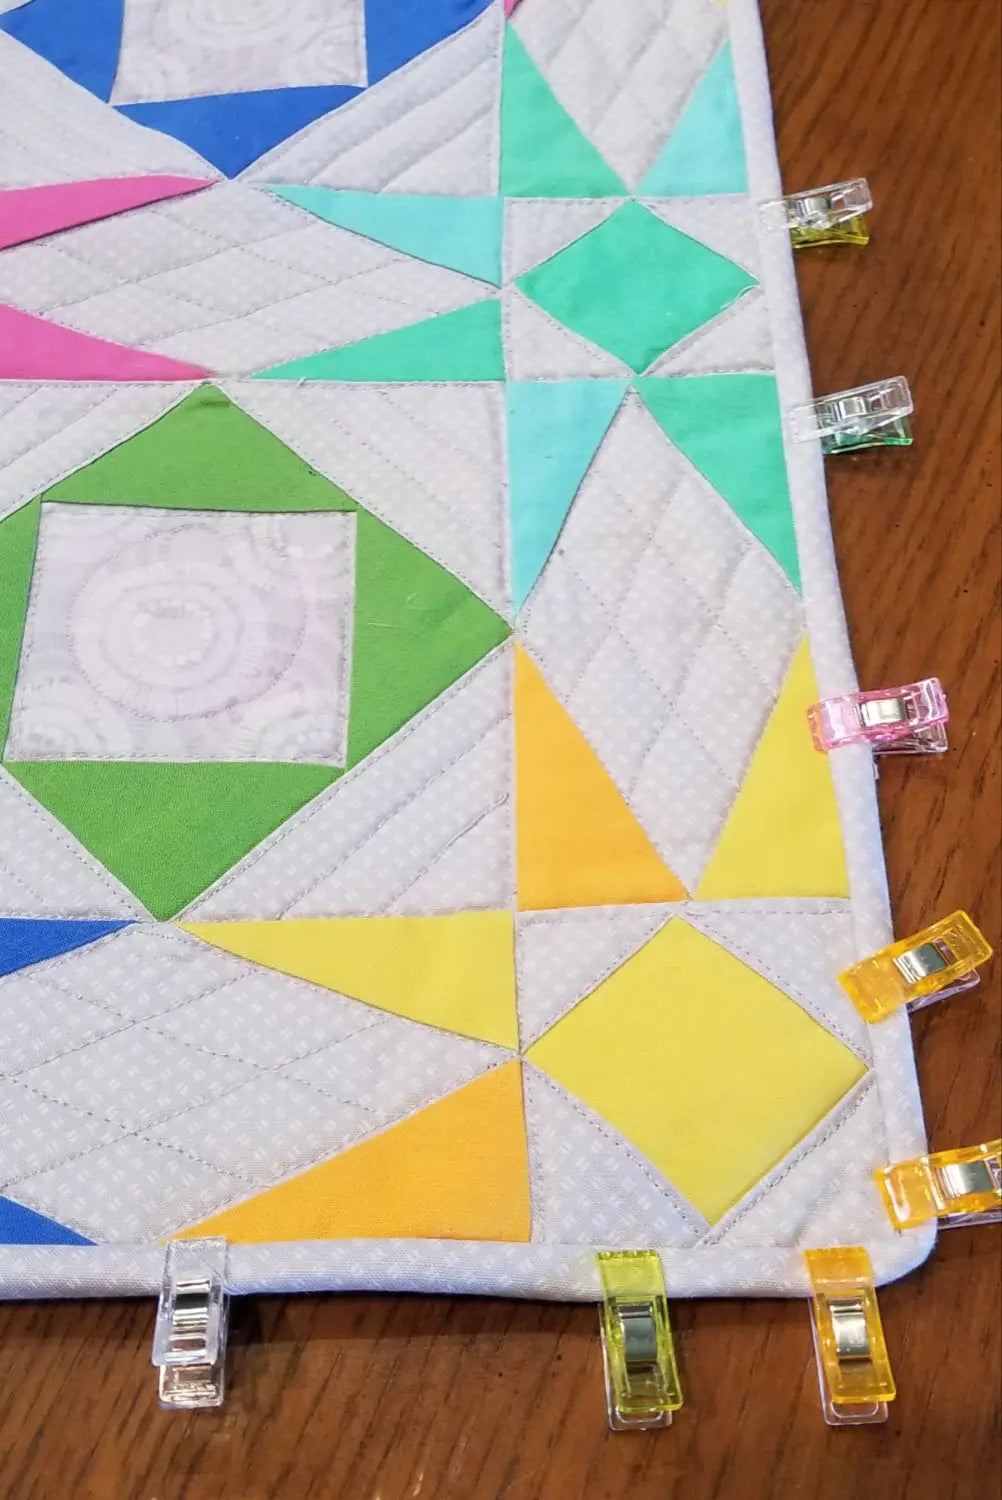
I also love their clips for binding the quilt.
Thank you for joining this Quilt-Along on Sewing By Sarah VIP members on Facebook.
I hope that you have had as much fun making your quilt as I did designing them.


Leave a comment (all fields required)