Puff quilts are certainly making a comeback. They are great as quilts (they feel like a weighted blanket), baby mats, and dog beds! I remember my mother making a puff quilt in the 70's and it was pretty awesome (and time consuming). This quilt tutorial one is very modern as it up-cycles cotton face masks to make a quick and easy puff quilt.
I have a huge stash of fabric, but it's always a fun switch to take something and up-cycle it. I saw these Old Navy face masks on sale and thought- wow triple layer 100% cotton for that price!! This whole quilt cost me just $34 in materials and it's make entirely of up-cycled face masks! Puff quilts are fun quilts that take pockets you sew together and pleat and then stuff. This shortcuts most of the process of making a puff quilt as the puffs are already made for you by using a double layer mask!
The best part- no cutting (just some trimming) and the puff pockets are already made, you just have to stuff your puffs and stitch! Masks should have at least two layers of cotton for this to work (these had three). In addition, as in all up-cycle projects not all will be measured correctly using previously sewn materials. This particular quilt type is fairly forgiving so it was easy to adjust as needed, but if you use another type of masks or masks from multiple sources, you may have to improvise.
Here's how I did it:
Materials:
- Face masks- I made a quick baby quilt, but you can add more masks to make this as large as you'd like.
- Poly fil- I bought a big bag, but you can use a small bag of Poly-Fil or unstuff something you already have to recycle.
- Backing fabric- you could use a sheet and continue the upcycle trend or piece together a backing. Check out our cheat sheet for this here:
- Clever Clips- with so much weight and bulk, it's easier to use these than pins.
- Purple Thing- this little tool can help get those bulky seams under the presser foot more easily.
- Glider Foot. I used this foot from our Ultimate Quilting Presser Foot Set as it's made to go over thick layers of fabrics. Since these masks had a pretty substantial edging this made it easier to sew the masks together, but if you don't have this substantial edge, it may not be necessary. Experiment, but a 1/4" foot should do the job just fine or swap our a walking foot and give that a try.
- Extra needles- I broke one while stitching, lots of layers of fabric in these pre-made masks so just have an extra or two on hand.
Getting started:
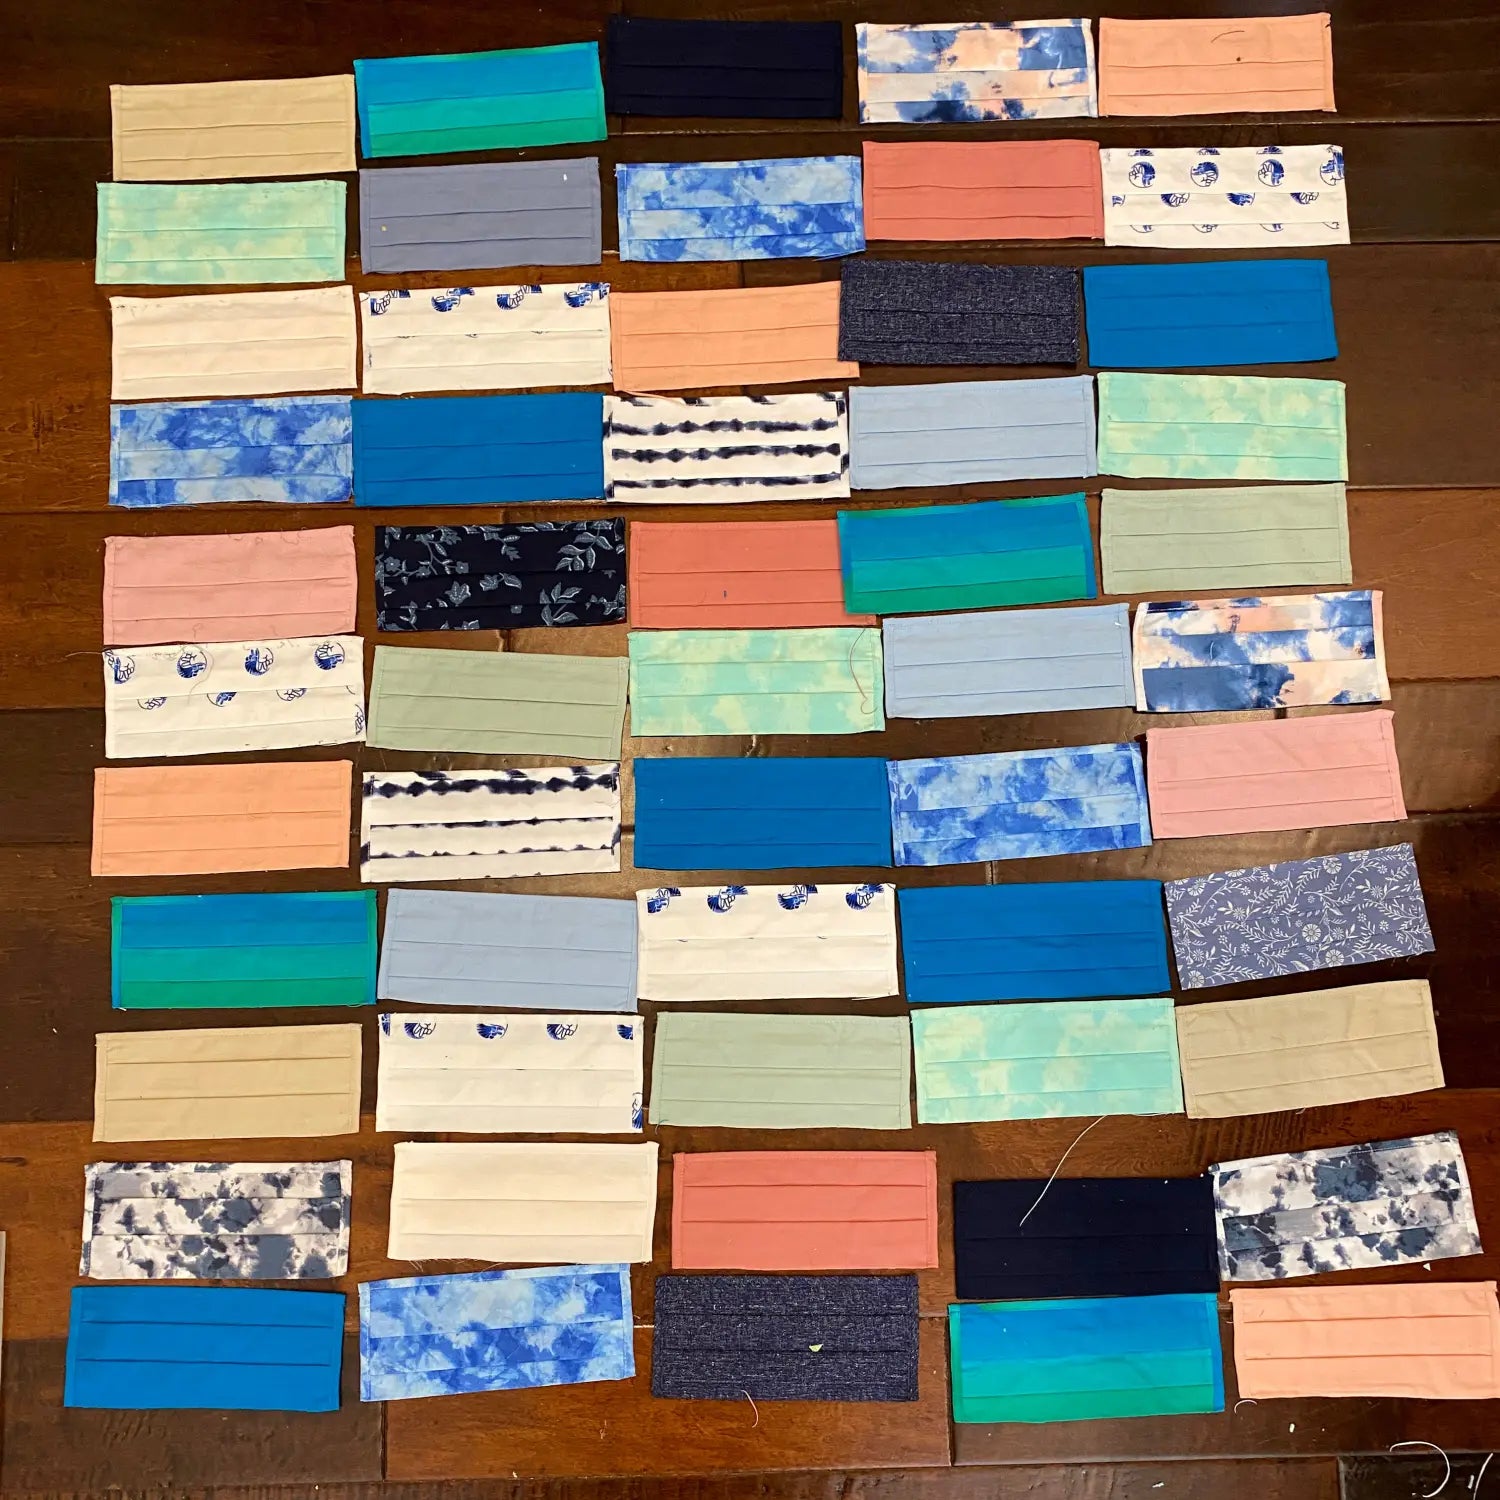
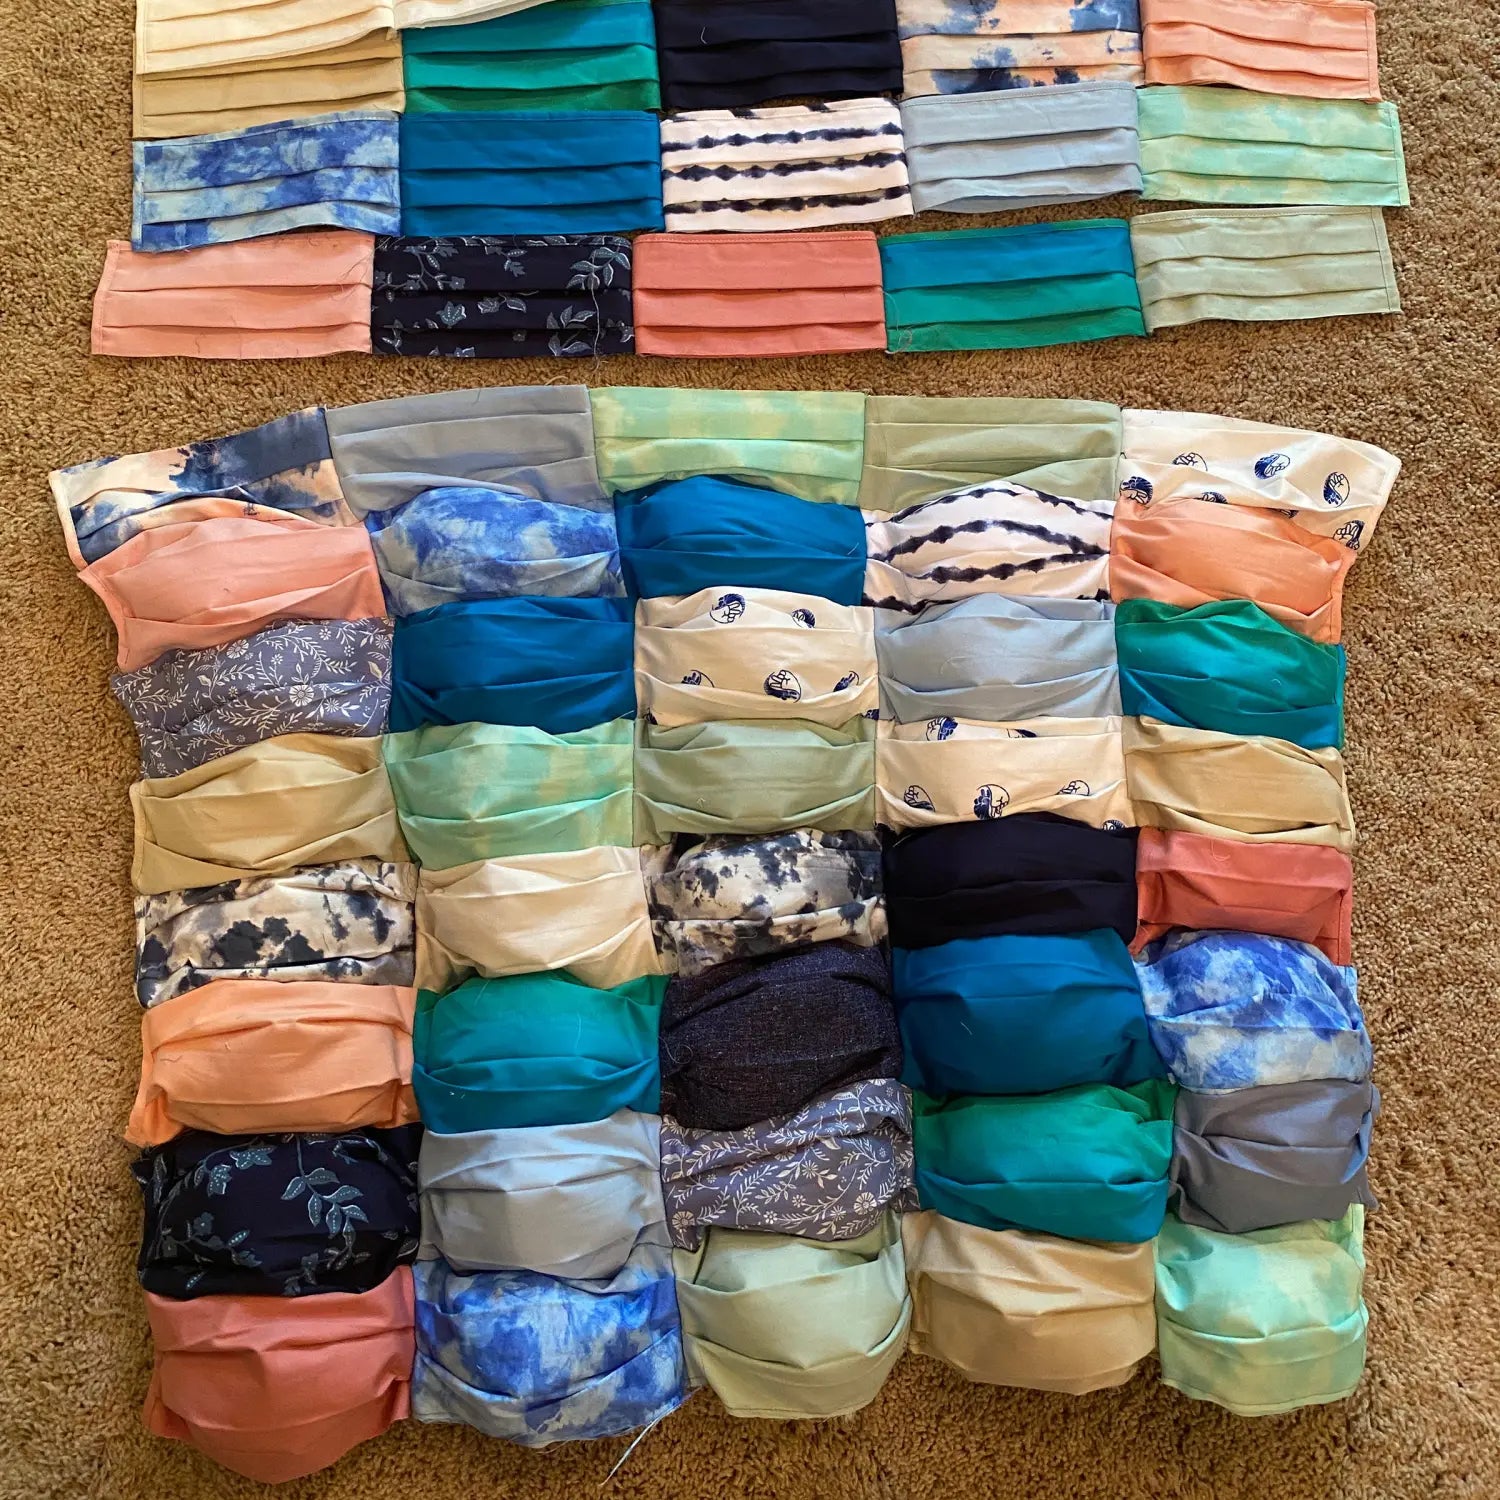
1. Determine the size of your quilt. I used masks that measured approximately 7" x 3" and bought 65 masks. The masks come in sets of 10 or 5 in a variety pack of colors/prints.
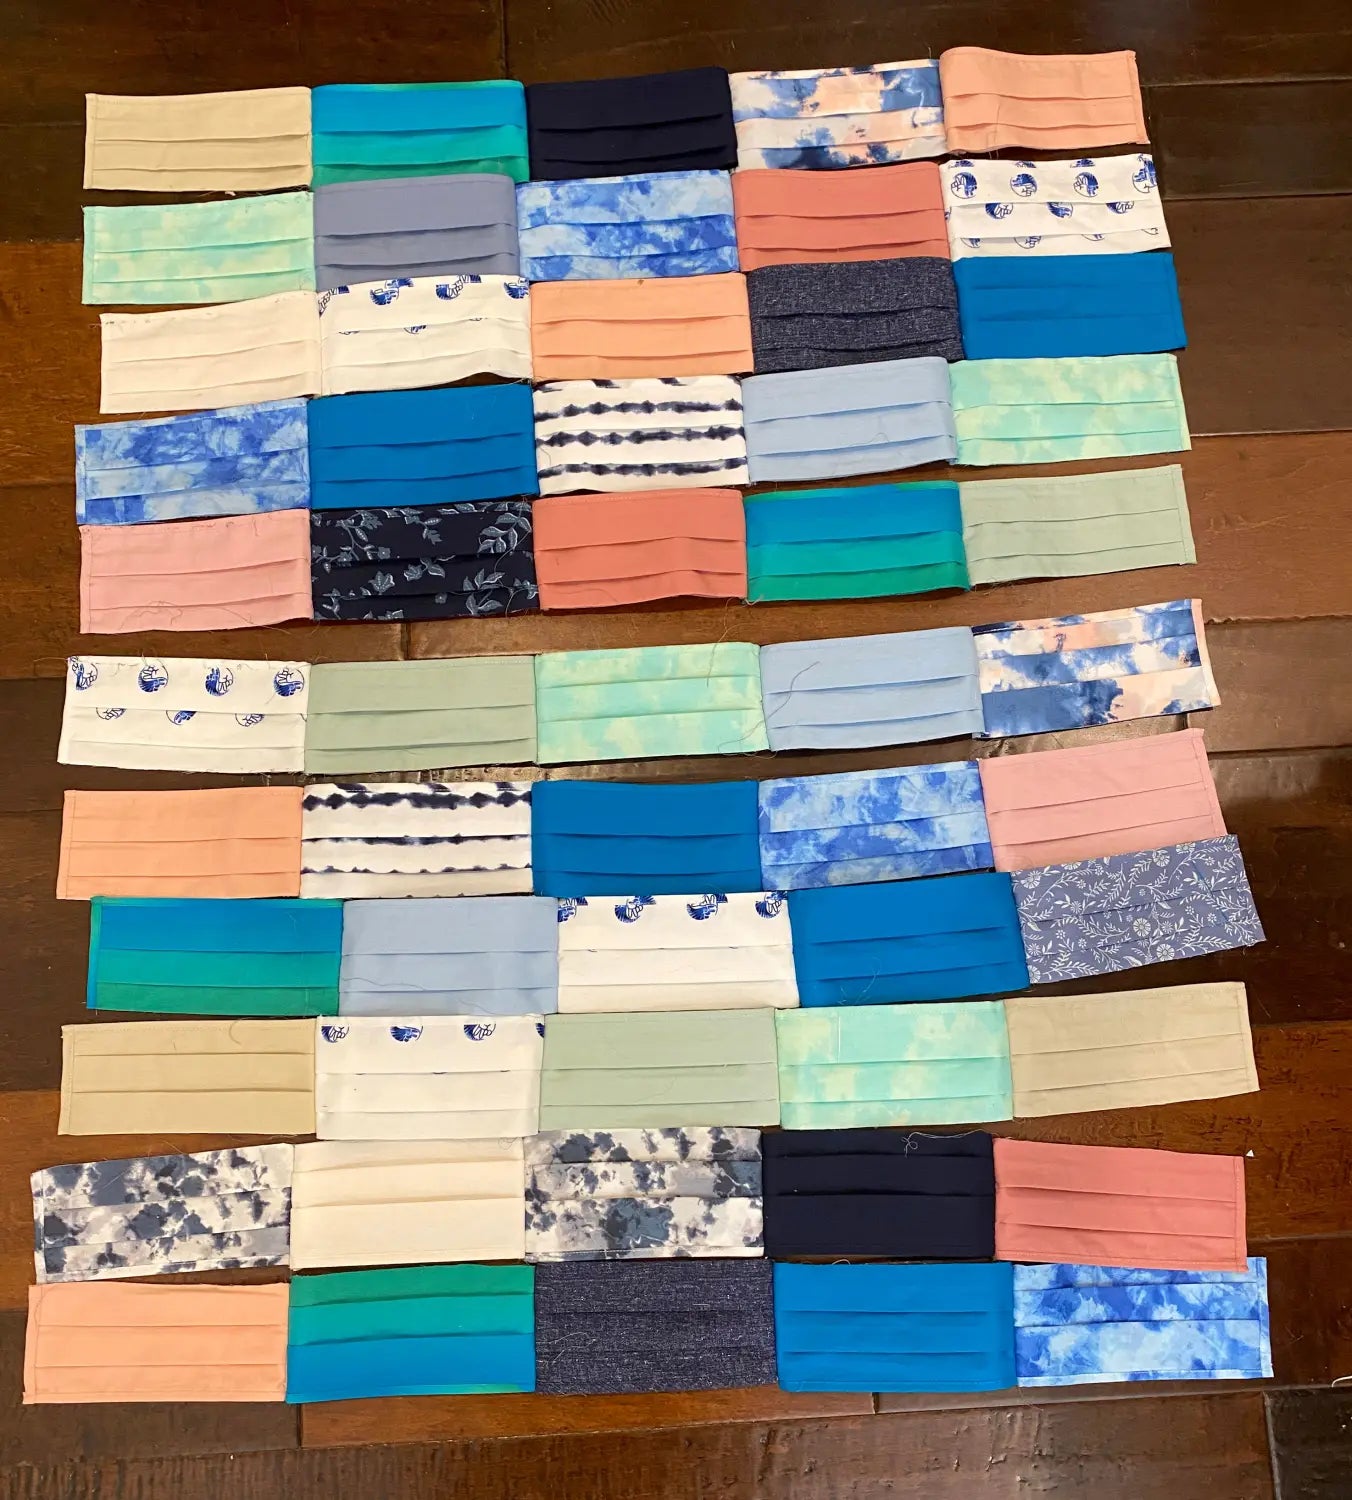
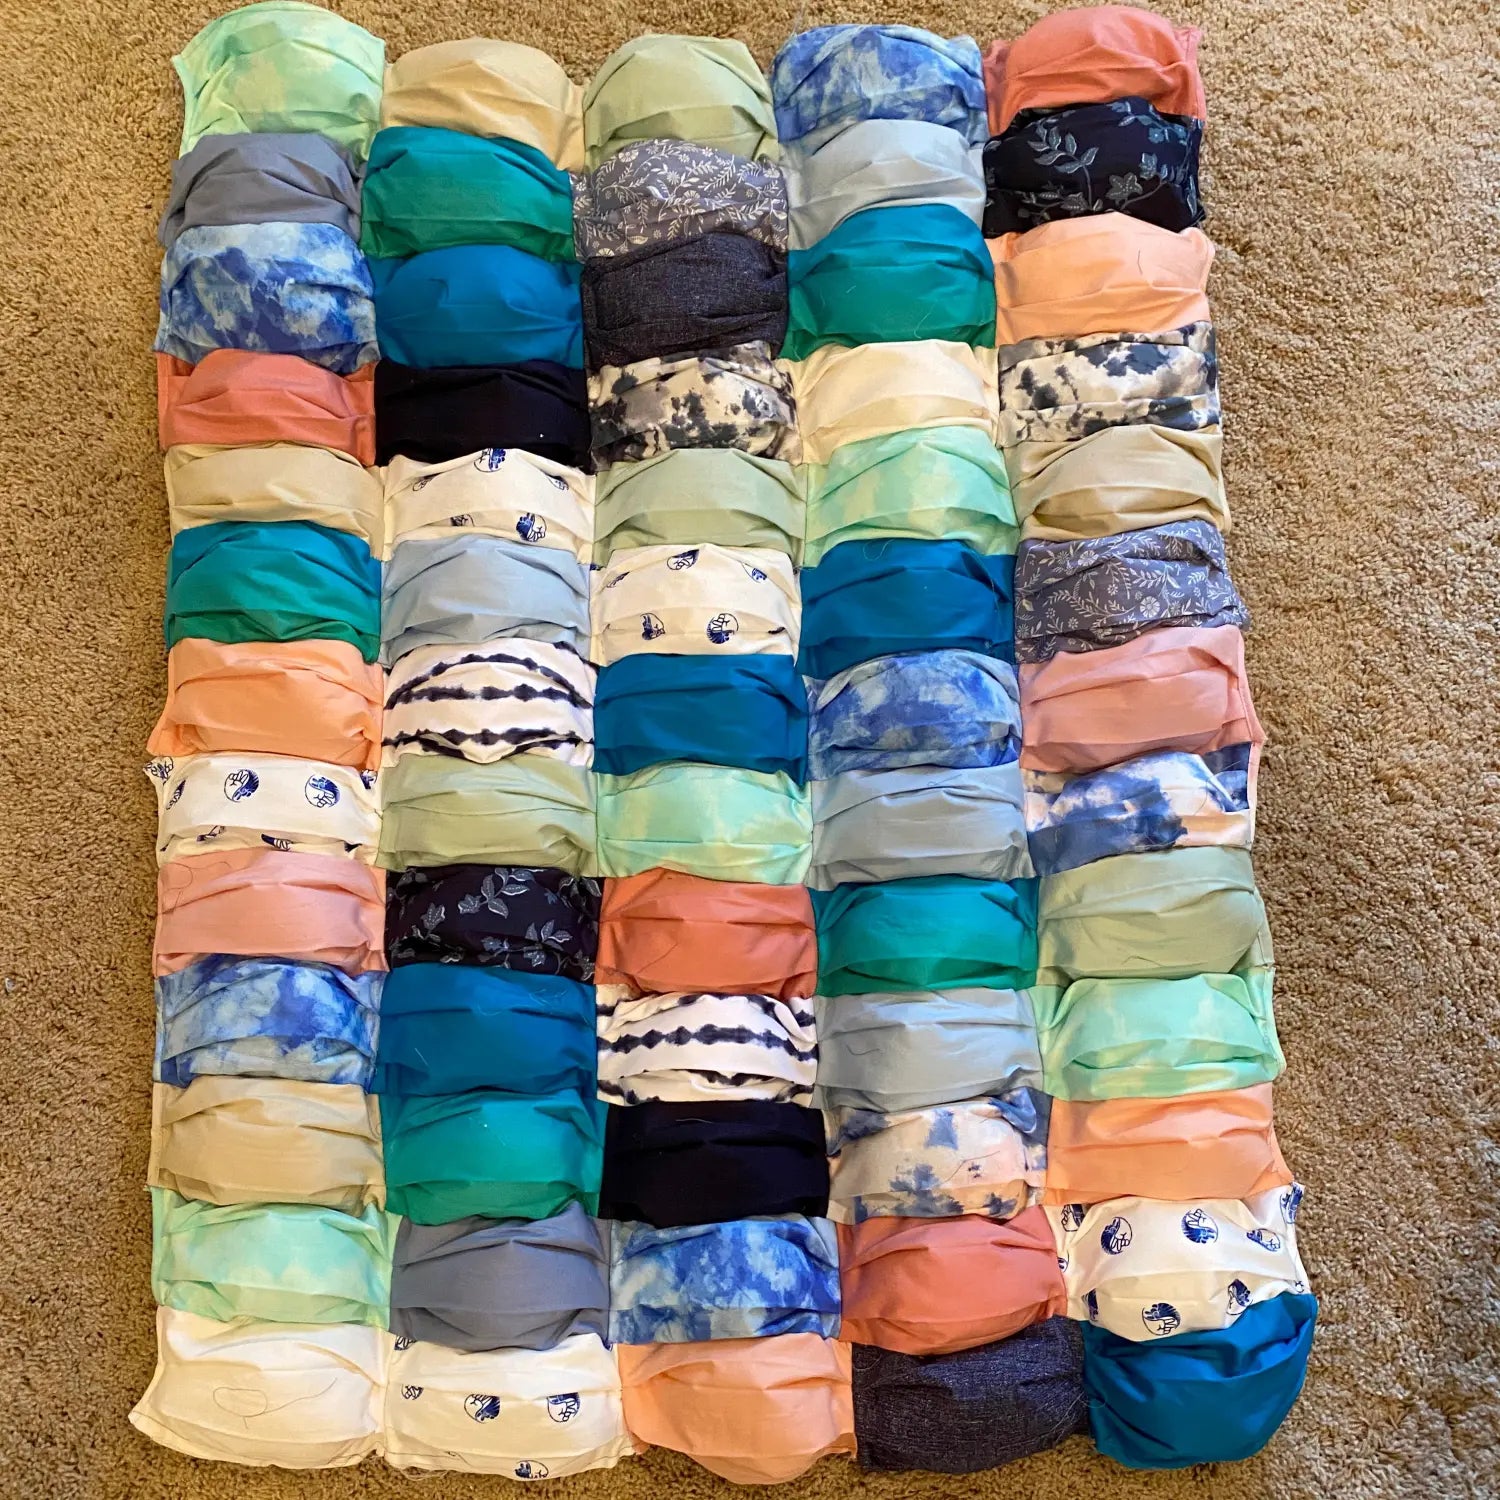
2. Lay out your quilt. I determined 13 down by 5 across would give me a nice size of 40" x 35" approximately. A good baby blanket or dog bed size! I played around with lots of arrangements of color and print before getting started
Trimming
1. First, trim off all of the mask elastic. You can use this later, but for now trim it off.

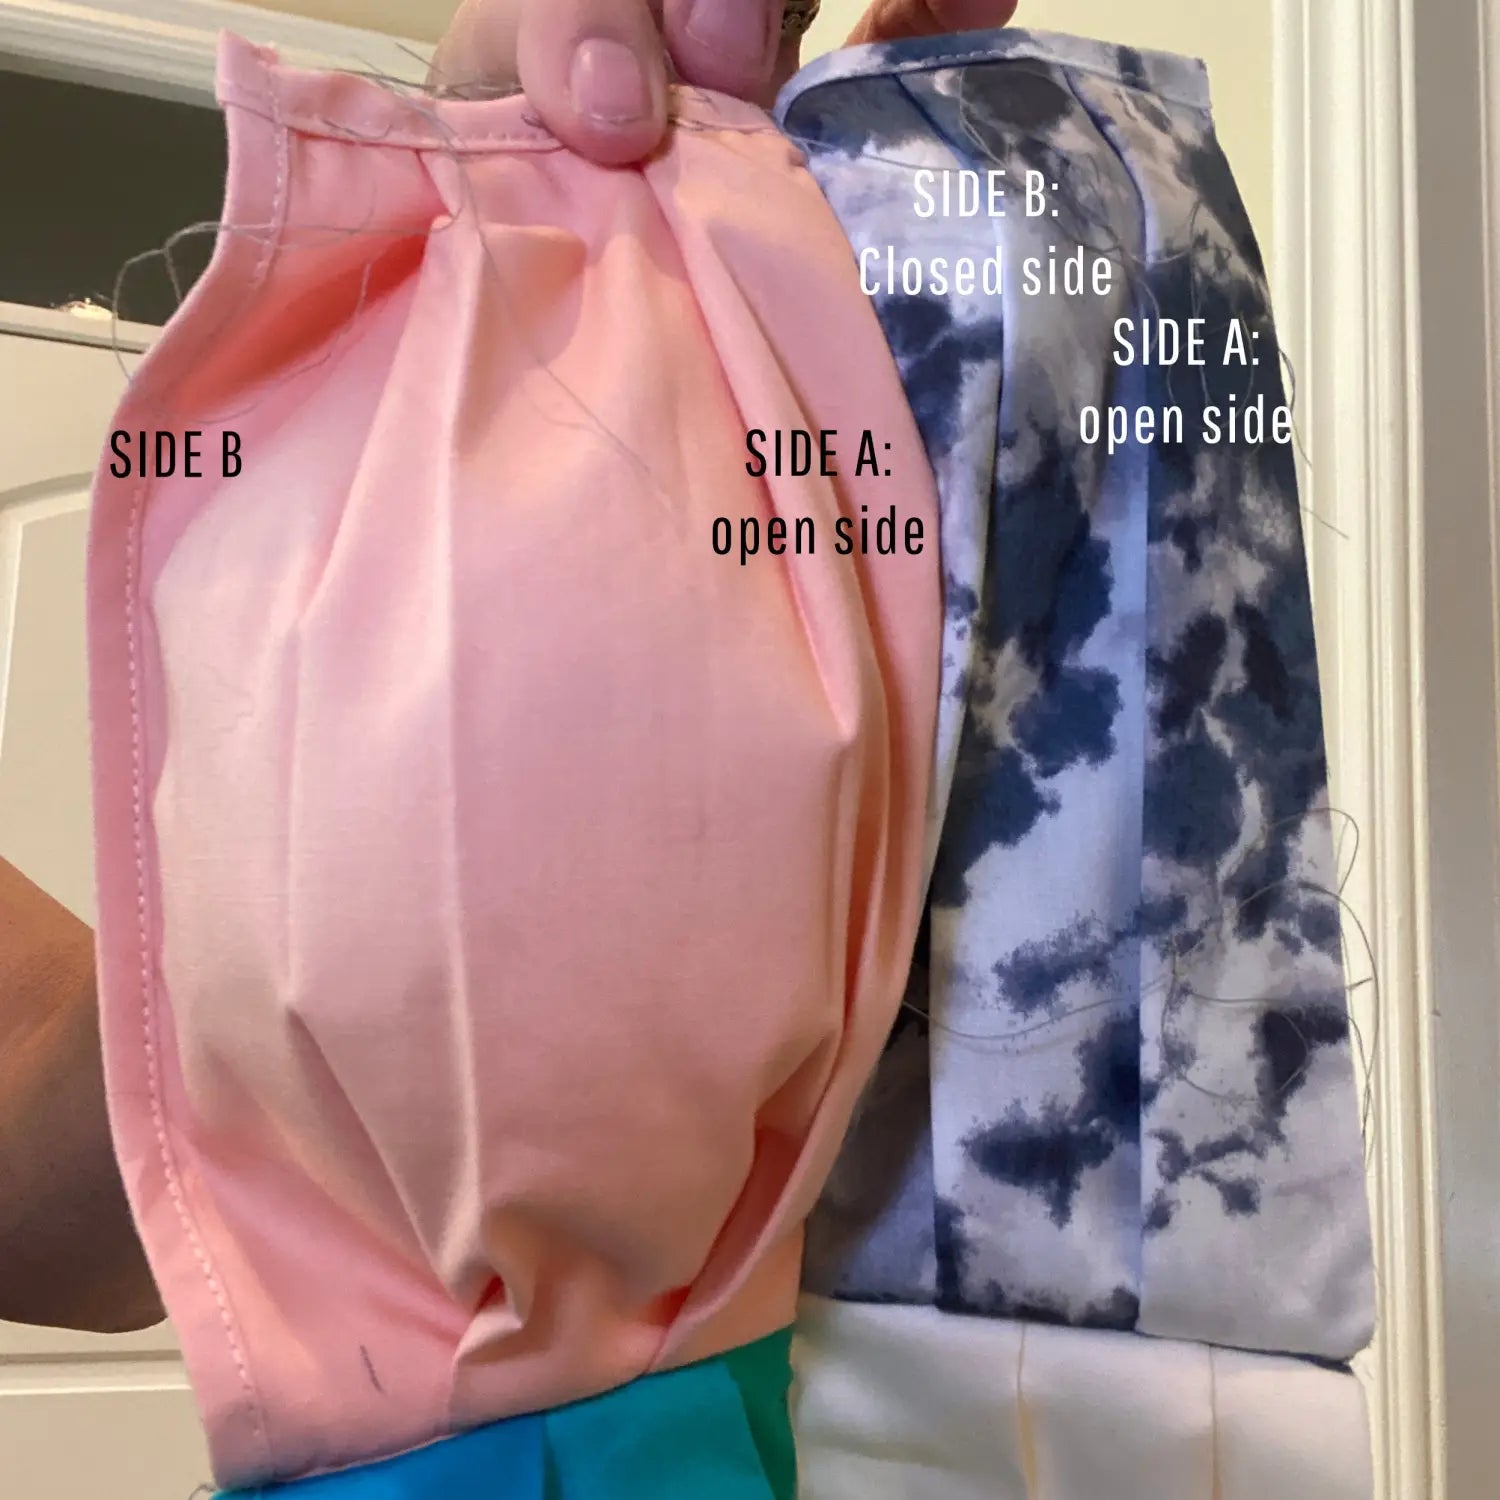
2. The second step is to trim the masks, this opens up the masks in order to stuff. These particular masks had a 1/4" binding around the finished edge, this creates some additional bulk under the sewing machine. I trimmed the long sides of these masks, since the "short" side had the pleating. If you trim this side you will lose the pleating. The pleating helps us keep the puffs nice and puffy, so it's part of the advantage of using these masks!
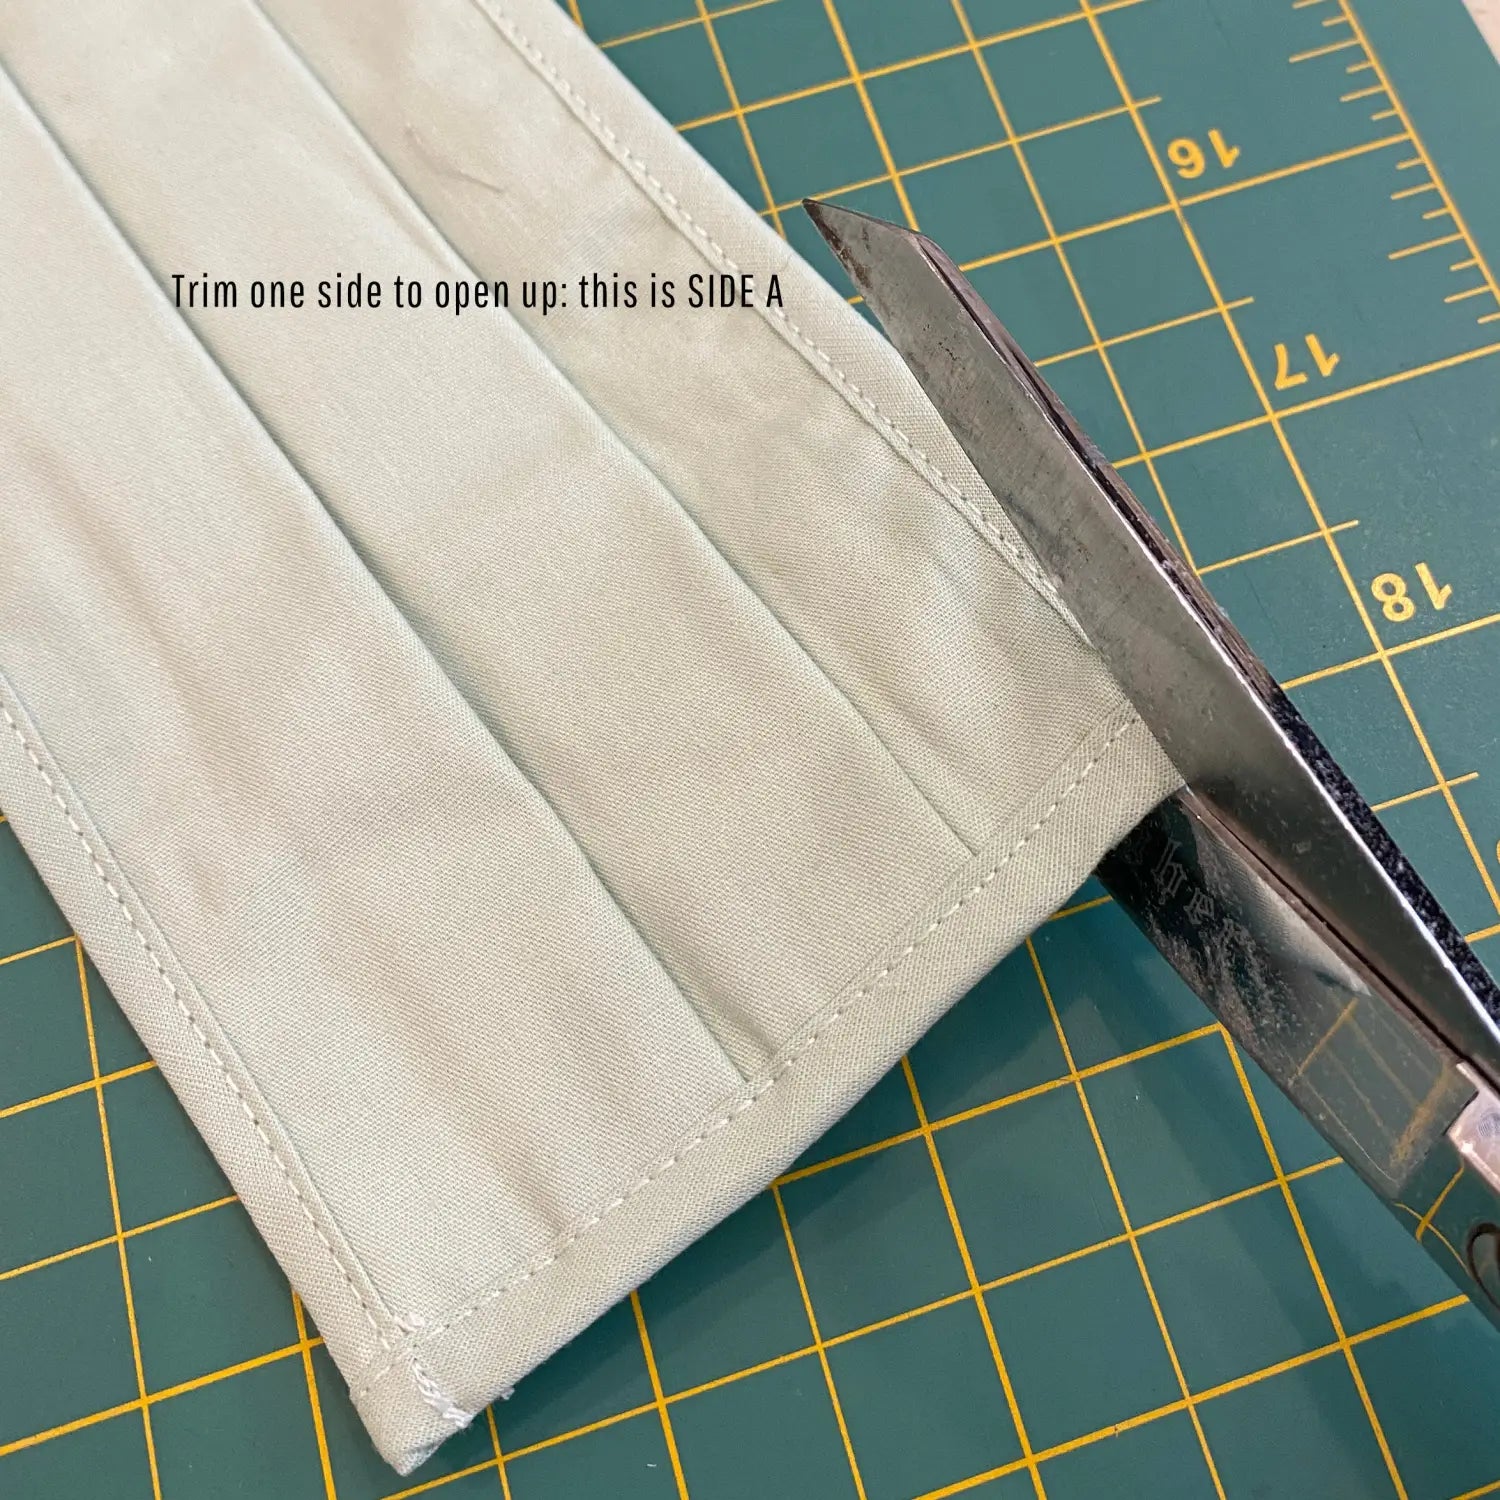
Side A. One "long" side of the masks should be trimmed and opened up completely. This is where you will add your stuffing to make it puff.
Side B. I trimmed the 1/4" away a bit to reduce bulk but LEFT the STITCHING so that one side of the masks is OPEN (SIDE A) and the other side is CLOSED (SIDE B), but this helped me reduce bulk while restitching. This step is not required.
Piecing
1. I pieced the short side of the masks together by sewing right sides together on the short side of the mask to make my rows. This allows me to keep the long side open for stuffing in the next step. I use the Purple thing to help guide the fabric and Clever Clips instead of pins to hold everything together.

2. Piece all rows together first before moving onto stuffing.
Stuffing and Stitching
1. The next step is the fun part- the stuffing. Here is what stuffing means. Using the layers of the masks and the side we opened up, take Poly-Fil and "stuff" your mask to make the puff. The beauty of the masks is the puff is already made for you, with multiple layers and pleats, it takes a ton of work out of making the puffs. No cutting, no stitching and an economical way to make a quilt!

2. Take two rows that you'd like to join together and start by stuffing the first row, first puff (side A, the open side gets stuffed) then closing up the seam by stitching it to the next row right sides together (SIDE B, the CLOSED side of the row)
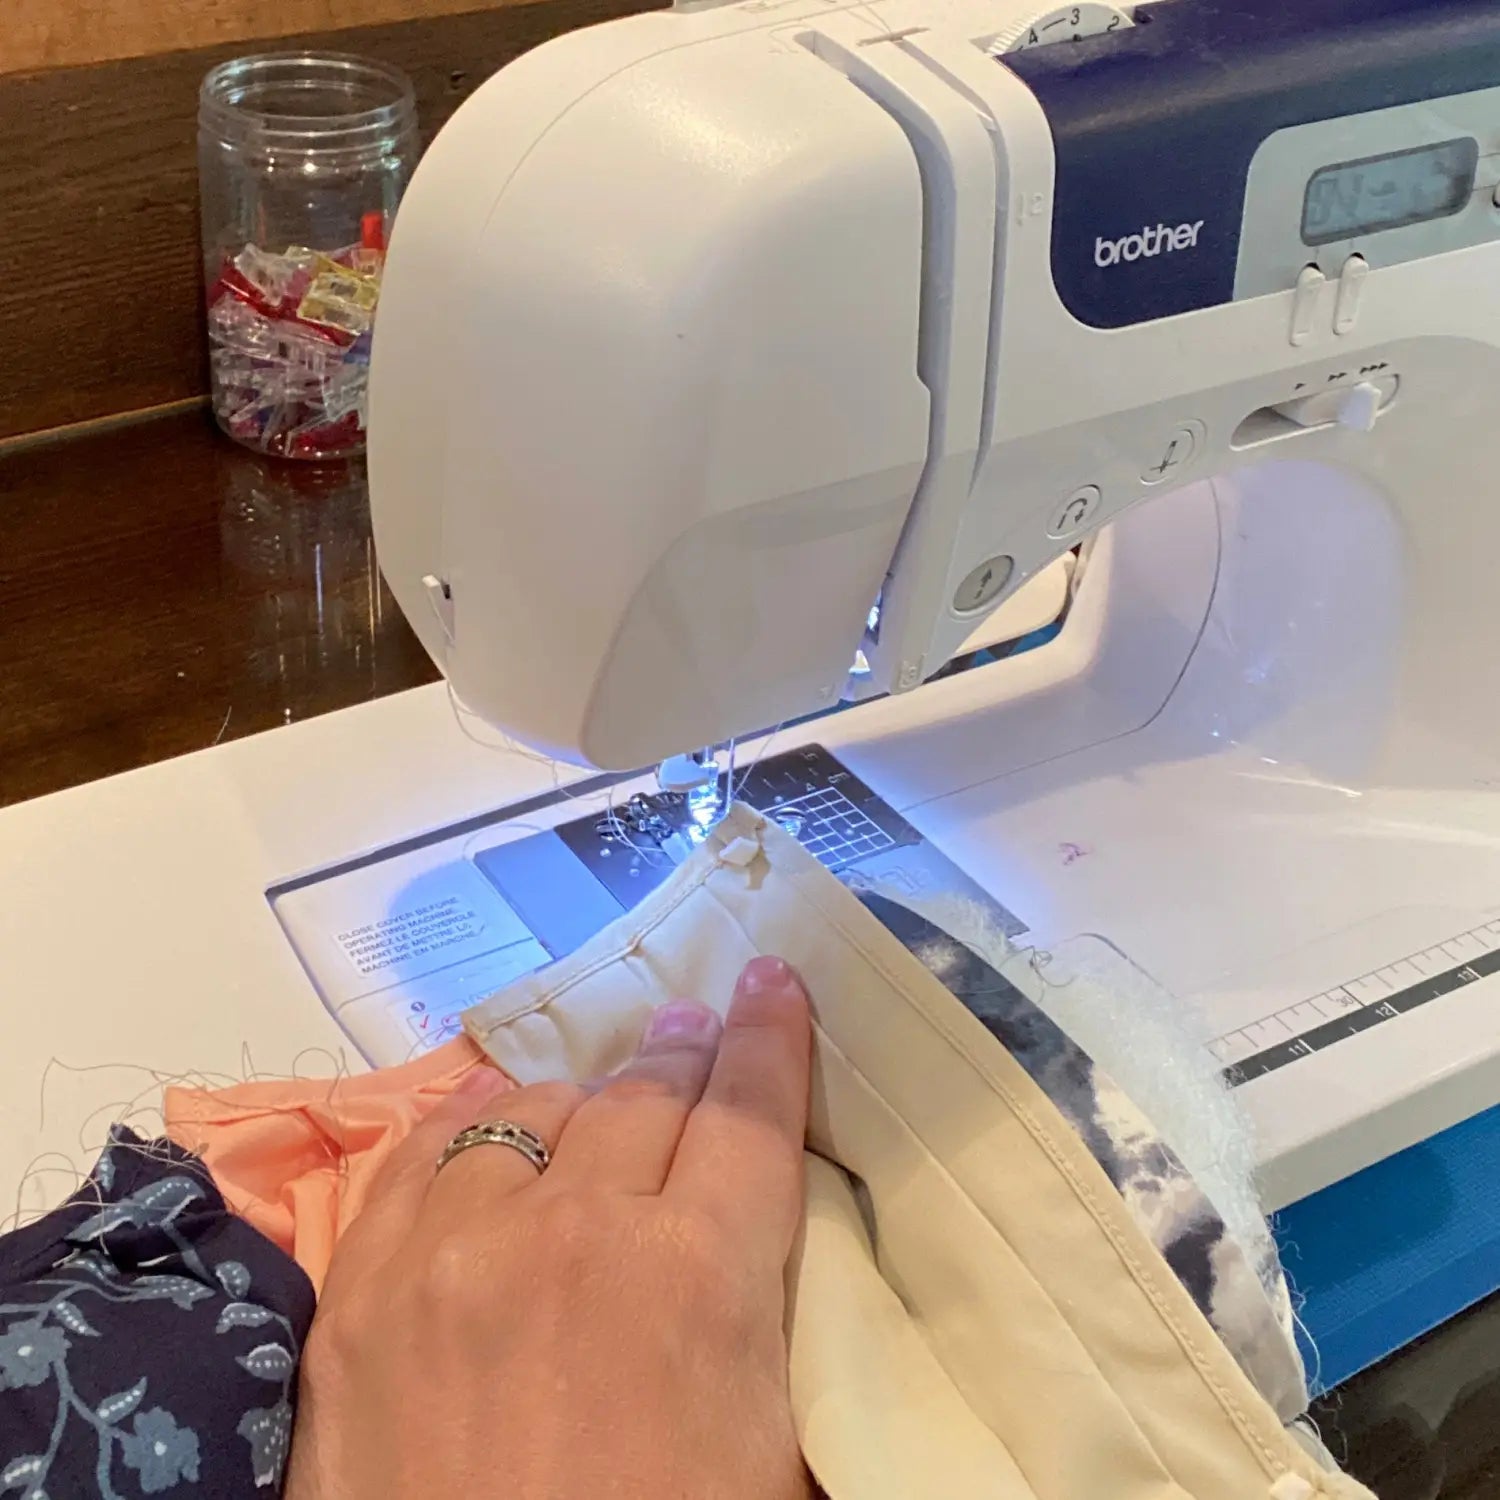
You are always stitching Side A (open side) of the one that is getting stuffed, to Side B (closed side) of the next row. And so on..
Continue stuffing each puff as you stitch to the next row.
Enjoy your cute puff quilt!
Finishing
1. The back of the quilt will have seams showing, but if you don't mind that you can simply leave it as is. The edges are finished as the masks already had a binding on them.
2. For a more finished look, create a backing fabric and bind your quilt. You can find instructions on binding here:
https://sewingbysarah.com/blogs/tutorials/quilting-101-how-to-bind-your-quilt-by-machine
3. Since this is puffy, you don't need to quilt it, but you can "tie" the quilt or stitch together the backing and front either by hand or by machine.

Stay in touch and Show us what you've made #puffquilt #upcyclepuffquilt
Instagram: @sewingbysarahstore
Join our Facebook Group with 8000 other sewists and quilters! https://www.facebook.com/groups/sbsvip


Leave a comment (all fields required)