
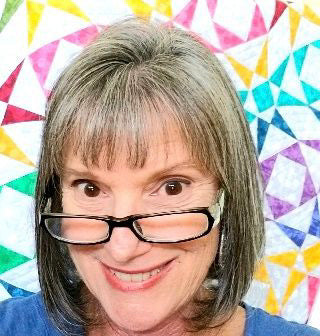
Hello Quilters! Sew along with me as I design and create this fun, “Storm at Sea” inspired quilt. I promise you that it is much easier than it looks. Best of all, you can use a Jelly-Roll of fabrics.
I hope that we all have fun and learn from each other. I have learned so much from other quilters! Any tips, comments or even jokes are welcome. I’d love to hear from you.
As a reminder, here is the full schedule:
January 5th- Color and Fabric Selection (click here)
January 19th- Cutting your blocks
February 2nd- Assembling your blocks
February 16th- Finishing
We are giving you two weeks between to be able to make progress on each of the steps.
For now, go ahead and download your pattern (which you should have received in email). Print it out and start thinking about your fabric and color choices.
We will be posting everything and interacting on the Sewing By Sarah Facebook Group. If you haven't already joined, please click below to join our group of over 8000 sewers and quilters. It's a fun group and a great way to stay motivated!! You will also be able to chat with us and ask questions.
If you are on Instagram, we will be using the Hashtag #StormatSeaQuiltAlong. If you use this hashtag we will be able to see your progress.
If you are reading this blog, you have probably already downloaded the pattern , but if not you can purchase it here: https://sewingbysarah.com/products/making-waves-pdf-pattern-by-sharon-joy-picciolo.
This “Quilt-Along” is just to take each step with you and share any tips with you on how to save time or do something an easier way.
FABRICS
So, let me begin by talking about fabrics. A “Jelly-Roll” is a collection of fabrics designed to be used together.
They are 2-1/2” wide fabrics that are at least 42” long. These strips come in a huge variety of colors and patterns. You will need 10 colors and 2 strips of each color. You will also need 2 yards of a background color, hopefully, one from the collection in your Jelly-Roll. The background can be light, like mine, or dark. Just be sure that there is a sharp contrast to the other fabrics.
Do you have to use a “Jelly-Roll”? No! You can use any fabrics. Fat-Quarters also will work great and you might have plenty of scraps in your closet that will work. A quarter of a yard of each color is plenty.
This is the jelly Roll, and background fabric that I used to make the “Modern” quilt. I love the texture.
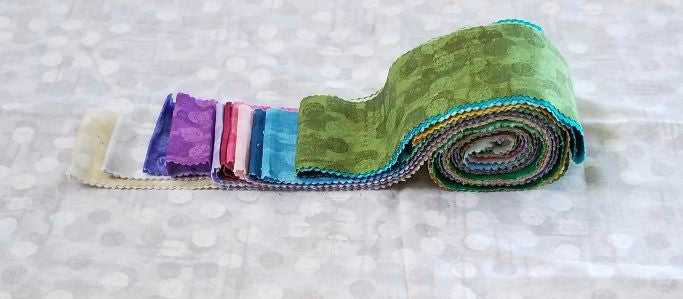
I will show you 2 ways to design this quilt. Create bold waves of color for a modern look. Or make the stars the main focus, for a more traditional look. Both ways are shown in the pattern and each block is listed.
If you prefer to choose your own colors, and maybe some of your favorite scraps, you might enjoy playing around with the colors for yourself. If you simply want to substitute a few of the colors, that’s easy. Simply change out the colors by number on the cutting list.
For example: Let’s say you like the crib quilt design. You have most of the same colors as pictured, however you have no lavender. You have a nice orange, though.
Lavender is #5 on the Crib Quilt cutting chart. Change #5 to Orange. Everywhere the pattern shows #5 will become orange.
If you really want to have fun with it, get out some colored pencils and print out this graph. Make your own design.
However, if you change the design, the cutting chart and block illustrations will no longer apply. You will need to figure those out for yourself. It would be much easier to substitute the colors by number on the cutting chart. You can use this graph to see how your substitutions would look. Print and enlarge it to any size for coloring.
Click HERE to download a PDF of the Coloring Page.

I will be making this quilt right along with you. I will be making the “Crib Quilt” design. Already I am making a change, not to the pattern or design, but I plan to use a second background fabric. I plan to use it only for the 16 pieces that are 3-1/2” square. They are the center of the 6” square. We will see how it comes out. The small check will be the main background and the one with the circles is for the 3-1/2” squares. I purchased 1-1/2 yards of the check, and ½ yard of the circles. (½-yard of the circles fabric was more than enough, however, I wanted a full circle to be in the center of the square and there was a large repeat to the pattern, so I bought a little extra.)
If you want to use a special design to your quilt, this little 3-1/2” background square is a great place to do it.
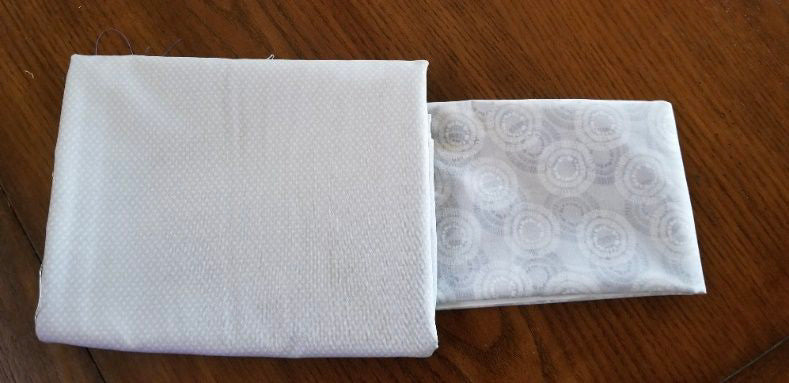
These are the fabrics that I will be using for the “Crib Quilt”. It’s a good idea to lay them out on your background fabric to see how the colors work. You can see that my colors are a bit brighter than listed. That is because I chose a grey color for the background. A few of the colors, did not show up well against the background color. So, I made the peach color an orange. I made the lavender color a purple, and I went with a darker blue. If you want to use lighter colors, I suggest using a very bright white background, or go very dark for the background. Midnight blue or charcoal grey could be nice background choices for pastel colors.

Here are the sewing tools that you will need for our next “Quilt-Along”: Cutting Your Fabrics.
- Cutting Mat, and Rotary blade for fabrics.
- Quilters’ ruler, and Sissors.
- Matching thread. Find one that matches your background fabric.
- Ironing board or ironing mat.
- Any sewing machine will work for sewing the quilt top
- Rotating Cutting Mat
- Suction handle for your quilter’s ruler.
- Wool Mat for ironing.
- Magnetic sewing guide for your sewing machine.
- Thread Cutter.
Joan Preager
February 05, 2021
Hi, I have downloaded the #1 sew along instructions for the fabric selection but I have not yet seen the #2 cutting the blocks instructions. Is it coming soon? Thanks, Joan