I love quilting. I love choosing fabrics for a project. I love stitching up strips, blocks, triangles, and seeing the (almost) magic that happens when two fabrics come together in perfect harmony. I love seeing the blocks come together. And I love it when my quilting fairy (thank you, Pat!) transforms my quilt top into a real, honest-to-goodness quilt! So I tend to linger over each step, thoroughly enjoying the process. Don't you?
But....what about the BEFORE? Have you given much thought to the before? Kinda a great idea to think about the before - as prepping your sewing area for a new project will help insure a successful project AND an enjoyable experience! Feel the love - I've prepared a checklist for you to help you get ready for your next quilting project - and make it the best project yet!
Checklist - 10 Steps to Prepping For Your Quilting Project:
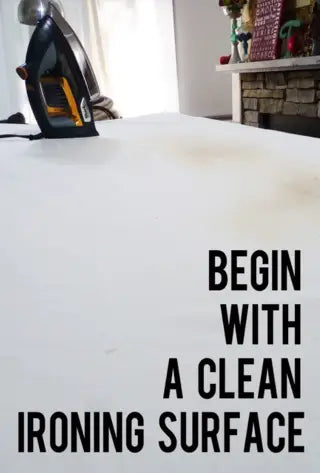
Now I think I know what you're thinking. Hold the phone, Tammy. That surface doesn't look clean! Ah.....but it is!
I cover my big board with a double layer of muslin, securing it to the underside with thumbtacks, and making it easy to remove. Over time, the muslin has become stained and scorched (ok, I admit it - I get a LITTLE zealous with the ironing sometimes!).
Before each new project, I take the muslin off and wash it. Not just wash it. I bleach it. So those dark areas you see are permanent stains - but washed, bleached stains that won't transfer over to my new project.
That transfer of stains is the reason you should make sure your ironing surface is clean. Using steam, spraying water, sizing or starch on your projects may be great - but you can also create water/sizing/starch stains on your ironing board. And if you're a non-washer (don't panic, I shower! I'm talking about my fabric - I don't prewash), your fabrics may sometimes bleed onto the ironing board.
See - suddenly that "clean ironing surface" statement doesn't sound so strange, does it?
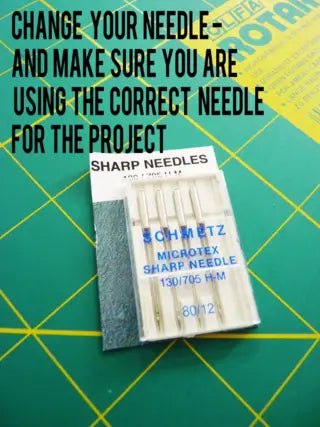
I don't know about you, but I'll admit to forgetting this step sometimes. I'm in such a hurry to begin that quilting magic that I completely forget to change my needle.
Changing the needle approximately every eight hours of sewing is recommended. FYI - if you are hearing "pop, pop, pop" when you are stitching - you REALLY need to change your needle! It has become dull, and is pushing through the fabric, rather than piercing the fabric.
This can lead to skipped stitches an sometimes cause tension issues. And it's generally hard on your machine.
So what needle to use? My recommendations are as follows:
Sharps Size 80/12 = woven fabrics, general weight fabrics.
Ballpoint Size 80/12 = knit fabrics.
Sharps Size 90/14 = quilting/heavy fabrics.
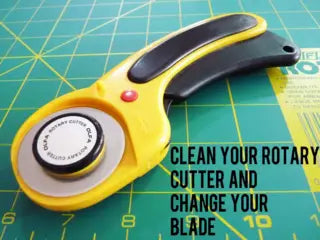
What about your rotary cutter? When is the last time you cleaned it (yes, I'm serious!)? Lint builds up under the blade and in all those little nooks and crannies? Carefully - VERY carefully - remove the blade and wipe the area clean.
Drop a TINY bit of machine oil on the screw area that holds the blade on.
And while you have the blade off - go ahead and change that bad boy. C'mon - when is the last time you changed the blade? Yes, they cost $$. But....you're gonna thank me. There is almost nothing finer than slicing through layers of fabric with a fresh blade (ok, sounds a bit like a horror movie when I say it like that....but you know what I mean).
A sharp blade makes cutting easier, which can help with accuracy AND reduce strain on the wrist. You're not having to saw back and forth to get those cuts. Yes, I saw that. You've done it. We've ALL done it!
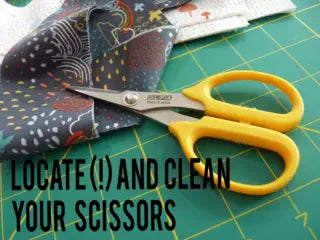
Locate your scissors? Yes....I mean it. If you haven't been putting them back in their designated area (what - they don't have a designated area?!), then you need to find them.
Just like your rotary cutter, they may need a little love. I love to do fused applique - which means that sometimes my scissors, especially my awesome little Olfa trimmers, can get gummy. So they need a bit of cleaning so they are ready for the next project.
Do you have the right scissors for your new project? Are they in good repair and ready to go? Do you need small trimmers? Pinking shears? Large scissors for large cutting jobs?
And how sharp are they? Like the rotary cutter, nothing is nicer than a sharp pair of shears - it makes cutting quick, accurate and easy! 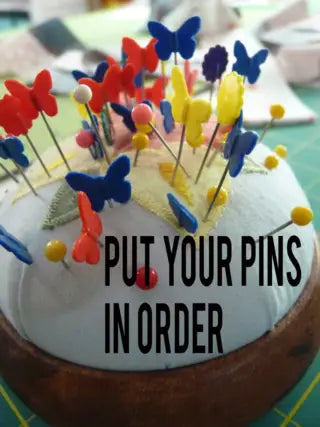
So by now, you're seeing a theme emerge - gather your supplies, and put them where you can access them. Yup!
And your pins are no different. If you're like me, during the process of your last project, they may have become scattered. A few around the sewing machine. Maybe a few scattered on the ironing board (but not now - because you've washed the ironing board cover and replaced it, right?). Perhaps a few random pins laying on the cutting mat. Even a pin or two on the floor - ouch!
Gathering up the pins you have - and discarding those that are bent or dull - will ensure you are able to work on your project without interruption. You'll have everything you need on hand - when you need it.
Are you doing applique? Got your nice, tiny appliqué pins?
Doing some ironing and need those motifs to stay in place? So you've got your glass head pins and they are ready to go?
It's a little thing, really - but pins are such an essential tool in quilting. The unsung hero, so to speak.
So take a minute, gather them up and put them in/on the pincushion of choice. And take the time to remove those that have done their duty and ready for retirement (a nice way of saying toss the broken/bent/dull ones. So long!).
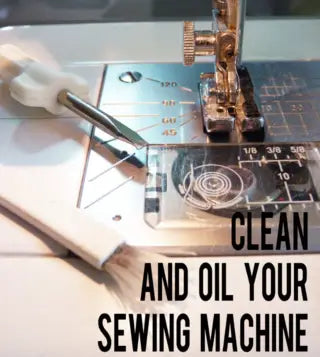
You didn't really think I was going to skip this one, did you? Cleaning and oiling your machine is right up there with - oh, wait - yeah, everything else.
How much you are able to do - cleaning and oiling - will depend upon your machine. Do as much as possible. As a general rule of thumb, I try to clean out my bobbin housing with a small brush every time I change my bobbin. This helps prevent major lint buildup in the bobbin area.
Now, there are two schools of thought with cleaning this area. Some say canned air is safe to use, and strongly advocate using the canned air to clean the area.
Others say to avoid canned air, as it can blow lint further INTO the machine, gumming up the workings of the machine, which is counter to what is being accomplished when cleaning the machine.
I avoid the canned air; when I have my machine serviced (once every six months), if the technician wants to use canned air, he's the expert. I leave that to him. For me, I clean everything I can reach with the little brush, and even employee a long straight pin to reach reluctant lint that is gathering in corners.
Your machine manual will provide information on oiling the machine if possible and/or warranted, so follow those instructions. And make a habit of following those instructions on a regular basis to keep the workhorse of your sewing room (your machine) running smoothly!
What type of project are you working on? What type and color thread do you need to complete the project? Now is the time to take inventory. There's nothing more frustrating than running out of thread - at 2am. You know it happens. It happens to me. And for some strange reason, my local quilt shop and Joanns is NOT open at 2am. Urgh.
Taking inventory of your thread will help prevent this inconvenient catastrophe.
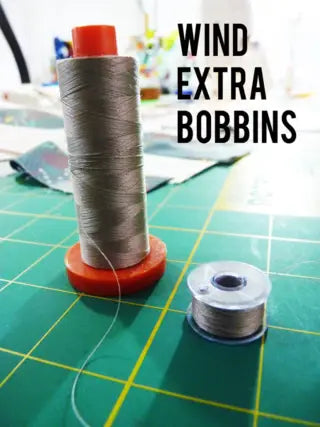
Winding extra bobbins - well, that just keeps the project bob-bob-bobbin (sorry, couldn't' resist!) along! Take the time to wind several bobbins in the thread of choice means you barely even have to slow down to change bobbins. Awesome!
And just a side note here - I'm a bit of a thread snob (I freely admit it!). I piece and quilt with Aurifil. I love how smooth the thread is, which eliminates a majority of lint in my machine. And my machine seems to appreciate the thread as well.
No matter what thread you and your machine like, make sure you have enough to complete your project before you begin (and remember - think neutrals!).
Read through your pattern. What notions do you need? Perhaps some fusible (I LOVE fusible projects - and am addicted to Steam-A-Seam 2). Will you need to mark your fabric? So do you need a pencil, a fabric marker, or maybe a pencil?
Are there templates to trace? Ah...template plastic! Do you have enough?
You get the general idea - like the thread, far better to have everything pulled together now, before you begin, than to find out in the middle of a marathon sewing session that you need one more thing. And usually (at least for me!), that discovery comes late at night, long after the stores have closed. Ugg!
Ummm....I may have already said this (yep, I did!), but read through your pattern. What rulers are you going to need? If you're cutting full yardage, you'll want to have your 24" long ruler handy.
Making HSTs (half square triangles)? You'll want the appropriate size square ruler.
What about specialty rulers? Maybe the pattern doesn't call for it, but you just know your setting triangle ruler is going to be a lot easier to use to cut those large triangles.
Like everything else, having those rulers pulled out and ready to go - and having the ones you DON'T need put away - will help your project flow smoothly!

Finally - you are ready to pull out all luscious fabrics and get ready to sew!
I know you are going to iron every fabric before you begin cutting, right?! And you're going to follow the best practices of quilting: read through all the directions BEFORE beginning, AND make a sample block first out of scrap fabric (I do all of my sample blocks out of a set of fabrics JUST for this purpose, so after several projects, I'll have a nice sampler set of blocks to put together). Yeah, I know - great idea! Wish I could take credit, but....alas, I read it somewhere on someone else's blog!
Take a little time, get everything in order, and you are all set to enjoy your next quilting project! Have fun, happy stitching - and don't forget to send me a picture of your finished project!
Found these tips helpful? But maybe you don't want to come back to this post again and again (but I do hope you'll come back to visit!)? No problem! I've created a downloadable checklist for you to use! Just click on Download 10 Step Great Project Checklist, download and print (borderless). Enjoy!
About Tammy Silvers

Tammy Silvers is a pattern designer who has been quilting since 1991. She designs patterns under her label Tamarinis. Under the label Tamarinis, Tammy's designs are regularly published in a variety of quilt magazines. She also works with some of the major fabric manufacturers designing projects to showcase and promote their fabric lines, including Northcott, Free Spirit, Maywood, Dear Stella and Timeless Treasures.
About Tammy.... "I'm no different than most quilters - I enjoy working with almost any fabric. But I must confess - my favorites (the one that will make me drool, and blow a carefully constructed budget) are batiks, bold prints, and almost any fabric with words on it. Having a background in art and literature, another of my guilty quilty pleasures is finding ways to use “words” in my work, be it in the fabric itself or by adding them to the piece. I am a Georgia native and currently live in Acworth with my husband, children (when they come to visit!), one grumpy dog, and my favorite fat cat."

Leave a comment (all fields required)