Sometimes things seem intimidating, like sewing curves, armholes, necklines etc. It can keep you from picking certain patterns. I certainly paused when my daughter said she wanted a rainbow quilt for her room. Well, better jump right in I thought.
I hadn’t done a project with curves for a while, but my training came back pretty quickly and it was fun to do something different and challenge myself.
Here’s the tips I remembered have picked up after. The pattern I was using was from MissMake (the Looper quilt) and she also had some nice tips and reminders.
Easing- this is a concept and term you will come across a lot when sewing curves- EASE the fabric. What this basically means is that you can’t just “line it up and sew” like you would with two straight seams. It needs a little fussing and since fabric cut into a curve has bias, things get stretch and get out of hand easily. The best overall tip- try to touch things as little as possible to avoid stretching.
There are two types of curves you may sew-
A concave (inward curve) is the sort of curve you make when you take a bite out of a sandwich – what I learnt as ‘concave’ when I was at school.
An inward (concave) curve.
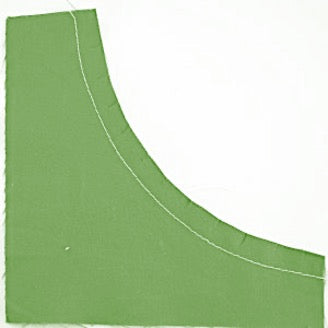
A convex outward curve is the opposite (unsurprisingly!) Think of the outside of a circle.
TIPS for sewing curves
- Create a consistent seam allowance. As with straight sewing this is important to insure things line up across your finished piece, but with curves, a varying seam allowance will compound the issue quickly.
- Use a ¼” seam presser foot (this one comes with a magnetic seam guide, this foot is also in our 32 piece set and our Ultimate Quilting Presser foot set.)
- Use a magnetic seam guide (also included in our Ultimate Quilting Presser foot set.)
- Go slow, I turn down the speed on my machine as I tend to sew too fast if it’s turned up. Stop and readjust as necessary
- Turn down the stitch length a hair- I usually sew at 2.5 and I turned my down to
- PIN PIN PIN. I hate pinning and rarely pin if I don’t have to, but for curves this is a step I don’t skip. Pinning can help you EASE your fabric in. I show you how to use the pin to get rid of any “pleats” you created when sewing below. They are your friend and use them generously.
-
- I pin first from the center out. Find the center of each piece (you can fold in half) and pin the centers together first. Then pin each end together and then work your way inward back to the center to pin. This keeps the pieces as stable as possible. You will have some parts that seem like- " this isn’t going to fit" and it’s wobbly looking but that’s ok.
- I sew over my pins I realize this can be controversial but I find it the best way for me. Pin Perpendicular to your seam and then sew over them. I use long Quilting pins.
- I pin first from the center out. Find the center of each piece (you can fold in half) and pin the centers together first. Then pin each end together and then work your way inward back to the center to pin. This keeps the pieces as stable as possible. You will have some parts that seem like- " this isn’t going to fit" and it’s wobbly looking but that’s ok.

6. Remember, when you are putting your pieces underneath your sewing machine, they won’t all feel like they will fit, or that you will be able to get them through, but the only thing that needs to be flat is the part that’s under the sewing machine. Keep your eye on the fabric, not the needle- your seam allowance should be lined up and look at the fabric that’s going under the needle to see if it’s flat, if so you are good to continue.
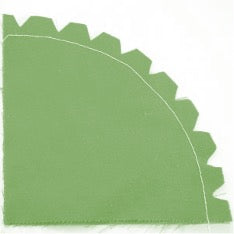
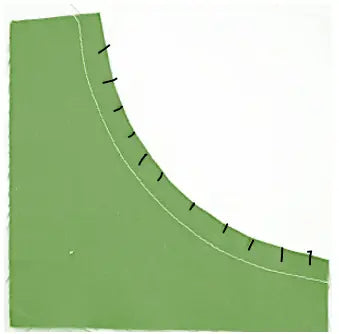
Clipping/Notching
8 years of sewing courses in high school and college stressed the importance of this step. You may or may not need to use it but it is helpful to relieve the “tension” sometimes created when sewing curved seams. With armholes, etc. I always recommend this step, but in quilting this “seams” to be optional. Here’s what it is.
A concave curve should be “clipped” along the seam allowance once sewn to help the curve lay flat. You can see where I’ve marked the clips with a black pen to make them easier to see- you simply take the tip of your scissor and clip (INSIDE THE SEAM ALLOWANCE) that just takes that tension off.
A convex curve should be “notched” along the seam allowance once sewn to help the curve lay flat. Use your scissor to take a v shape out of the SEAM ALLOWANCE! Careful not to cut through your seam.
Troubleshooting
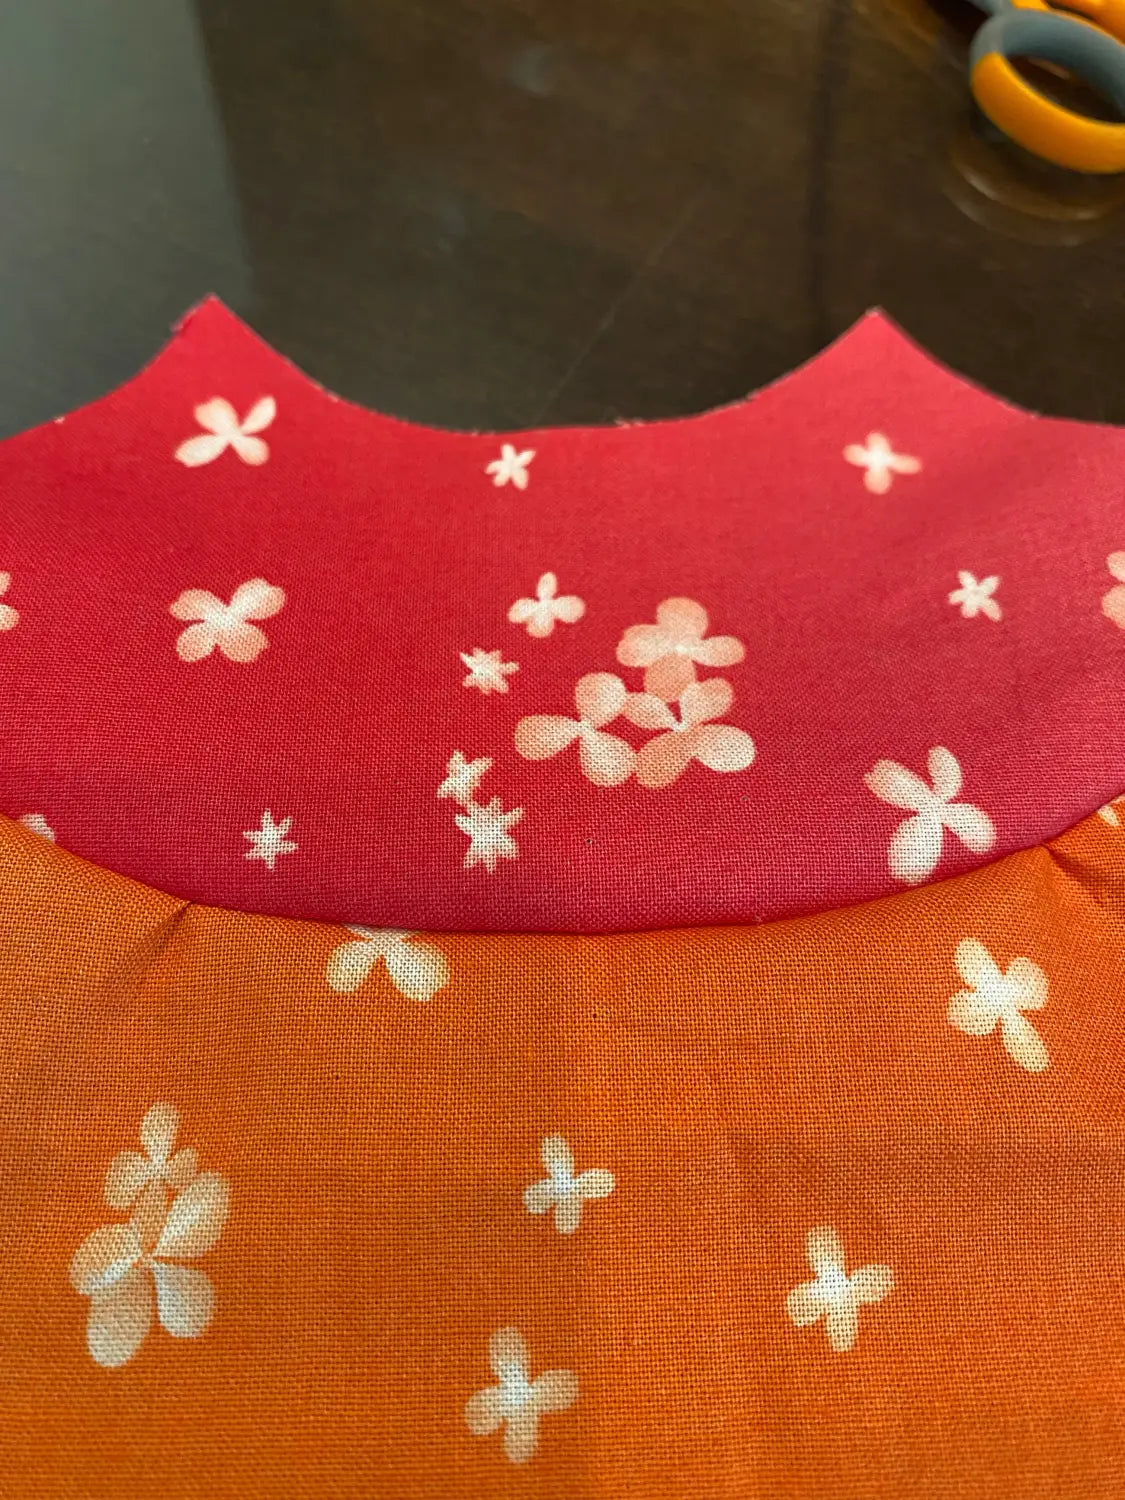
Typically what happens when sewing curves is you create a little “dimple” or “pleat” when the seams don’t ease perfectly. Don’t fret, there is an easy fix.
- Find the “pleat” or “dimple”, many times this shows on one side but not the other and usually it was from the bottom fabric and it “snuck” in while sewing. You can see the first photo below shows the dimple on the right side of my project. The second photo shows the stitch that is creating the dimple.
2. Simply take the ONE STITCH out with your seam ripper. No need to rip everything out, just the stitches that are directly impacting and creating the dimple. Here it was just one. 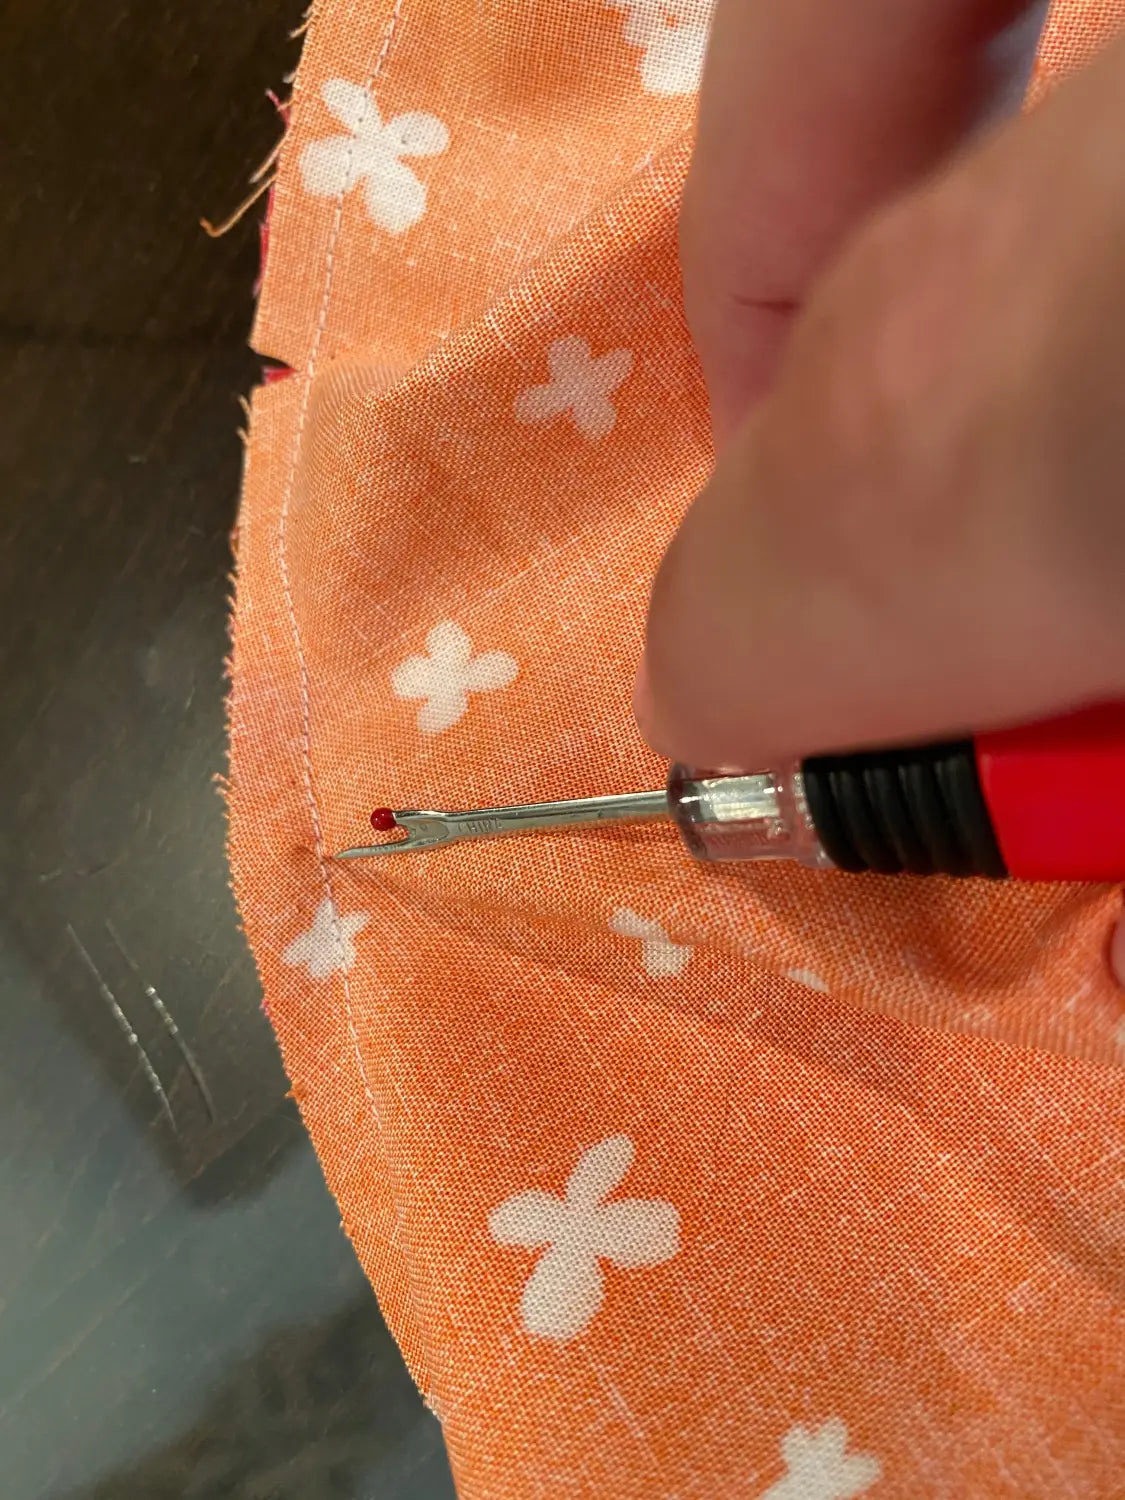
3. Then place a pin right in the center of the “dimple”. And resew. Sewing over the pin.
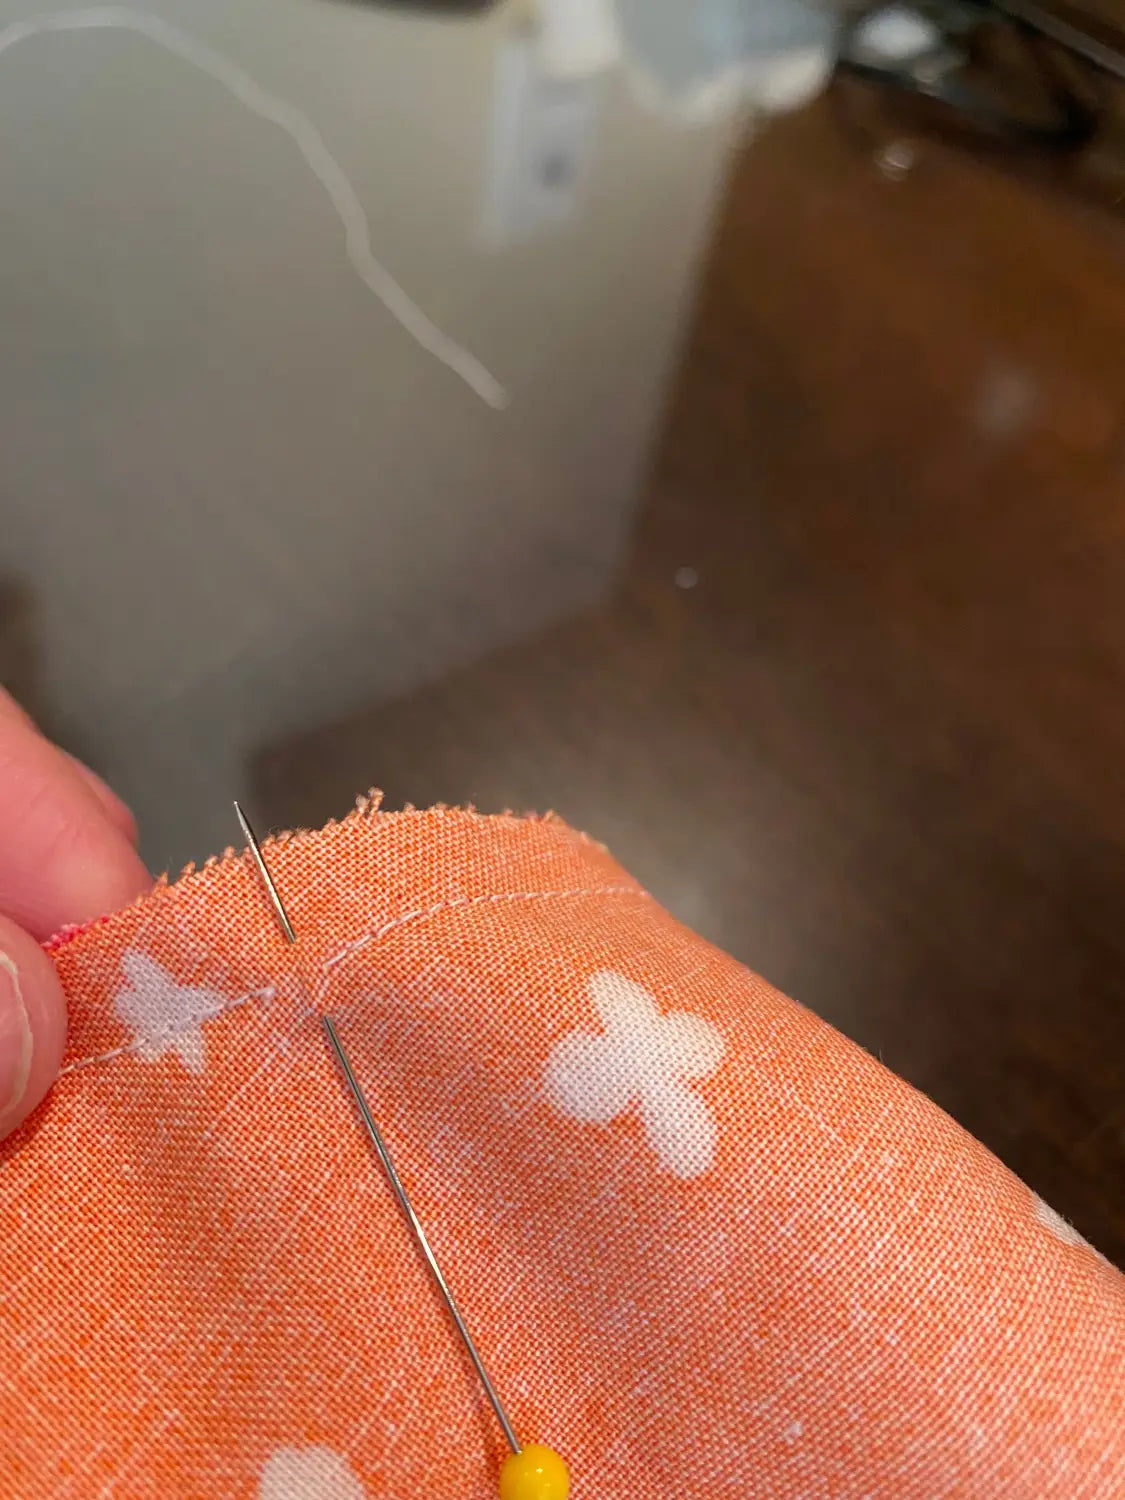
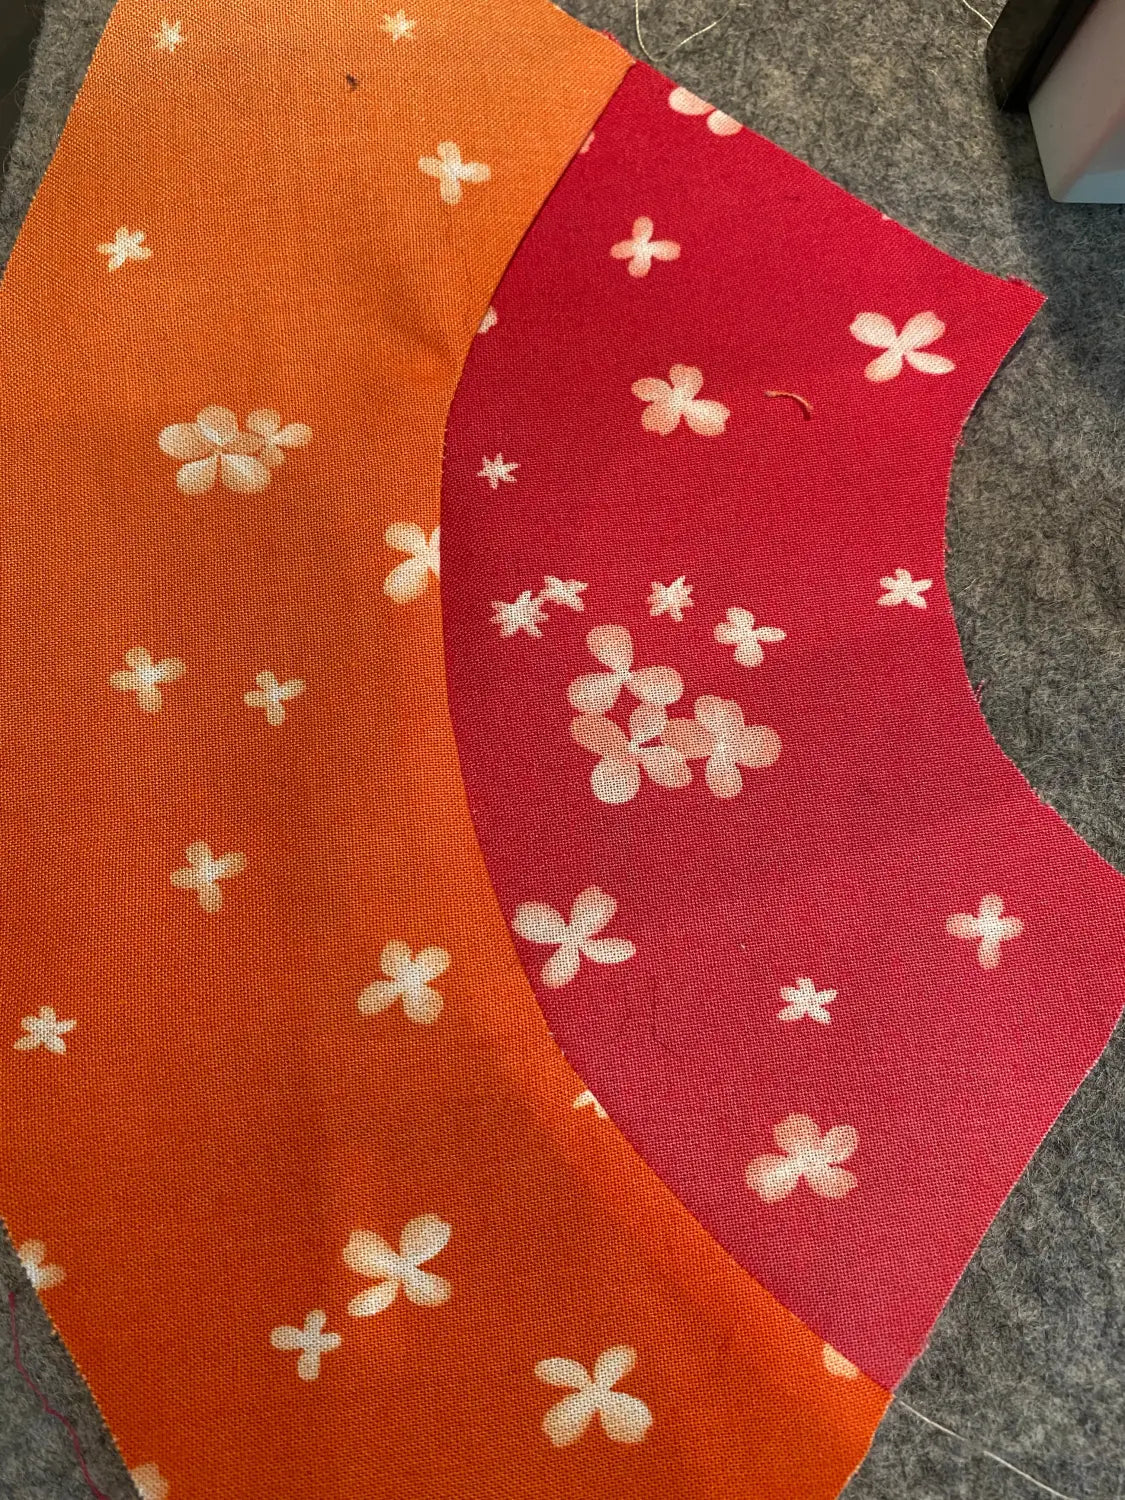
And the dimple is gone!
Happy Sewing!!
Stay in touch and Show us what you've made:
Instagram: @sewingbysarahstore
Facebook VIP Group: https://www.facebook.com/groups/sbsvip
Download your FREE Presser Foot Quick Guide Here:


Chris
May 07, 2021
I am going to buy that special foot for curves when I start a quilt like that and I can get one from Phaff. That’s the type of machine I have.